How to start sewing your own clothes!
Disclosure: I am an Amazon affiliate and this post contains affiliate links, which means I may earn a commission (at no extra cost to you) if you purchase products mentioned.
Have you ever had an interest in making your own clothes? Well, I was in my early twenties when I first started thinking about how cool it would be. For me, making pants seemed like an especially good idea. All my life, shopping for pants meant going to the store and realizing 90% of pants would be too short for me. The other 10% would barely be long enough. (Why don’t they make girls’ pants in lengths like men’s?!)
But, over time, just sewing my own clothes has become such an incredible hobby! For one thing, you wear clothing items over and over, so you get to enjoy the fruits of your labors again and again. And the ability to customize things to your own vision is SO lovely.
Step 1: Learn how to use a sewing machine
While you could technically sew everything by hand, it would take forever to do so. That’s why the sewing machine was such an incredible invention!
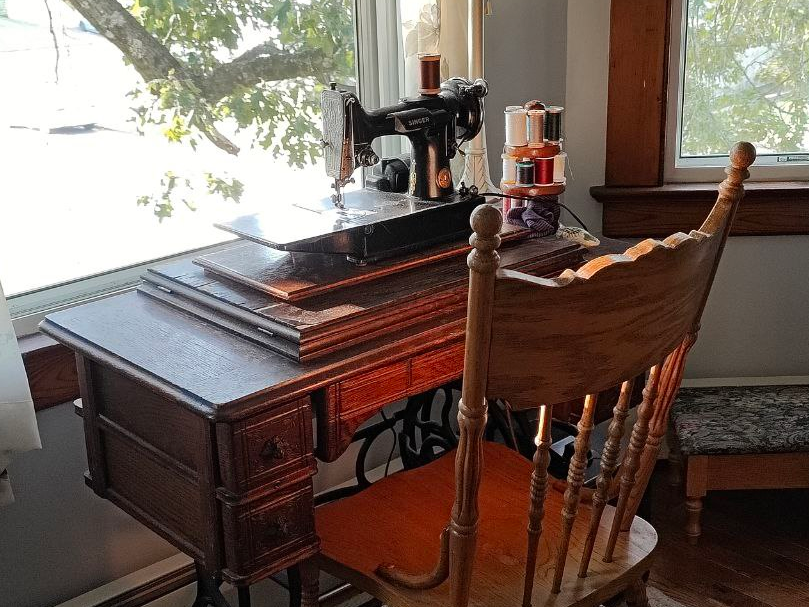
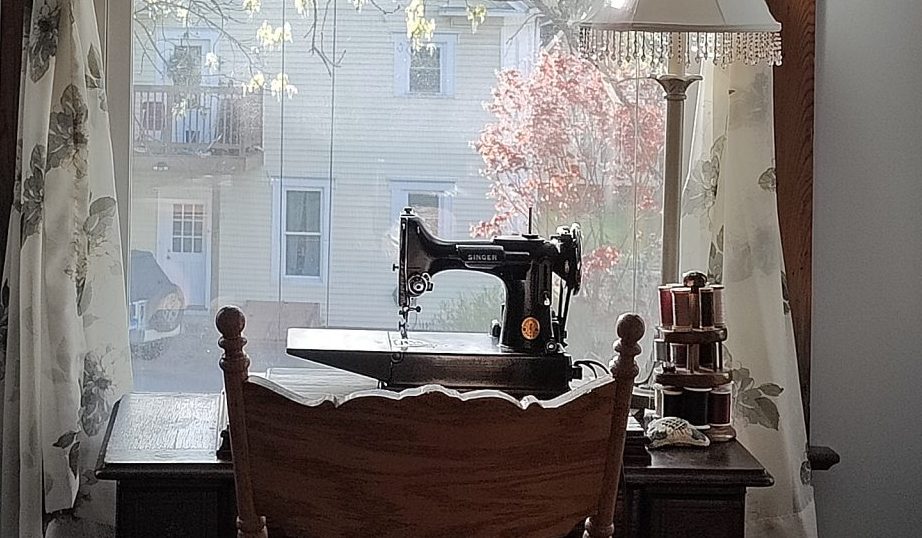
That’s my great-grandmother’s Singer Featherweight in the picture above. It was my first sewing machine. It got handed down to me and, though I now have four sewing machines total, it is still my favorite to sew with!
My sewing experience before this was limited. I took sewing in middle school and also had some lessons from my mom (who used to sew all the time). However, by the time I wanted to sew again in my twenties, I didn’t remember that much!
Thankfully, every sewing machine comes with a manual on how to thread it and use it. Even this vintage one had the manual in the case!
Before sewing actual clothing, I’d recommend practicing on something really small. For me, that was hemming many small rectangles of fabric, since I was making washable/reusable tissues at the time. It really helped me practice pivoting at the corners, holding the fabric properly, and getting better with where the stitches ended up going on the fabric.
The main thing is you want to get relatively confident operating your machine!
Step 2: Learn how to use a sewing pattern
If you’re going to start making your own clothes, the easiest way to start doing this is by using patterns. Making your own patterns is extremely difficult, though it it something I am interested in trying down the road. But for beginners, and even most people, using patterns is the way to go!
A pattern basically consists of large pieces of thin paper with shapes that you cut out. These shapes are the different pieces of fabric that get sown together to produce your garment. See how I have these pattern pieces arranged on my fabric below?
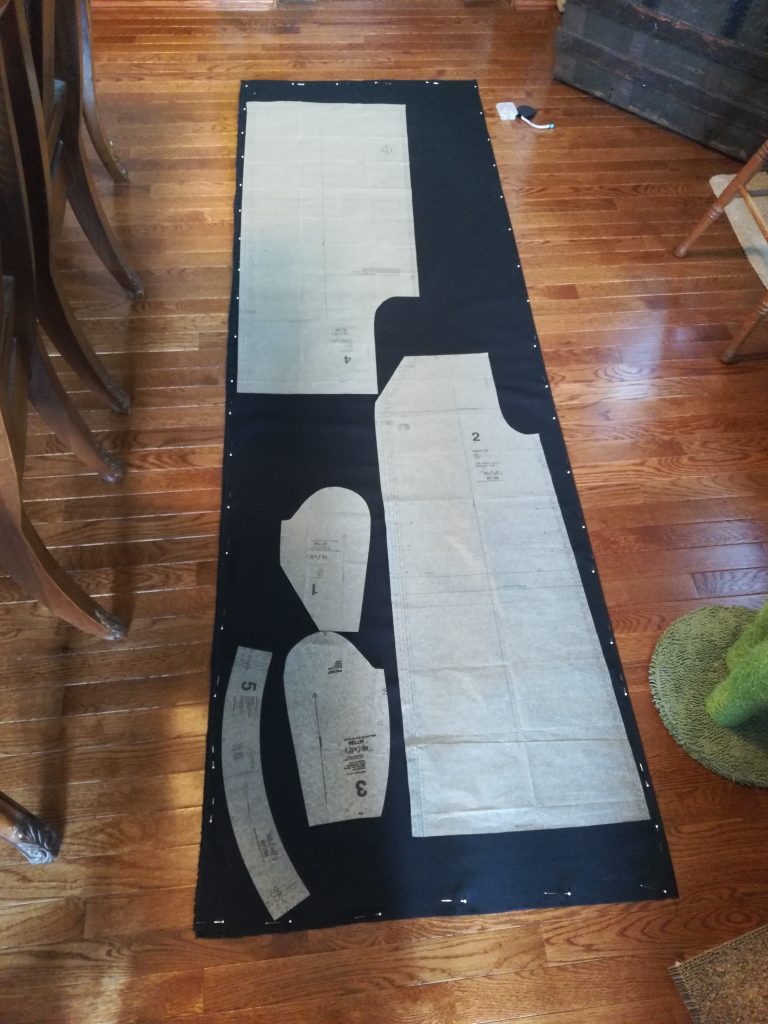
When it comes to using a pattern and transferring it to your fabric, there is a lot to learn – much more than you’d think!
The first three videos in this series gave me confidence to try using a pattern for the first time. She goes over all the essentials that you need to know, such as truing your fabric, pinning your pattern pieces to the fabric, cutting out the pieces, transferring marks from your pattern, etc. She also gives a general tutorial on sewing which will be so useful to the beginner, or anyone who needs a refresh!
Step 3: Pick out your pattern
As your machine skills and knowledge of patterns improve, you’ll want to start seeking out a beginner-friendly pattern. There are SO many patterns out there! I’d recommend checking out Simplicity.com to search the many patterns that are available. Then, you can search for the pattern on other sites if you’d like to compare prices.
Just remember to keep it simple to begin with! Patterns that use fusible interfacing, need buttons, or require a zipper can be a bit much for the first go. My first project was using this pattern – palazzo pants with an elastic waistband. Basically, as easy as pants can get!
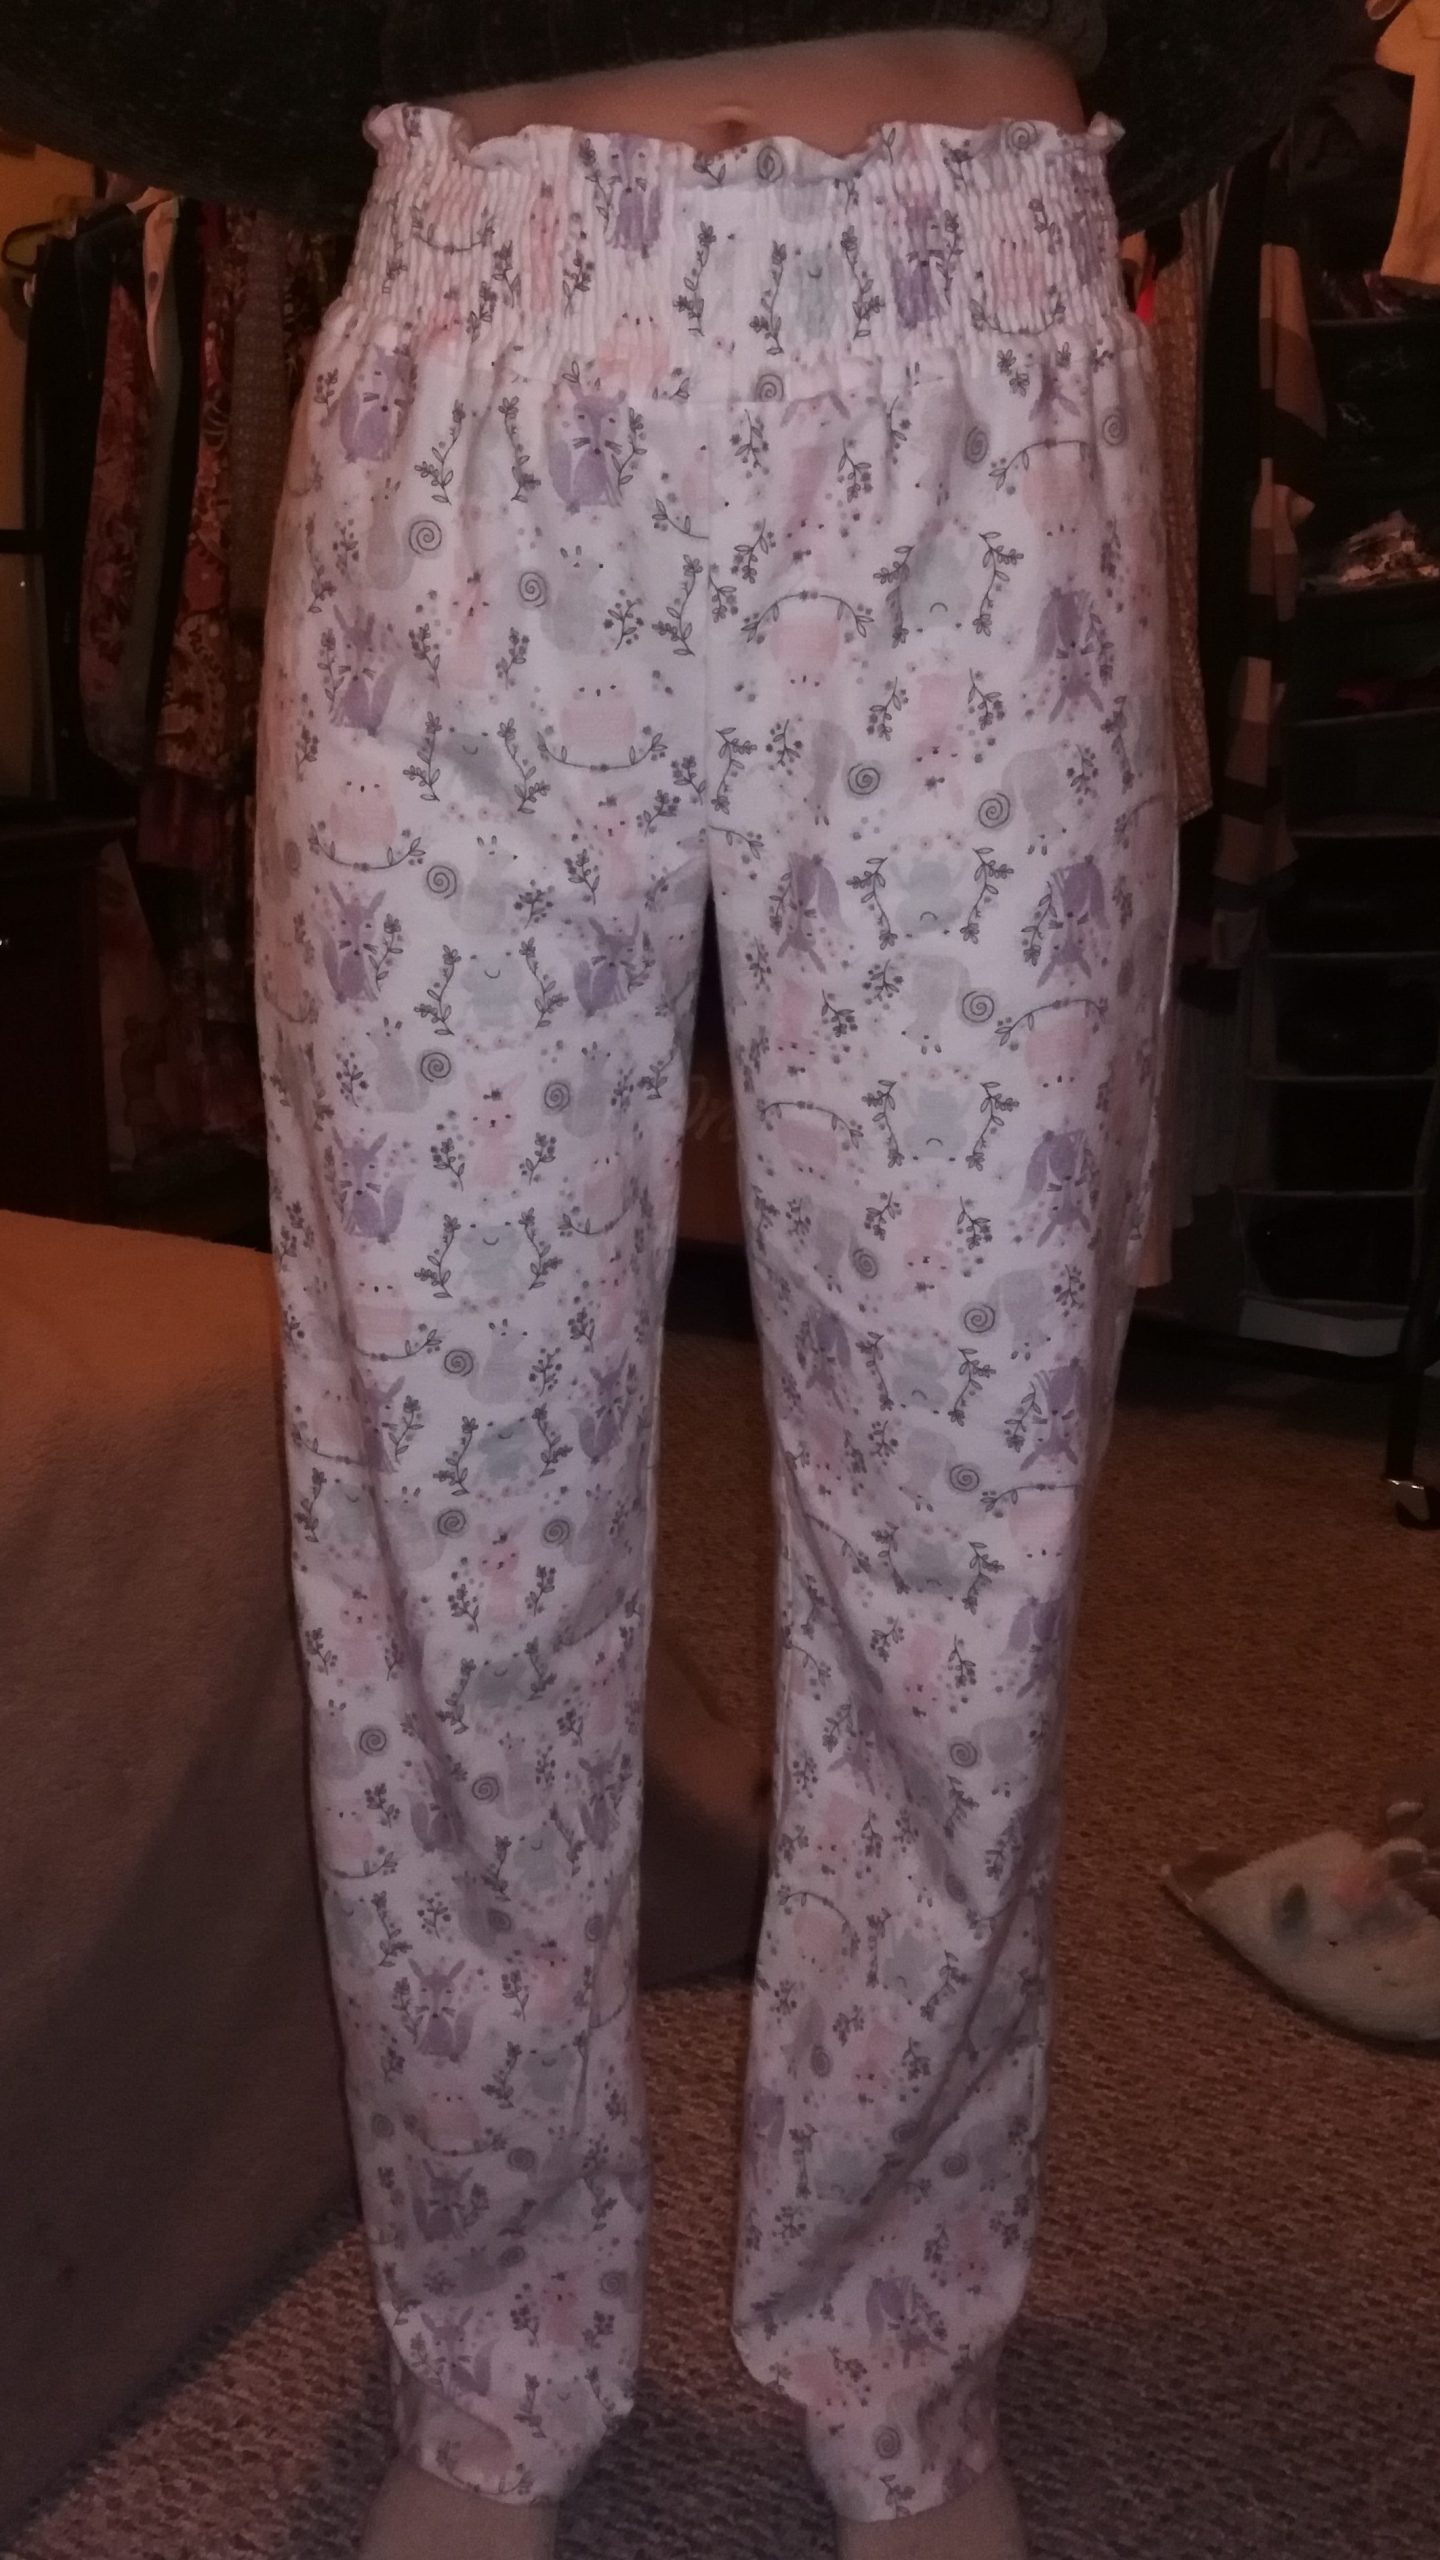
The great thing about a pattern is you can use it over and over! I made four pairs of pants with this one! (Including PJs! See pic below. Yes I did modify the waistband and shirred it instead of using the elastic.)
Make sure the pattern is something you’re interested in actually wearing. That will make the project so much more fun.
Step 4: Pick out your fabric, thread, and other supplies
Now would be the time to go to Joann’s! If… they hadn’t just closed all their stores. Yes, that was a major loss for the sewing world!
However, some Walmarts do have an elaborate sewing section, with fabric, thread, and supplies – basically everything you’d need to start your first project! The ones in my area even have patterns, though your selection online will be far greater.
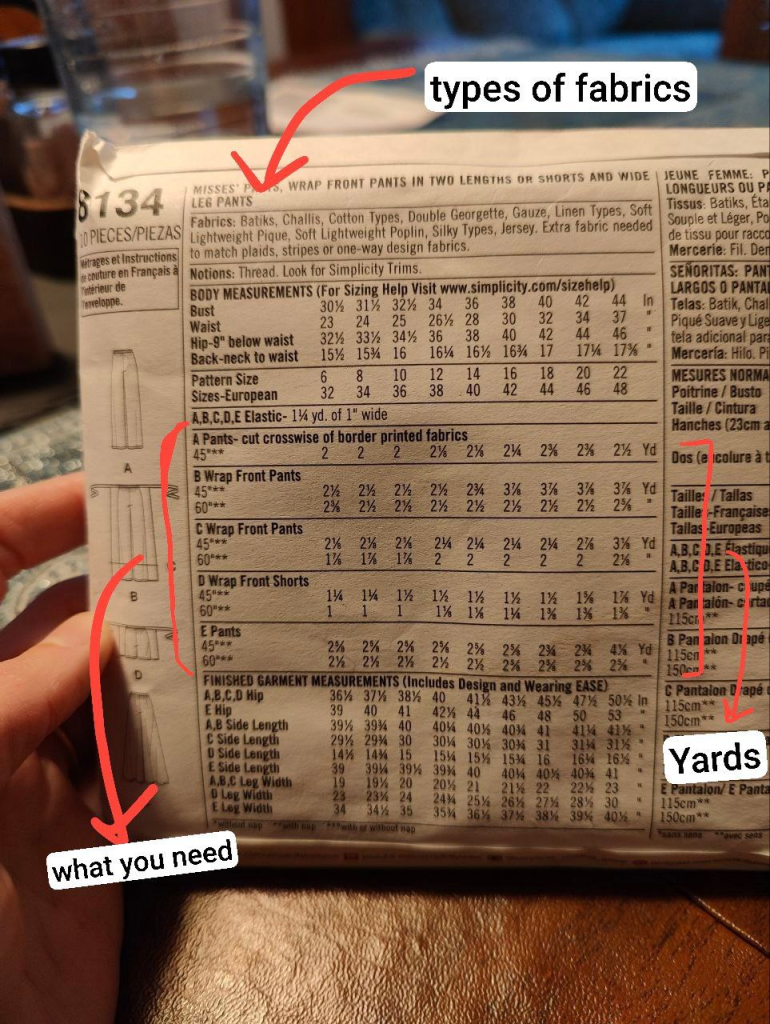
If you’re wondering what you’ll need, your pattern should tell you, usually on the back of the packet. It will also tell you how many yards you need of fabric, depending on your size and the width of the fabric. For example, fabric usually comes in 45″ or 60″ widths so, naturally, you’d usually require less fabric with the latter. Here’s an example of a pattern and what to look for on the back:
For every project, you’ll at the very least need:
- Fabric of your choice (check your pattern for the types of fabrics that suit it!)
- Matching thread (usually all purpose polyester or cotton)
- Sewing scissors (the nicer and sharper the easier, linked is what I use and I love them!)
- Ample pins
- A sewing needle
- A seam ripper (for those pesky mistakes – they WILL happen)
- Your machine
- An iron is also an absolute essential for sewing!
Step 5: Start sewing!
At this step, all your preparation is done! You just need to take action. Here is a very basic list of what you’ll do:
- Iron and true your fabric.
- Cut out your pattern pieces in the correct size (measure yourself and consider body measurements vs. finished garment measurements to decide which size is best).
- Pin the pattern pieces to the fabric, which has usually been pinned folded in half.
- Cut out your fabric pieces and transfer any notches or other markings before or as you unpin.
- Follow the directions the pattern came with to construct your garment in the correct order.
Usually the sewing directions that patterns come with are good enough. Sometimes they are a bit confusing, especially for beginners. Over time, you start to get used to looking at the illustrations and making sense of what the words are saying.
Sometimes, certain vocabulary might be new, such as “stitch in the ditch”, “understitch”, etc. Simplicity’s website has a very useful archive of short and sweet tutorials for all of these little techniques. I use them whenever I don’t know something or if I need a refresher! It’s amazing how much you’ll learn by making your own clothes!
Step 6: Wear your new garment!
This is the best part, when all your hard work pays off! You get to wear something YOU made. It’s such a cool feeling. I’ve written already about how good it feels to do things yourself. The sense of achievement and satisfaction you get are so nice!
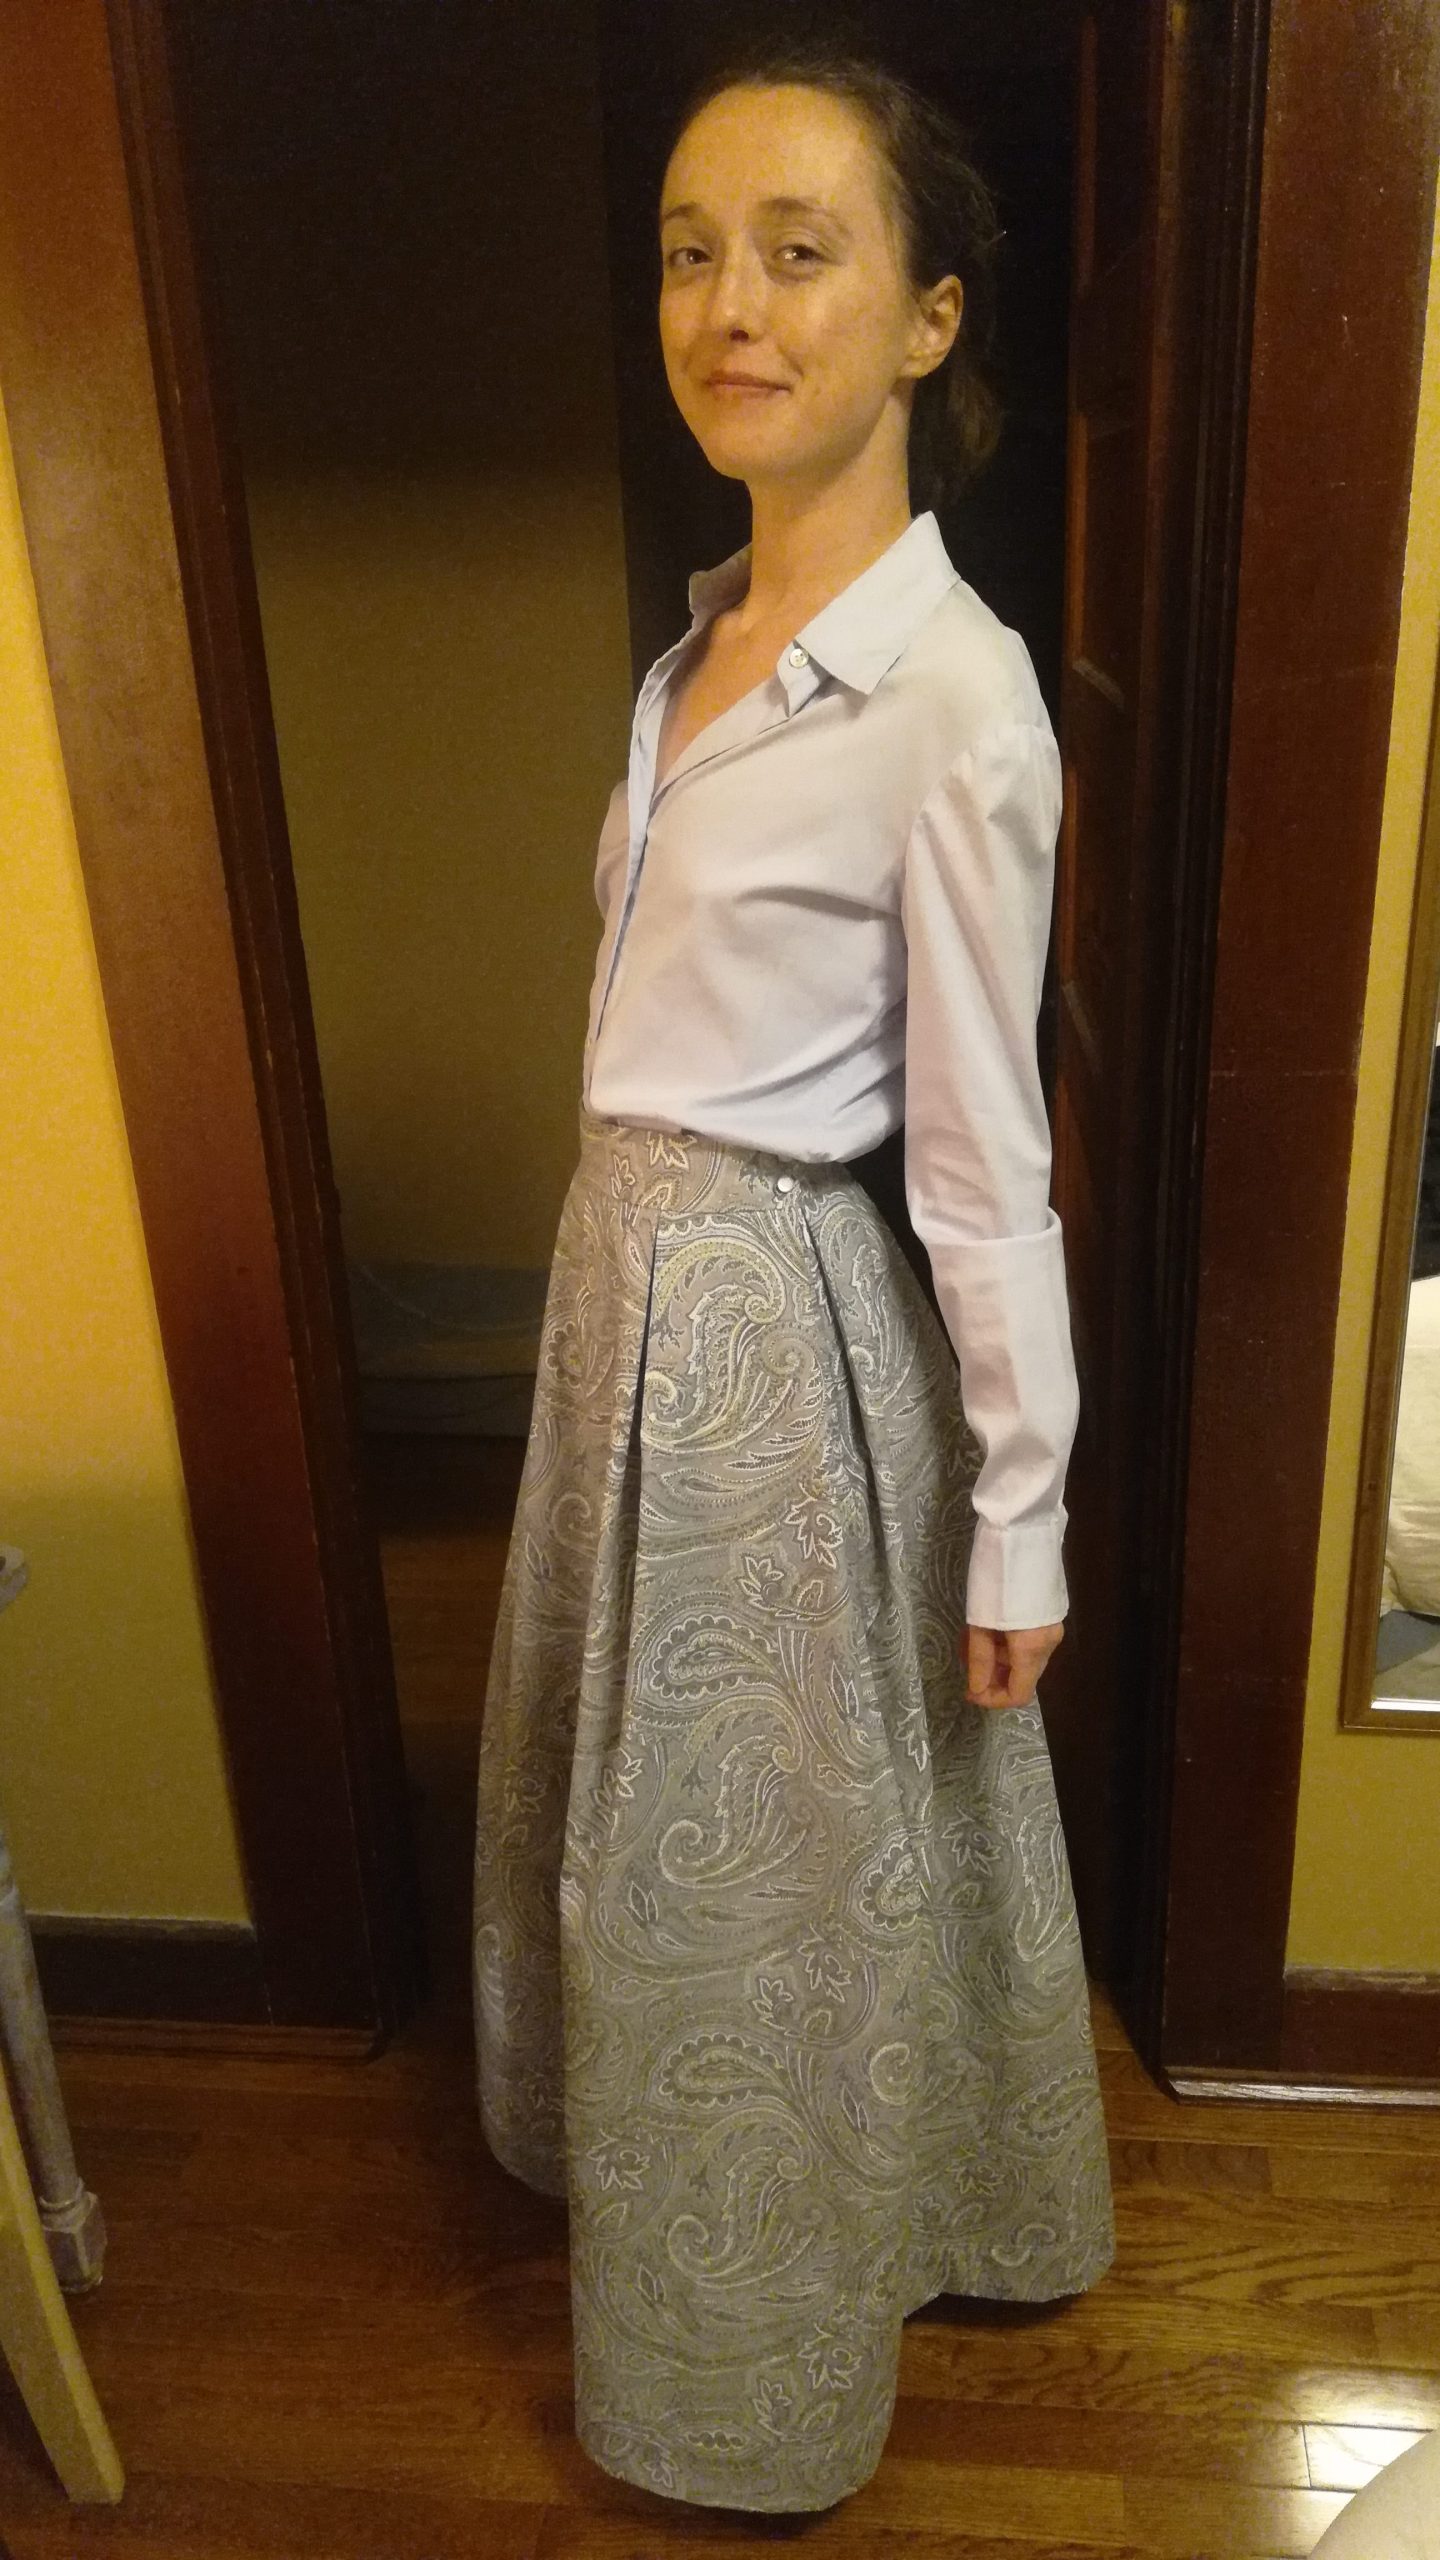
This next picture is me in an entire outfit I made. I used this pattern, and was so happy with the results that I made another skirt, too!
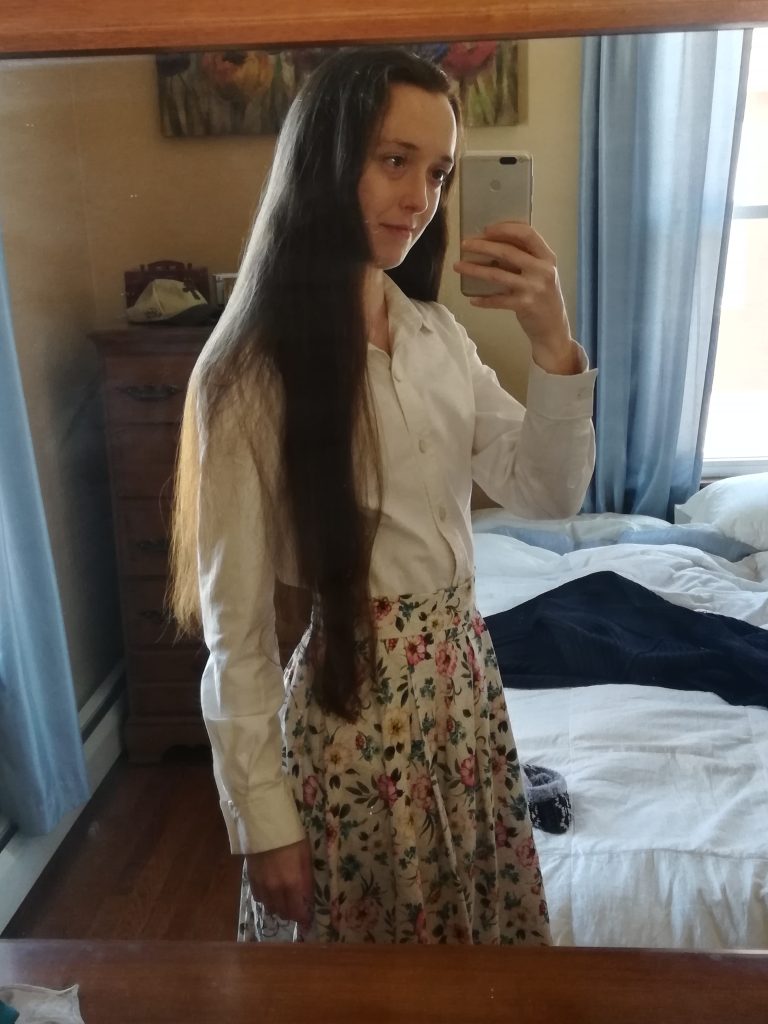
Here’s another outfit I made entirely myself…
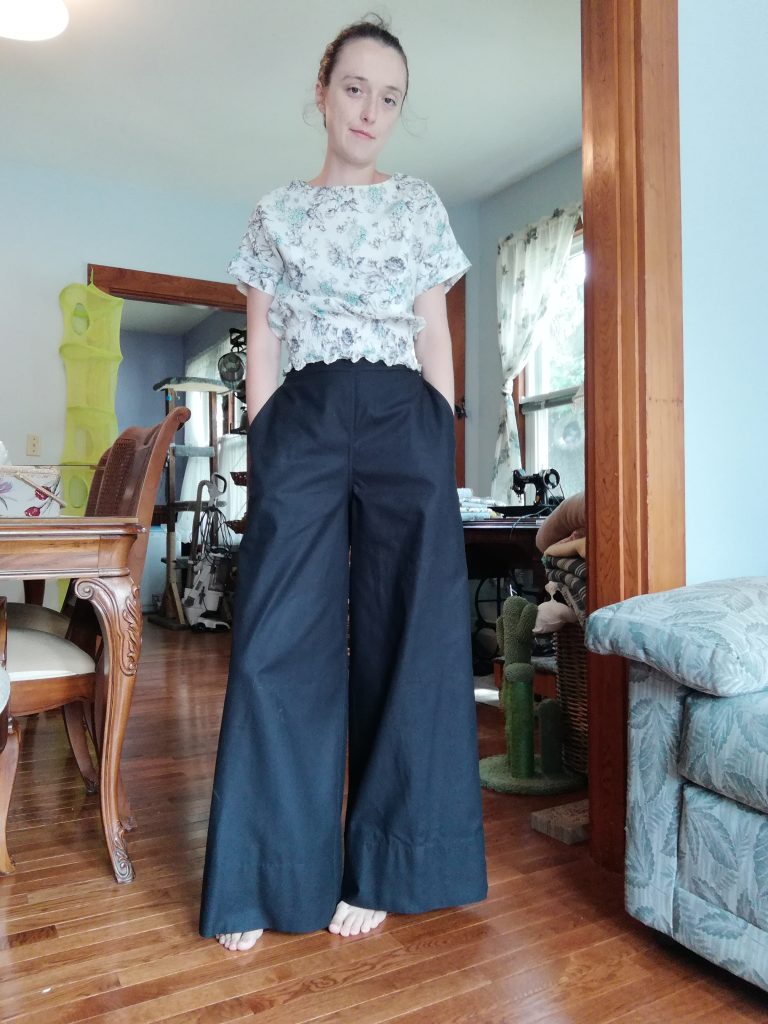
And see? The pants are plenty long for me! Younger Corey can rejoice!
I’m going to finish off this article with an extra tip I would like to share…
An extra tip: Finishing seams
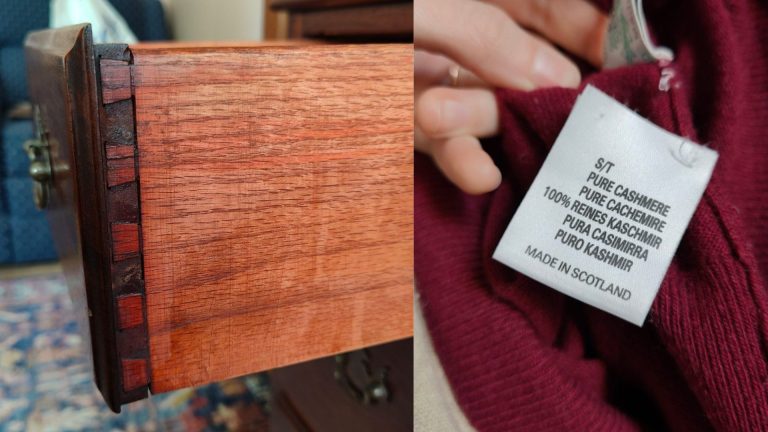
When I first set out to sew my own clothes, one of the biggest issues I foresaw was how I would finish the seams on the inside of the garments. I started studying my own wardrobe and clearly realized all of the seams were finished in a way that no sewing machine could achieve.
Turns out, most clothes nowadays have seams finished with a serger. A serger is a machine which requires four spools of thread of the same color (yes, $$$ indeed for those of us on a budget) and it overlocks the edge of the fabric while also optionally cutting it. (This is my understanding from my research, though I’ve never owned a serger so those of you who do, please feel free to add to this or correct me!)
For someone who sews at home and not commercially, getting a serger seemed cost-prohibitive and unnecessarily complicated. So, I started searching for other options.
Some people will recommend simply zigzagging your raw edges, which is certainly better than nothing. A much neater method, however, is sewing a type of seam which naturally encases the raw edges inside. Which brings us to…
French seams & Flat-felled seams
Two such seams are the French seam and the flat-felled seam.
French seams are great for thinner/lighter fabrics. You’ll notice fine silk garments are still sewed with them, because they are actually far more durable than serging.
Flat-felled seams are great for bulkier fabrics, such as jeans and flannel shirts, which are also often sewn with the flat-felled seam, even nowadays, as it is incredibly sturdy.
These seams do take more of your time to construct but, in my view, they are well worth it, as they create garments which are beautiful both inside and out!
Now you’re ready to start making your own clothes!
See that? Well, I know there’s still a lot to learn, but I hope this general overview gives you an idea of what it takes to start sewing your own clothes. As I’ve said, it’s rewarding, fun, and satisfying to do! And you have unique garments which often last for years.
Do keep in mind that sewing your own clothes can be a bit time-consuming, as well as expensive if you opt for really expensive fabrics. I try to do budget finds, like getting simple cottons from Walmart and finding patterns that will work for them. I don’t like synthetics, so I am a bit limited, but that’s okay! I can always thrift nice linen and silk clothes from Goodwill if I need to, hah!
Please let me know in the comments below if you have tried to make your own garments. I would love to hear about it!