How to do shirring, a super easy but awesome sewing technique!
Disclosure: I am an Amazon affiliate and this post contains affiliate links, which means I may earn a commission (at no extra cost to you) if you purchase products mentioned.
Okay, so I’m super excited to write this post about how to do shirring, one of my favorite sewing techniques!
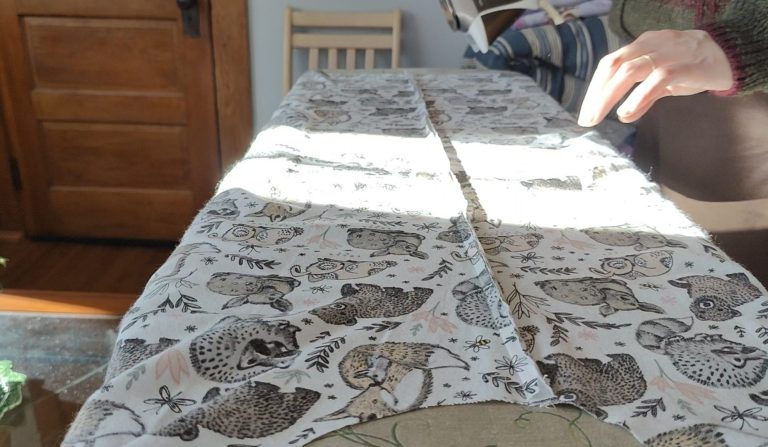
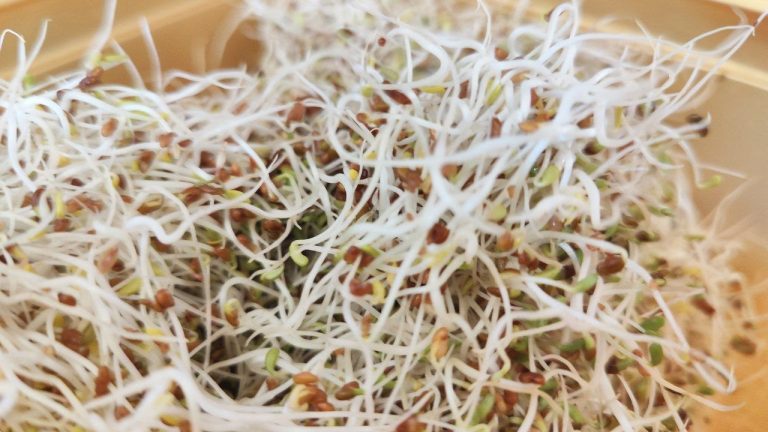
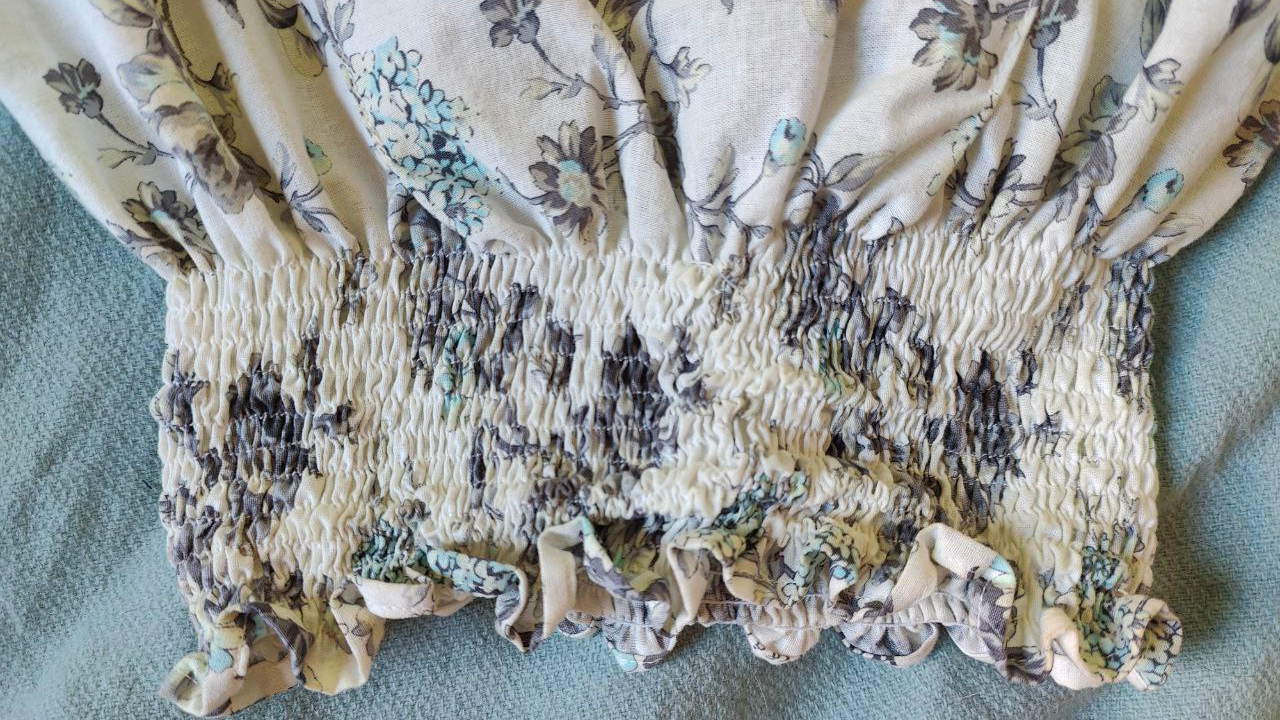
If you don’t know what shirring is, hopefully the picture above illustrates it: It’s a bunch of rows of sewing which produce an attractive, scrunchy, elastic gathering of the fabric.
It requires no elastic inserts, only elastic thread!
I used to wonder how to replicate this look which so many of my palazzo pants had at the waistband. It looked so complicated, so I was super excited when I found out it’s totally easy to do on really any machine! All you need is a straight stitch!
Alright guys, let’s dive in and I will show you everything you need to know about shirring!
Some related projects which use shirring:
- How to make the perfect cloth fermentation covers!
- Sewing PJ pants for my sister – the perfect Christmas gift! (Full step-by-step sew-along tutorial)
How exactly does shirring make fabric scrunchy and stretchy?
The mechanism by which shirring causes fabric to scrunch up and become stretchy is by one simple modification to our usual sewing: Instead of a normal thread in the bobbin, an elastic thread is used.
If the bobbin and top thread tensions are correctly adjusted and the longest stitch length is selected on the machine, the elastic thread will slightly stretch as it is sewn into the fabric, and the fabric will scrunch up and become stretchy.
See how simple the idea is?
But it all rests on having the correct tensions! And that will be a huge focus of this post – helping you feel confident in setting your tensions so you can get right into shirring your garment!
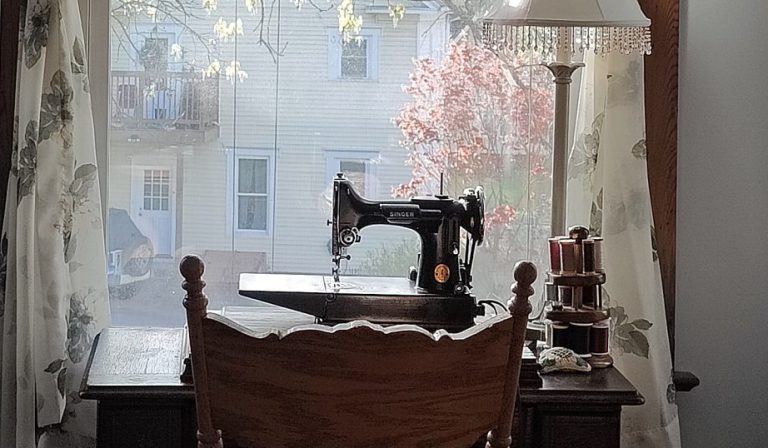
How to do shirring: Winding the bobbin
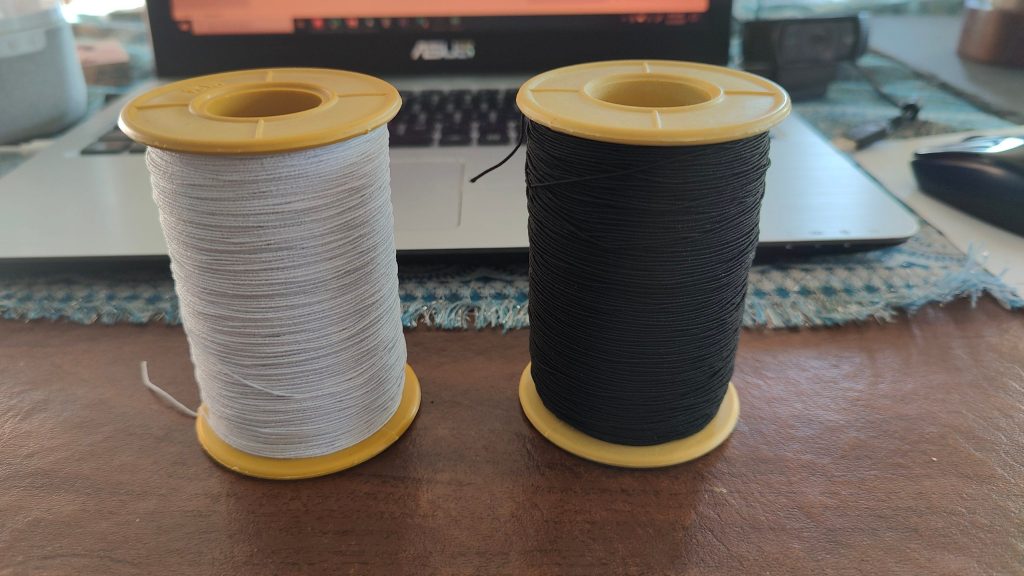
If you need to buy elastic thread, I highly recommend these on Amazon! The little spools you’ll find in stores are just so small and run out quickly. These enormous ones last forever and come in white and black, usually the only colors you’ll need since the elastic isn’t visible on the outside of the garment anyway.
Okay, so probably the most annoying thing about shirring is you unfortunately can’t use your machine’s automatic bobbin-winding feature. This is because it will stretch your thread as it is wound onto the bobbin, which you don’t want, and also because the elastic thread is just too thick to go through the tension disc.
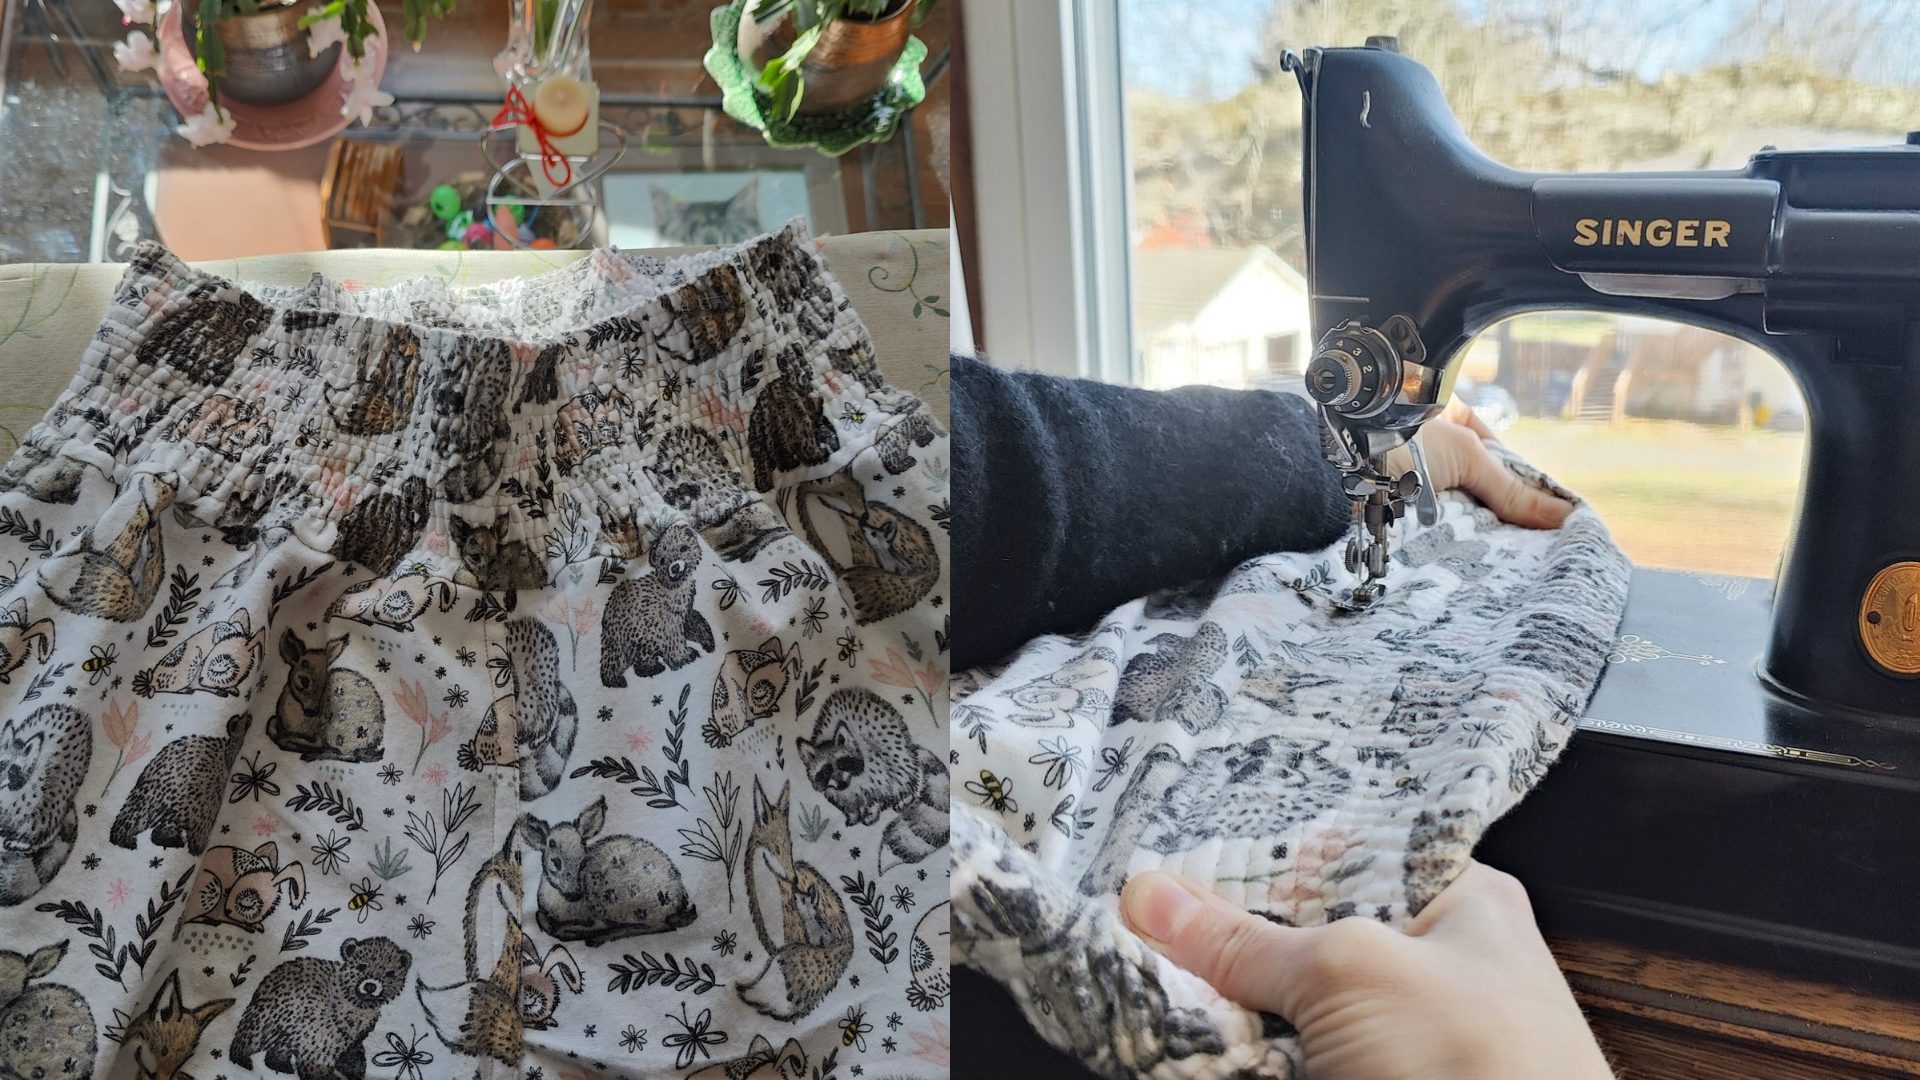
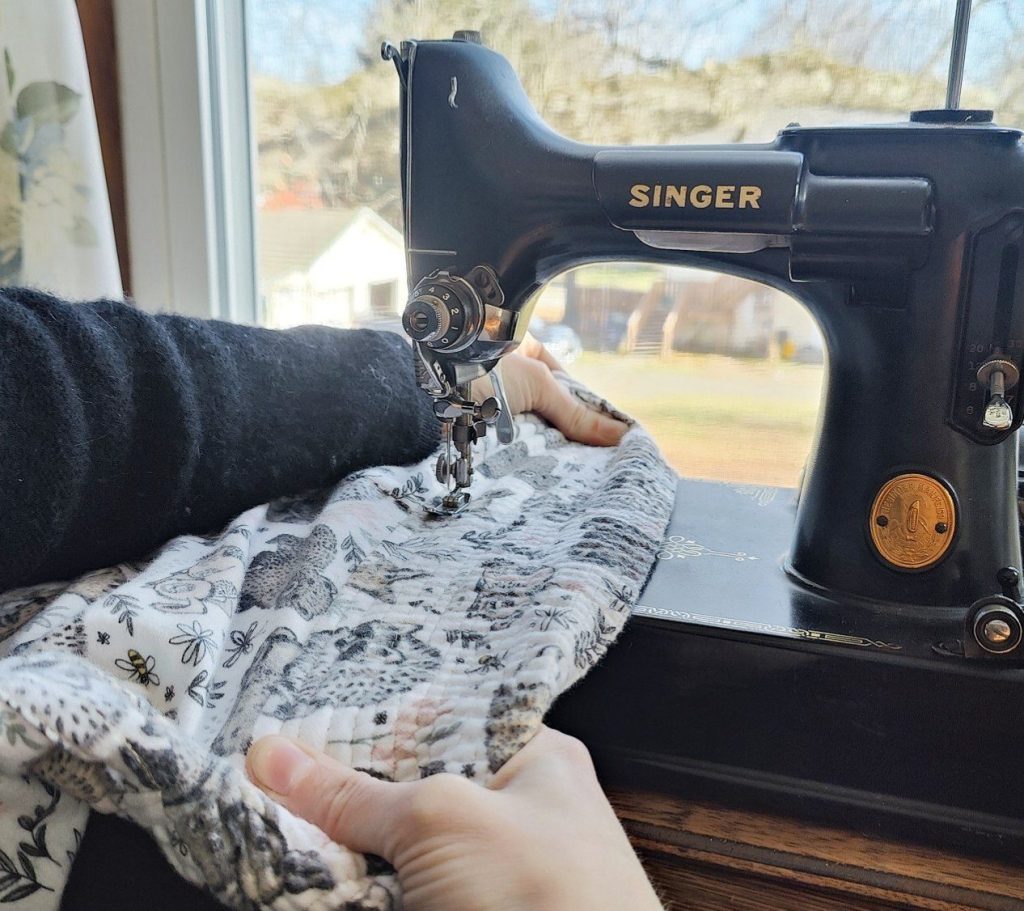
However, I like to use part of the automatic feature to help me out. What I do is hook up my bobbin to the winder and spin it with the machine slowly. I hold the thread myself, regulating the tension with one hand and freeing thread from the spool in the other.
Yes, I did demonstrate this on my vintage machine (my great-grandmother’s Singer Featherweight), but really any bobbin winder should be able to do the same, you might just need to adjust the position of your hands.
How to do shirring: Setting the bobbin tension
So this is where things get the tiniest bit dicey, just because generally, we don’t mess with our bobbin tension. I remember being afraid to change it because, well, how the heck would I know how to get it back to where it was supposed to be? I might ruin my bobbin case!
Now that I understand the bobbin tension, however, I feel confident adjusting it. You just have to be careful and make small adjustments. And, most importantly, know how to test the tension of your bobbin before starting to sew!
When you know what to do, it’s actually pretty straightforward.
Finding your bobbin’s tension adjustment screw
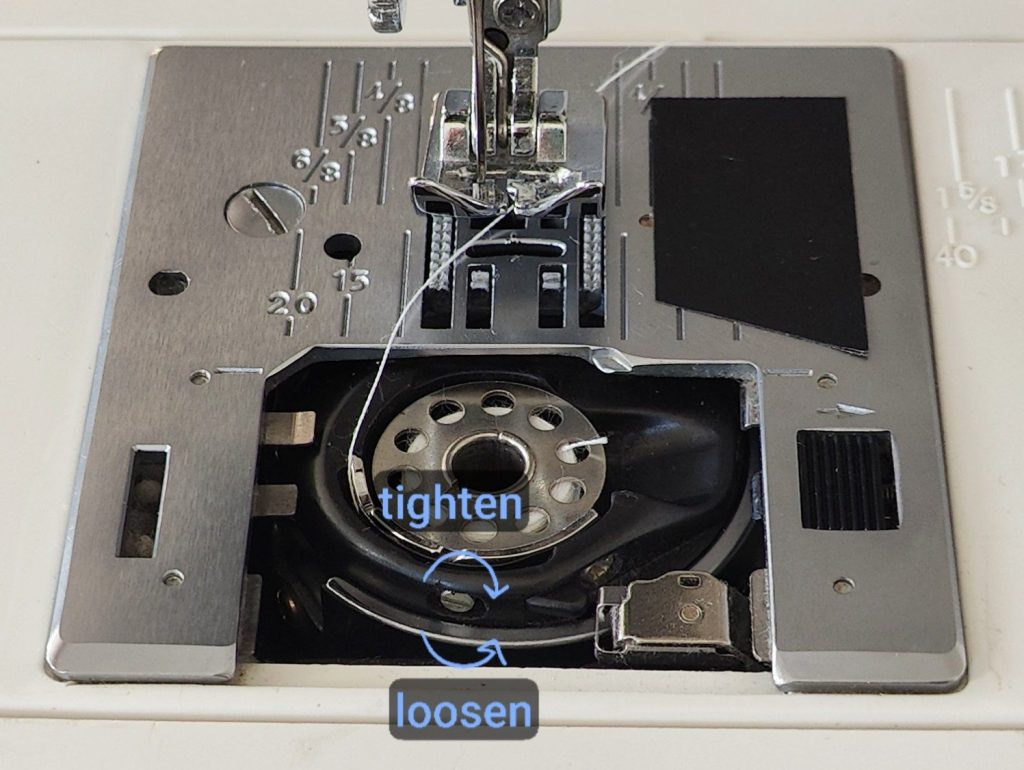
First, you need to locate the tension adjustment screw. On my relatively modern sewing machine, this is where the tension screw is located:
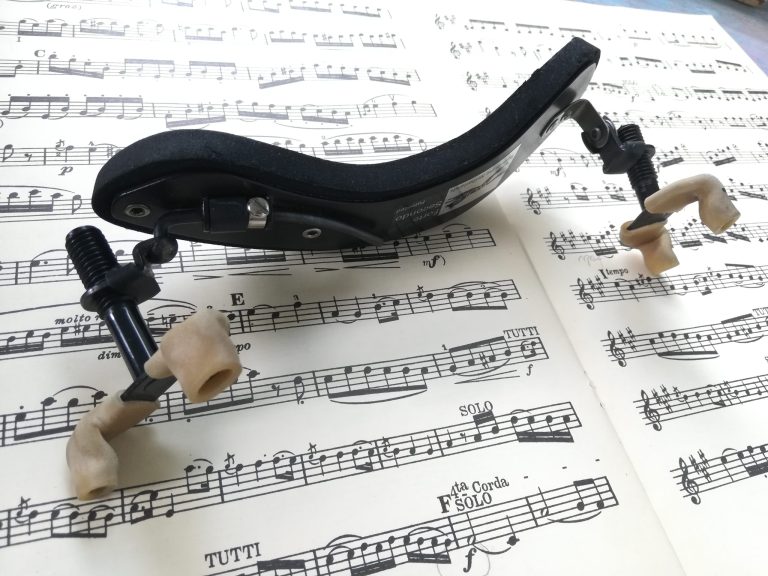
Vintage sewing machines usually have bobbin cases like these, and this is where the screw is for each of mine:
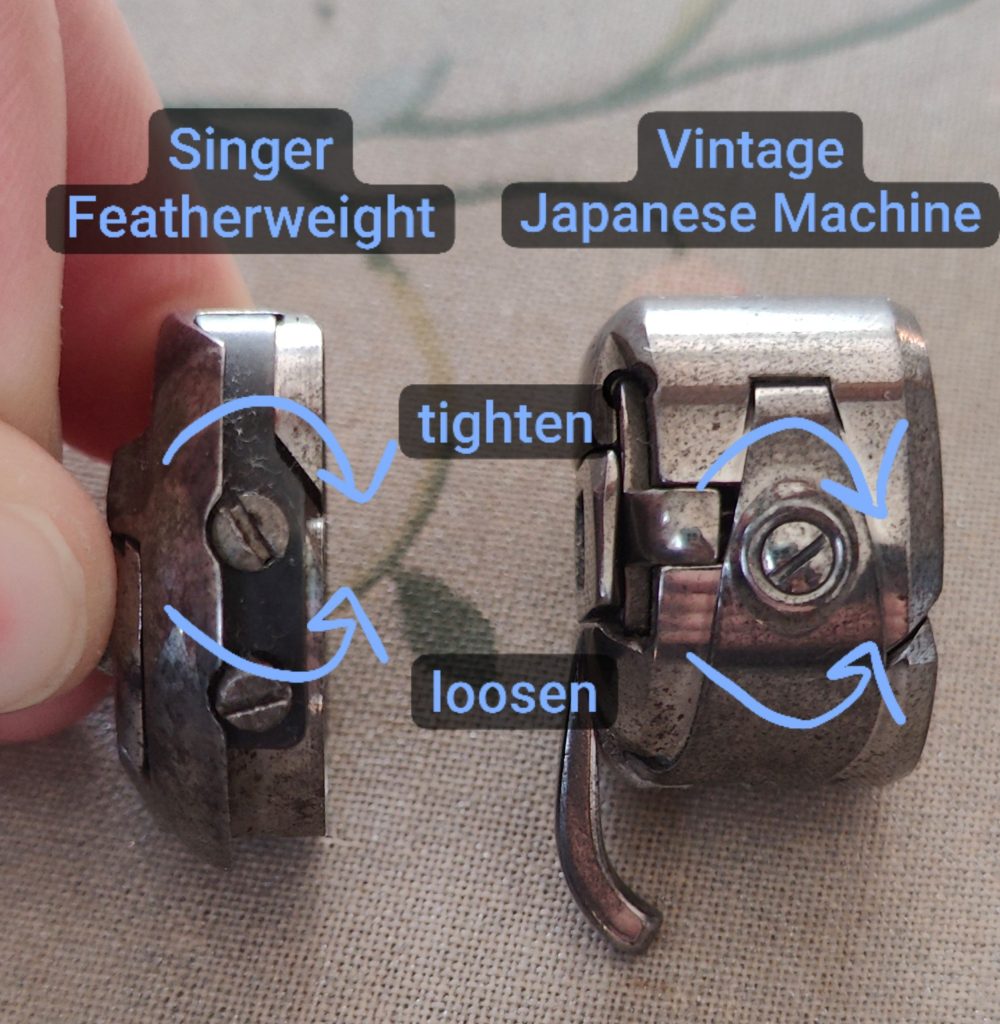
If you’re still unsure about where your tension screw is located, it should also be in the manual for your machine.
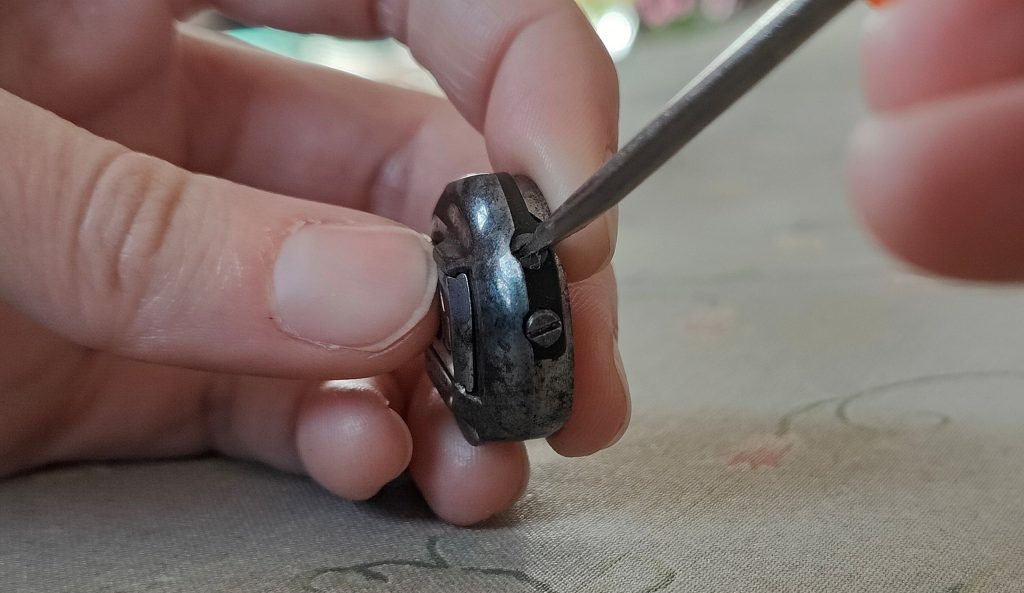
Adjusting your tension screw
Now, the trick to setting the tension is, first of all, make tiny tiny turns! Like a quarter turn at a time, then test. Also, it never hurts to take a picture of where your screw was to start with in case you run into problems resetting the tension later. But I will show you how to do this regardless!
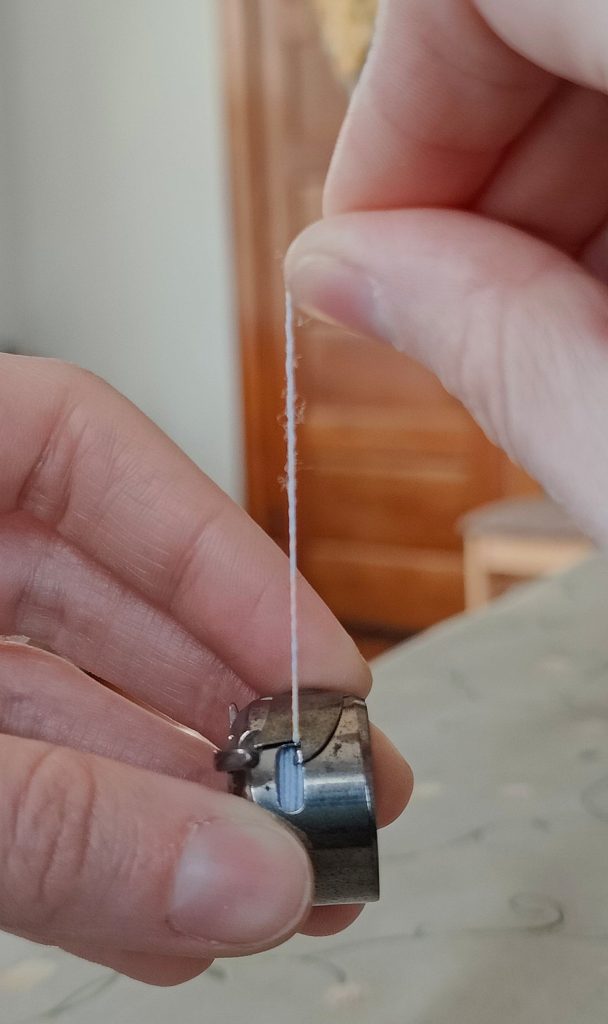
What I do is get my elastic-wound bobbin inserted into the bobbin case, make sure the thread is properly set in there, and then pull up on it. Based on how easy/difficult it is to pull up on the thread, I know to loosen or tighten the tension screw.
For all types of thread in general, you want a moderate amount of resistance/tension on the thread when pulled, and you’ll be able to feel this when you pull it.
For elastic thread specifically, your bobbin case’s default thread tension is going to be pretty tight. I’m guessing this is because the elastic thread is so much thicker and is being pulled through the same tight space as the thinner thread.
So, generally speaking, we need to loosen the tension a bit. But again, this can vary based on your machine, so always pull that thread to see what you’re dealing with!
Different amounts of tension produce different results
How tightly you set your bobbin depends on how much you want your elastic to scrunch the fabric. A tighter tension will give really dramatic shirring, while slightly looser tension will shirr the fabric more gently. Keep in mind that subsequent rows will multiply the effect and sometimes it’s better to start with a milder tension if you want a gentler fit in the finished garment.
The best way to visualize the effect of your bobbin’s tension is this: However much the elastic stretches when you pull it up out of the bobbin case, this is how much it will stretch as it is sewn into your fabric.
I would recommend playing around and testing this shirring technique on scrap fabric to get an idea of how tight you want your tension.
Adjusting your bobbin tension back to normal
If you’re like me, you might have memorized how many fractions of a turn you moved your tension screw and you are good to just move it back by the same amount. But, for educational purposes, let’s pretend you have NO idea where that screw is supposed to be for ordinary sewing and need to figure it out.
No problem! Seriously. What you do is perform exactly the same test as we did for the elastic thread but with an ordinary thread. Put it in there, pull, see if it’s way too loose or way too tight. Chances are it will need a bit of tightening.
Again, you want your thread to have a moderate amount of tension when you pull it out of the bobbin case. If there is a bit of resistance, you’re probably fine, because then you can always adjust the top thread’s tension if needed!
Sewing the rows of shirring
Okay, so at this point you should have your bobbin tension all set. Hopefully you’ve done some practice shirring on scrap fabric and have an idea of how tight you want your bobbin tension to be!
Now all that’s left is to actually sew the rows of shirring!
Planning your rows of shirring
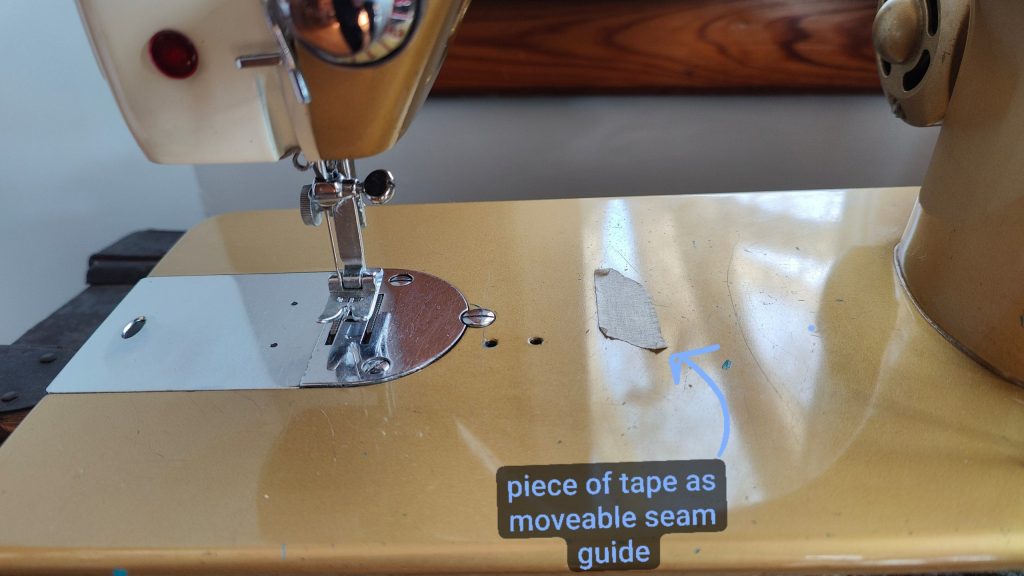
There are a few different ways to keep track of where to sew your rows. You can take a sewing ruler and mark your rows onto the fabric. Or, if your lines will be adjacent to the edge of the fabric, you can place a piece tape on your machine to use as a seam guide, moving it for each successive row.
Sewing your first few rows!
On your machine, make sure to set your stitch length to the longest one your machine is capable of. Failing to do this will keep the fabric from gathering properly as the elastic is sewn in.
Then, start sewing, making sure to backstitch initially to lock in your thread!
After you’ve sewn a few inches of your first row, feel your fabric. At this stage, you should see a bit of puckering on your fabric, but it shouldn’t look completely scrunched yet. Each new row will further scrunch the fabric until you start to see those classic shirred gathers!
Connecting rows vs. stopping and restarting them
Technically, as each new row is started, you’re supposed to backstitch, cut your thread, and then start a new row all over. You might have noticed in that above video that I didn’t do this!
Personally, I prefer to pivot my fabric under the lowered needle, sew a couple stitches vertically away from my current row, and then just start the new row there. I figure doing this creates fewer threads that could potentially come undone in the long run, and I hardly notice the extra stitches in the end!
Here is what this approach looks like on a shirred waistband:
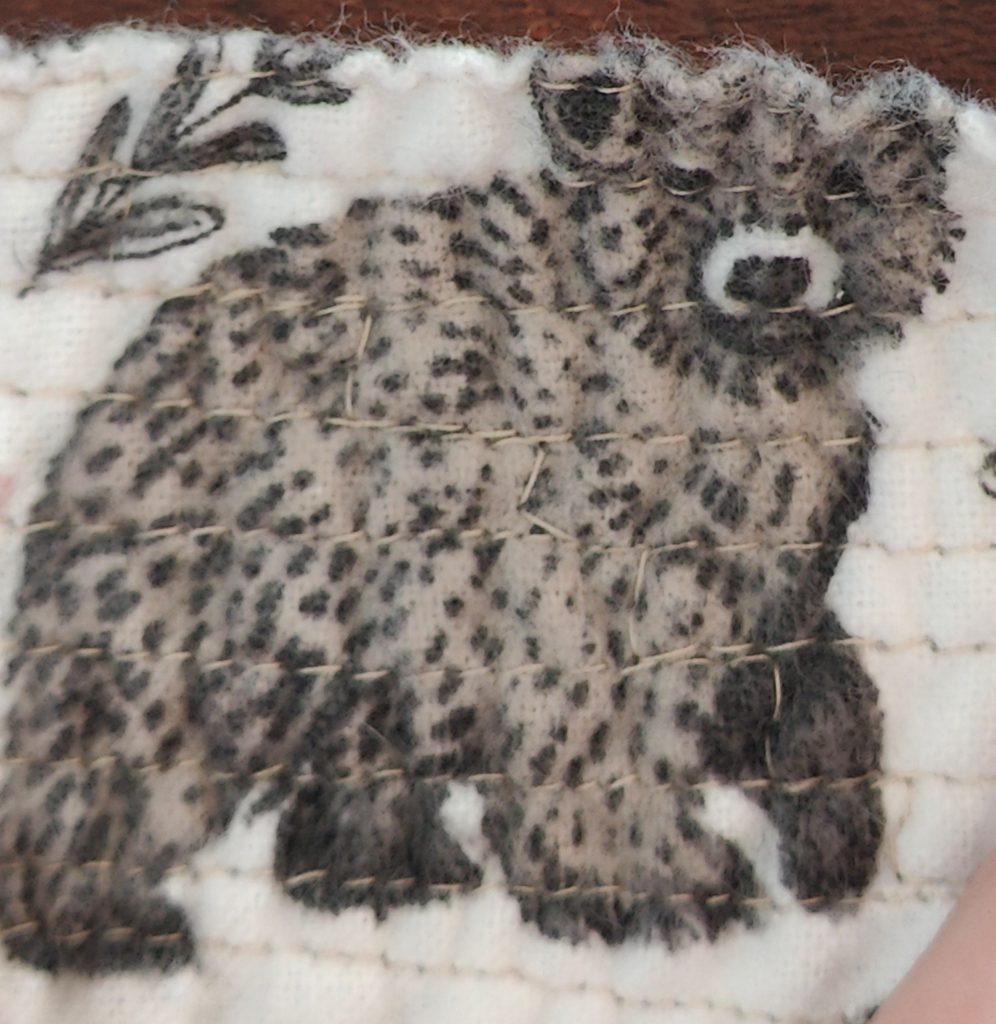
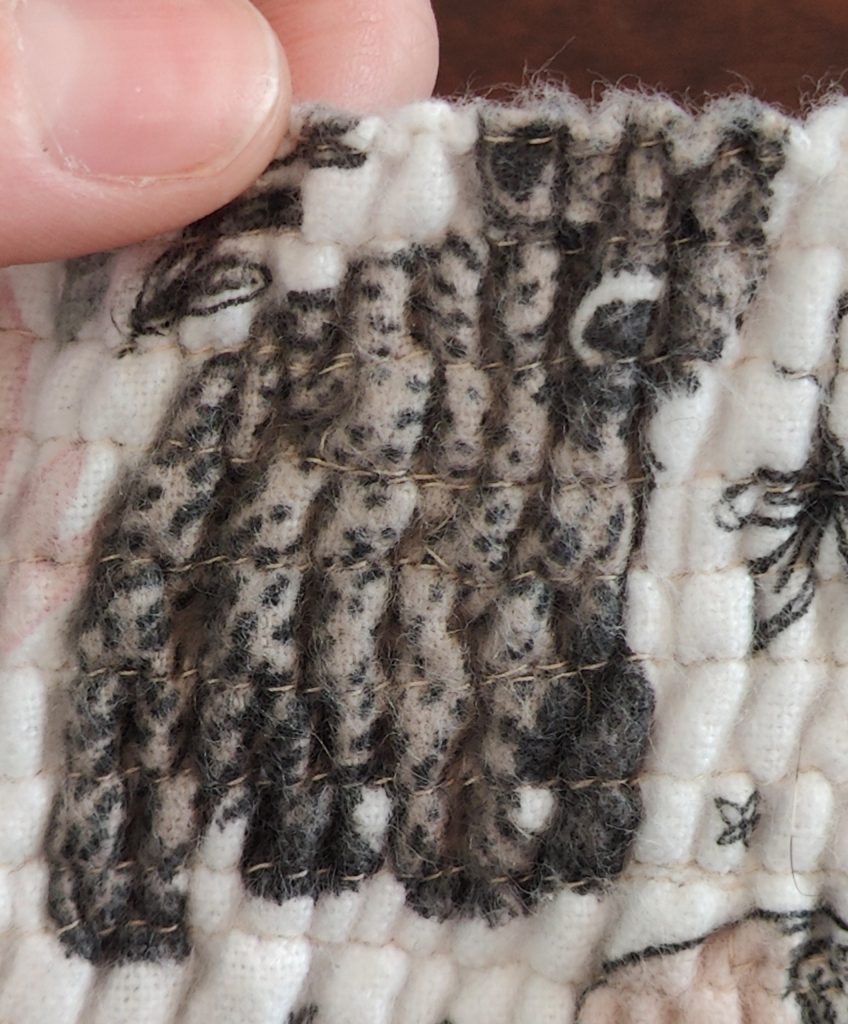
You can see above that the stitches, though visible when the shirring is stretched, are actually quite hidden in the gathers when not stretched.
Sewing the rest of the rows
Please note that as soon as you reach your second row, you’re going to need to be crafty about how you feed your fabric through the machine!
This is because the fabric has started to gather after the first row of shirring. If you sew the fabric with the gathers unstretched, then your fabric will end up with folds which are sewn in and all kinds of issues!
So, it’s imperative at this point to continuously stretch the fabric open and guide it through the needle. Each successive row will become harder to stretch the fabric open, but keep at it!
I recommend holding the fabric at the back and front of the machine as it’s guided through at this point:
If you pull only at the front, you’ll actually keep the fabric from getting fed through the machine! You sort of want to balance how much you pull on each end while still allowing the machine to do its job and feed the fabric through.
To finish the shirring, just keep sewing rows until you’re happy, and make sure to backstitch once done.
What to do if you run out of elastic thread in the bobbin
If you have a lot of rows, it’s probable that you’ll run out of elastic thread at some point. Your machine should suddenly sound a bit different and you’ll notice your top stitches aren’t taking into the fabric, just like any other time the bobbin thread runs out.
At this point, remove your project from the machine, refill your bobbin, and start where you left off, simply backstitching over the last few stitches you previously sewed to secure the loose ends.
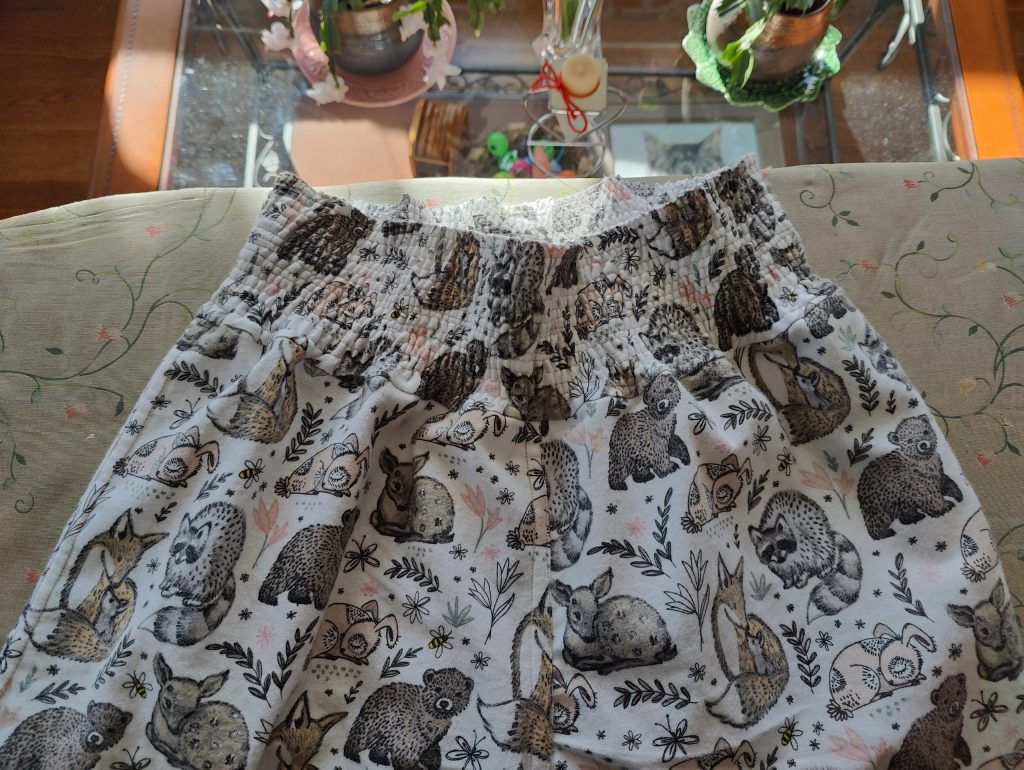
The last step: Admiring your shirred garment!
Once you’re done shirring – and this can truly take a long time, since there are so many rows in many cases! – all that is left to do is admire your work! I just LOVE the effect it produces!
It is worth noting that, the sheerer the fabric used, the more beautiful shirring is. But, despite this, even thick fabrics, such as the flannel in the first picture, take shirring just fine!
I truly hope I have demystified some of the aspects of shirring for you guys. When I first researched it, I didn’t fully understand all of the tension issues that could come up. But, once I’d figured it out, it was so easy to get good results every time!
If you have any questions (I’m sure I missed some details!) please feel free to ask in the comments below and I’ll do my best to help! Thank you all for being here and I hope your sewing projects bring you as much joy as mine bring to me! ♥