

Building kitchen cabinets with limited tools (no table saw) and no prior experience!
Disclosure: I am an Amazon affiliate and this post contains affiliate links, which means I may earn a commission (at no extra cost to you) if you purchase products mentioned.
Of all the home projects my husband and I have taken on since buying our house in 2023, building kitchen cabinets has to be my favorite!
Growing up, I always loved working with wood, though my experience was very basic up to this point. The idea of building kitchen cabinets was SO appealing to me, especially when I considered how expensive nice ones are to buy!
I have to admit, though, that the idea also intimidated me. I didn’t have a woodshop full of tools and I was very inexperienced. But I guess that didn’t stop me!
I want to encourage everyone that building your own cabinets is totally possible, even without a table saw and a woodshop. So many guides online require a table saw, so let me show you how I did it without one!
What tools we did use
While I do my absolute best to avoid power tools whenever I can, unfortunately you will need some power tools to build cabinets. However, I really think not needing a table saw is huge!
Since I am a musician and my hands are my bread and butter (and joy), I have vowed never to use a table saw.
Here are the tools we used when building our kitchen cabinets:
- A circular saw
- A drill (we have this one which is corded and very powerful)
- An impact driver
- A router (Yes, they can be expensive, but there are cheap ones! Check out Harbor Freight.)
- A pocket-hole jig (more on this below)
- This Kreg rip guide to make straight cuts with your circular saw
- A screwdriver
- A tape measure
If your budget is tight, keep an eye out for some of these things on Craigslist, at tag sales, etc. For example, we got our circular saw at a tag sale for $5!
Figuring out what materials we needed…
Of course, before we actually went to the store to get our materials, I had to do a fair bit of research and planning to even figure out what to get.
It seemed pocket holes were the key to amateur-level cabinet making, so I’d need to get a jig and the screws. I chose the cheapest and simplest pocket-hole jig by Kreg and appropriate length screws for 3/4″ plywood.
Cabinets are generally constructed by making cabinet boxes and then attaching face frames. Then, you make the doors, drawers, etc.
I found out cabinet boxes are almost never made with solid wood but with cabinet-grade plywood. This is because plywood is much more stable through temperature and humidity changes. Cheaper cabinets have boxes made from particle board… yuck! That was one of the biggest reasons I decided to make my own.
The face frames, doors, and drawer-fronts are typically made with a decorative solid wood, as this is what you actually see once the cabinet is installed.
This is a comprehensive list of the materials we used when building kitchen cabinets in our home:
- Cabinet-grade 3/4″ plywood
- Cabinet-grade 1/4″ plywood
- 1″x2″ solid wood boards
- 1″x6″ solid poplar board
- Pocket screws
- Wood glue
- Cabinet and trim enamel paint, or wood stain
- Oil-based polyurethane
- Drawer slides
- Door hinges
- Drawer pulls
- Door knobs
- Door catches (to keep doors closed)
Getting the materials
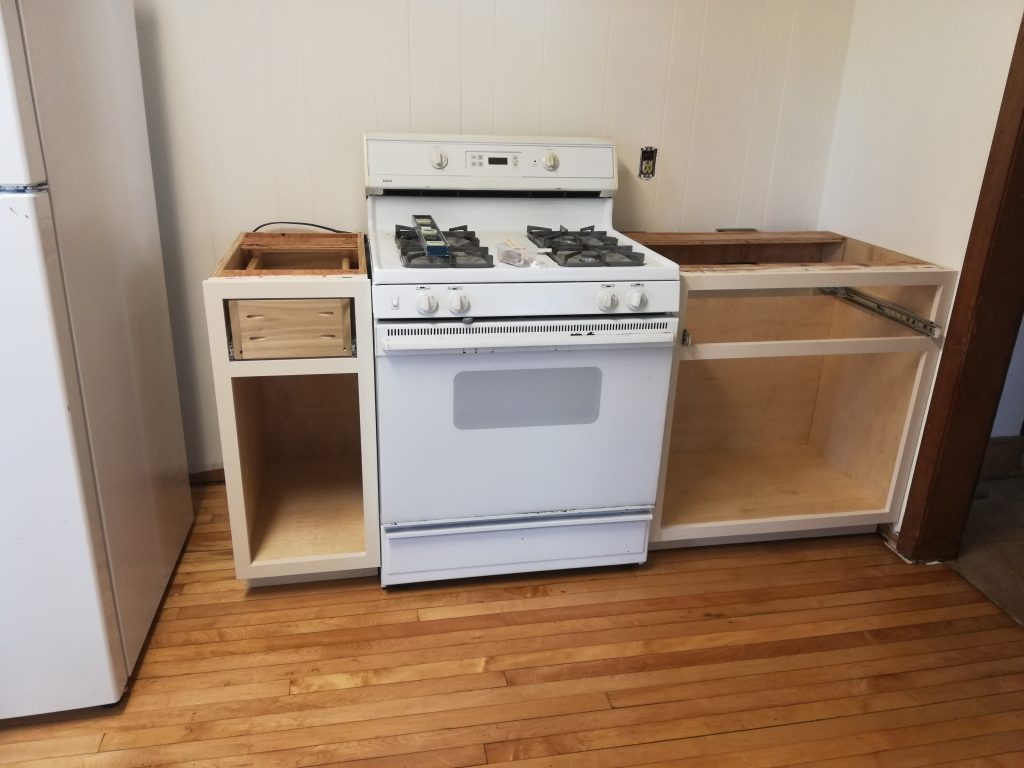
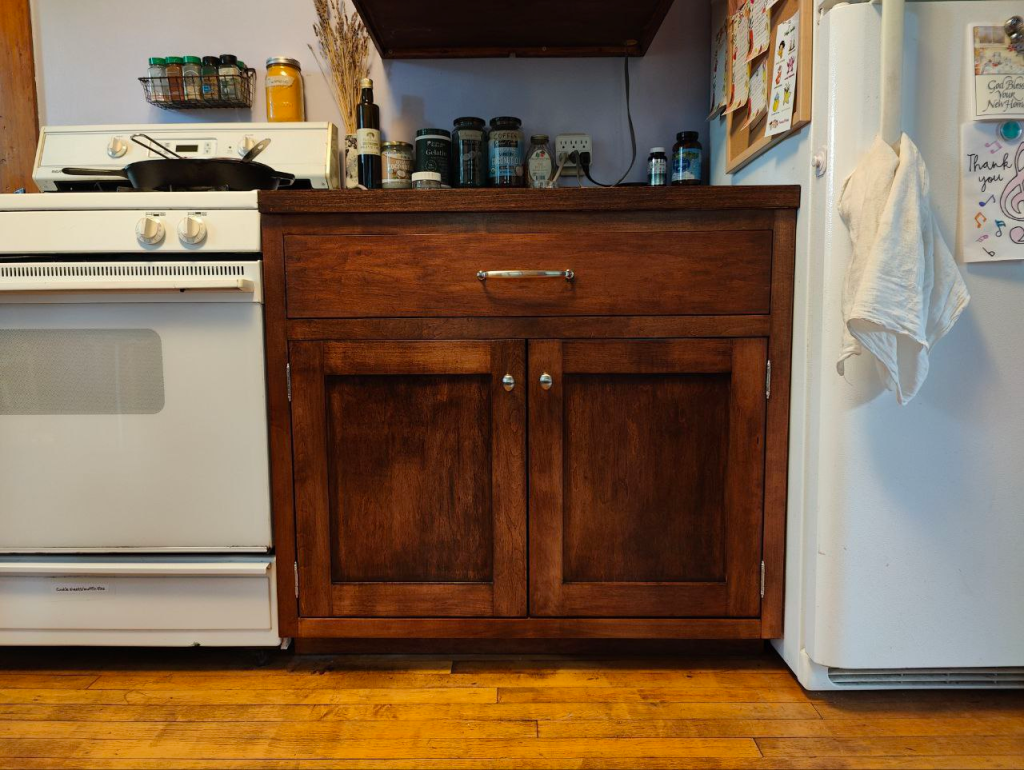
We live in a two-family house, so we actually have two kitchens. The upstairs kitchen really needed a cabinet for a specific spot between our fridge and stove. The downstairs kitchen needed a bunch of cabinets in general.
In order for the upstairs to match, I decided to go with maple that I would stain a dark brown. This meant I bought cabinet-grade maple plywood (expensive, around $90/sheet) with matching solid maple boards for the rest of the cabinet.
For the downstairs kitchen, my husband and I decided to build paint-grade cabinets to save money. This meant we were able to go with a less expensive plywood (Sandeply from Home Depot) and use poplar solid wood for the face frames. We even made doors and drawer fronts from the same plywood as the cabinet boxes in this case, making it super economic.
For any drawers I made (the drawer boxes themselves), I used poplar solid wood, though you can also use the cabinet-grade plywood for these. Even 1/2″ plywood will work beautifully.
The easiest way to cut the pieces for your cabinet boxes
The biggest obstacle you’ll run into when thinking of building kitchen cabinets is figuring out how you’ll actually cut down the 4’x8′ plywood sheets to the pieces you need.
Thankfully, Home Depot and Lowes do provide cutting services, and we took advantage of it!
Both stores will tell you they don’t do “precision” cuts. However, how precise these cuts end up depends a LOT on how nice the person who helps you is. Once, we got a grumpy lady at Home Depot who seemed to intentionally make no effort to cut with precision. Thankfully, after she made a few cuts, she got distracted and a nicer gentleman helped us and did a much better job.
We’ve never had trouble getting good cuts at Lowes so, generally, we prefer to go there.
Another alternative is to take the sheets home yourself and cut them down with a circular saw and a guide track like this one. Or you could clamp down a straightedge of some kind as a guide for your saw.
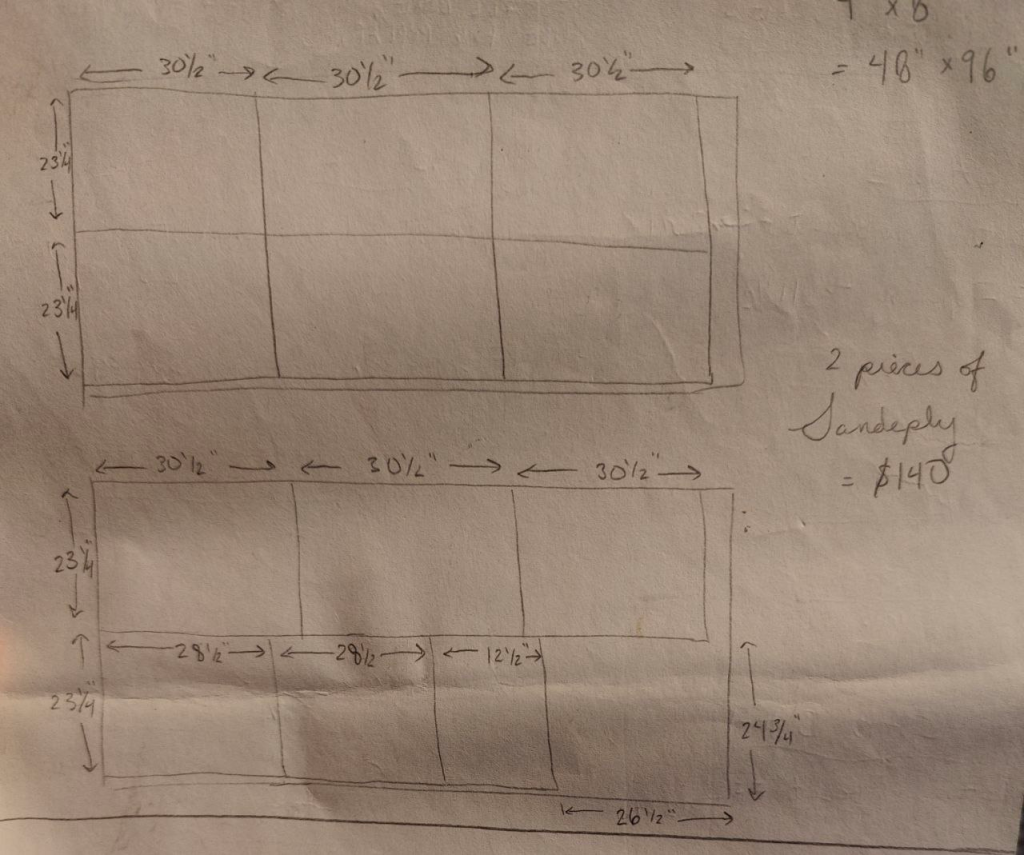
Though, if at all possible, I would recommend getting them cut down at the store. Those saws cut very straight and will save you a lot of time! If you do get the cuts done there, definitely make sure to plan them ahead of time on a sheet of paper based on your cabinet measurements and the dimensions of your cabinet boxes.
Here’s the plan I drew out before heading to the store:
Now to begin building kitchen cabinets!
There are many steps in building cabinets:
- You assemble the cabinet boxes and toekicks
- Build and attach the face frames, if using (it’s possible to build cabinets without them!)
- Make drawer boxes, install with drawer slides
- Make doors and drawer fronts
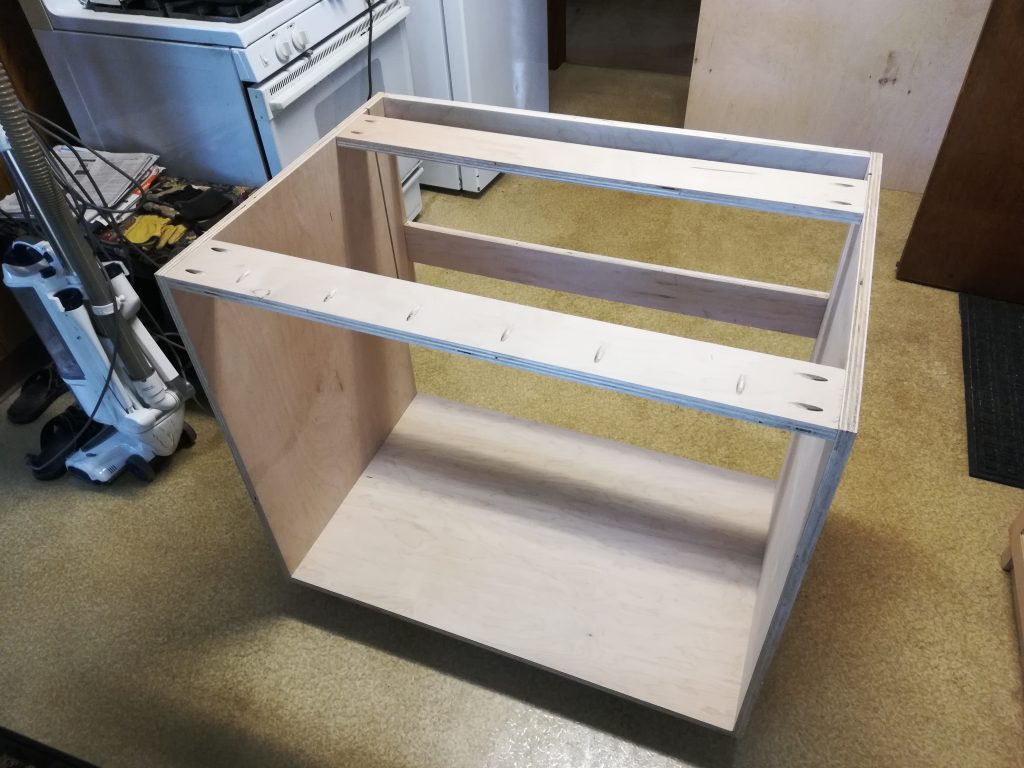
Assembling the cabinet boxes
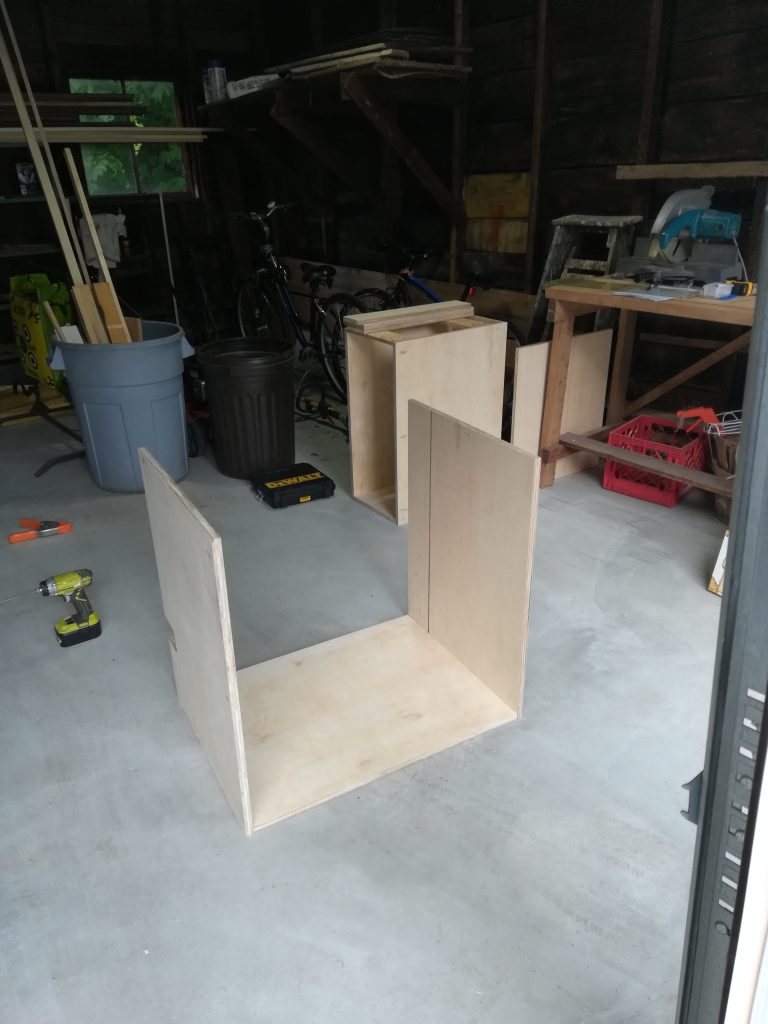
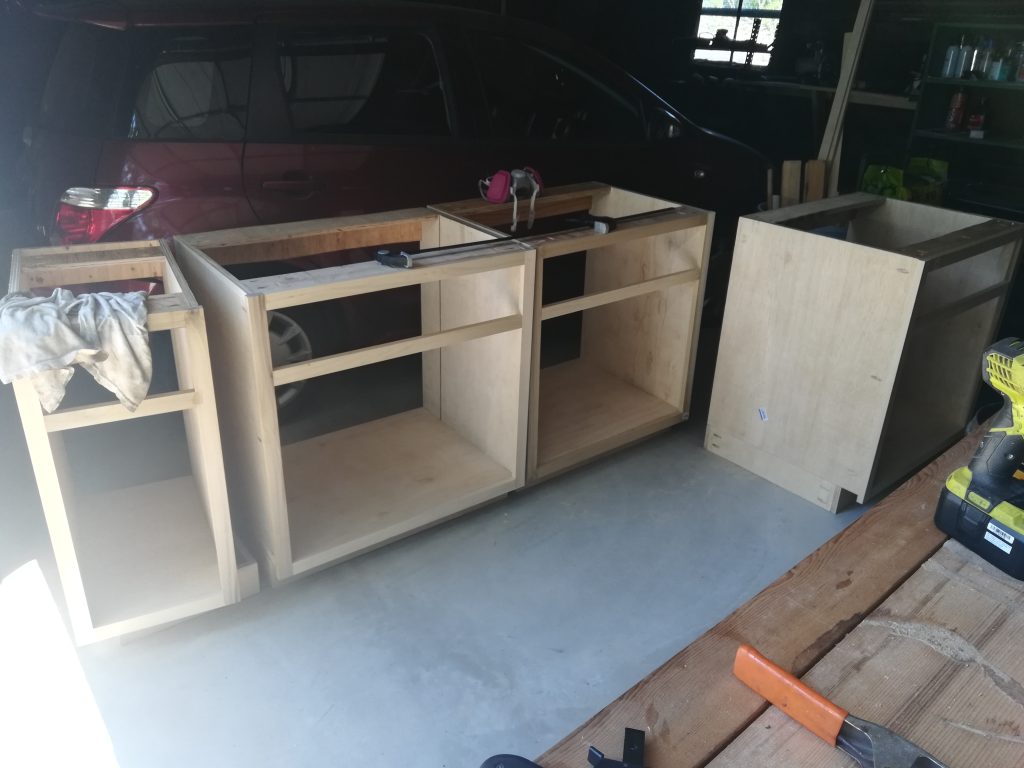
Once we had all of our cabinet box pieces cut to size at the store, we brought them home and started assembling them.
Basically, cabinet boxes have four pieces: the bottom and two sides (which are 3/4″ plywood), and back panel (which is typically 1/4″ plywood). You can decide to integrate the toekicks (the part of the cabinet which elevates it off the ground) into the side pieces or make separate toekick boxes.
We began by attaching the sides to the bottom. Then, you’re supposed to add a back panel, if you’re using one. For some of our cabinets, we simply let the wall of the kitchen be the back panel since the cabinets would be mounted flush against the wall. In other cases, we had gas pipes we wanted to hide, so we installed a back panel for that reason.
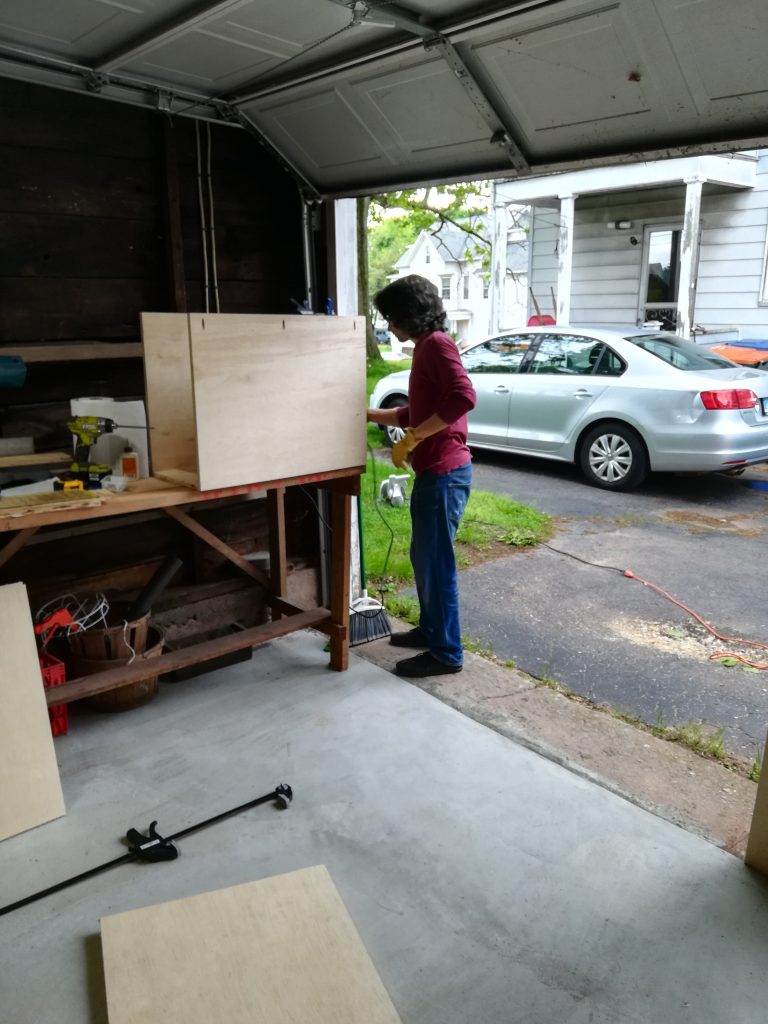
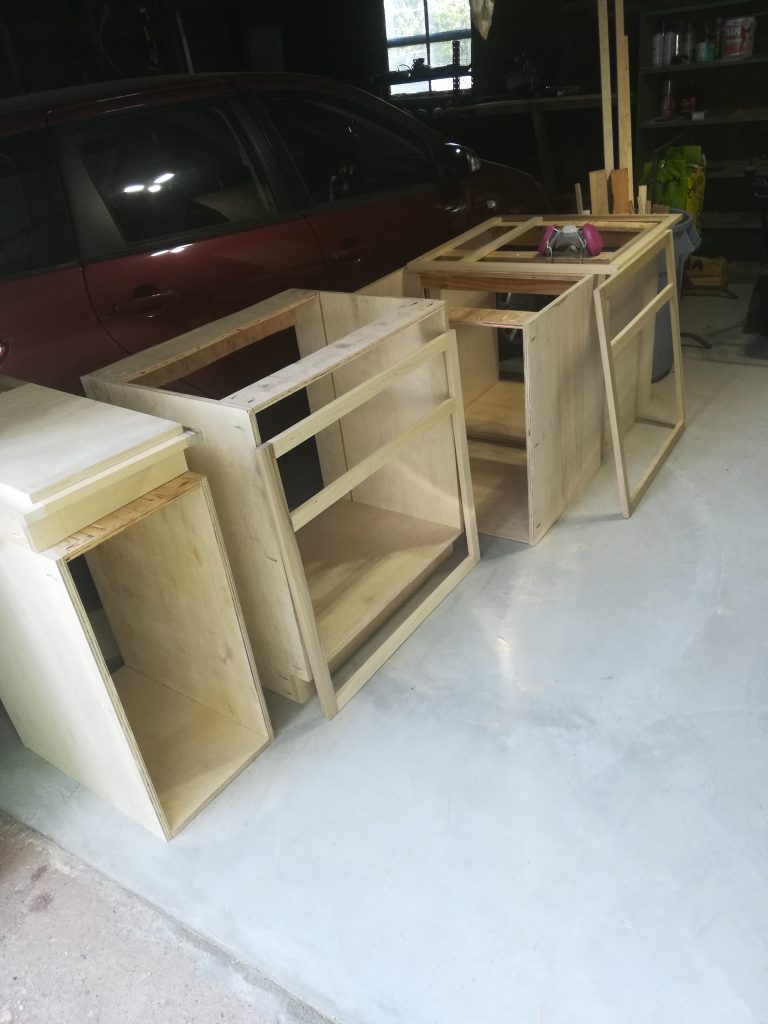
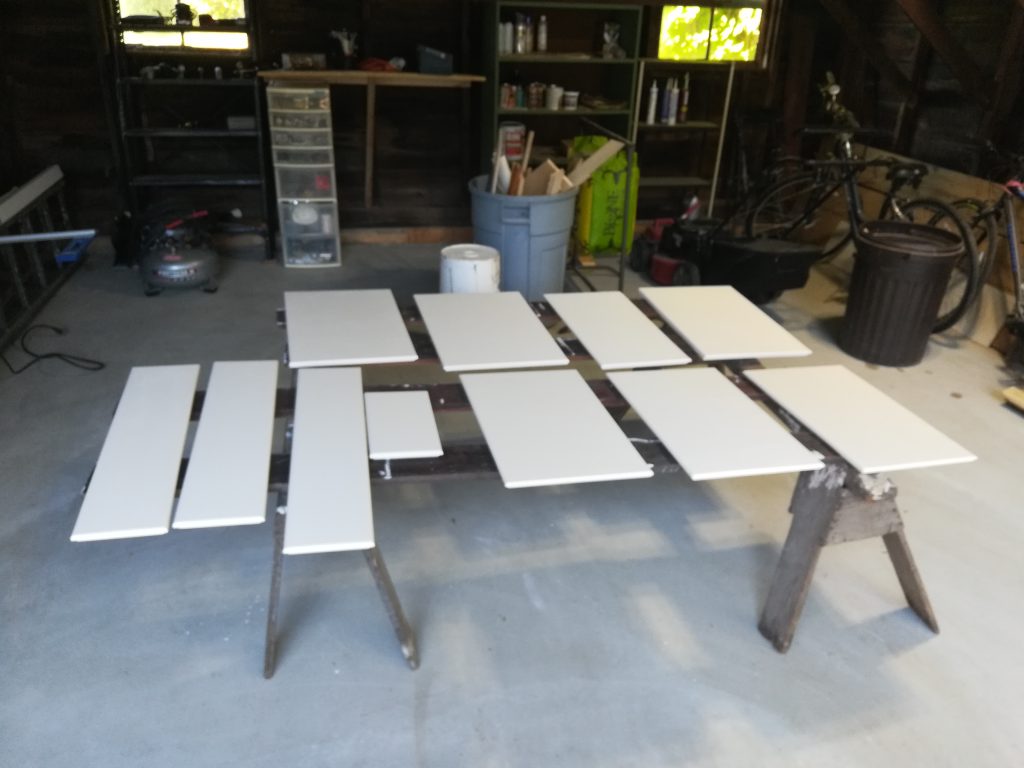
Our little garage became a cabinet shop for a few weeks!
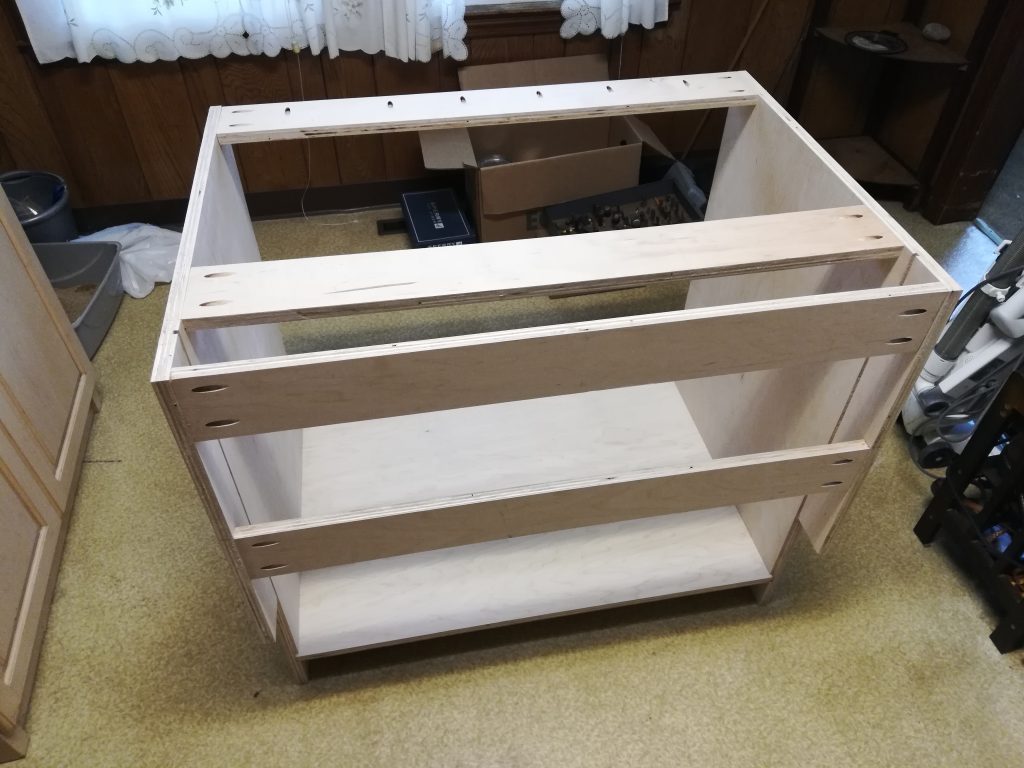
After assembling the box’s sides, bottom, and back panel, you need to add support pieces. These enable you to attach the face frames and to actually install the cabinets to the wall.
You make them by cutting pieces of 3/4″ plywood (doesn’t even need to be the cabinet-grade stuff) into strips about 4 inches wide. They’re also attached with pocket screws and glue. Remember to always use glue in addition to your pocket screws!
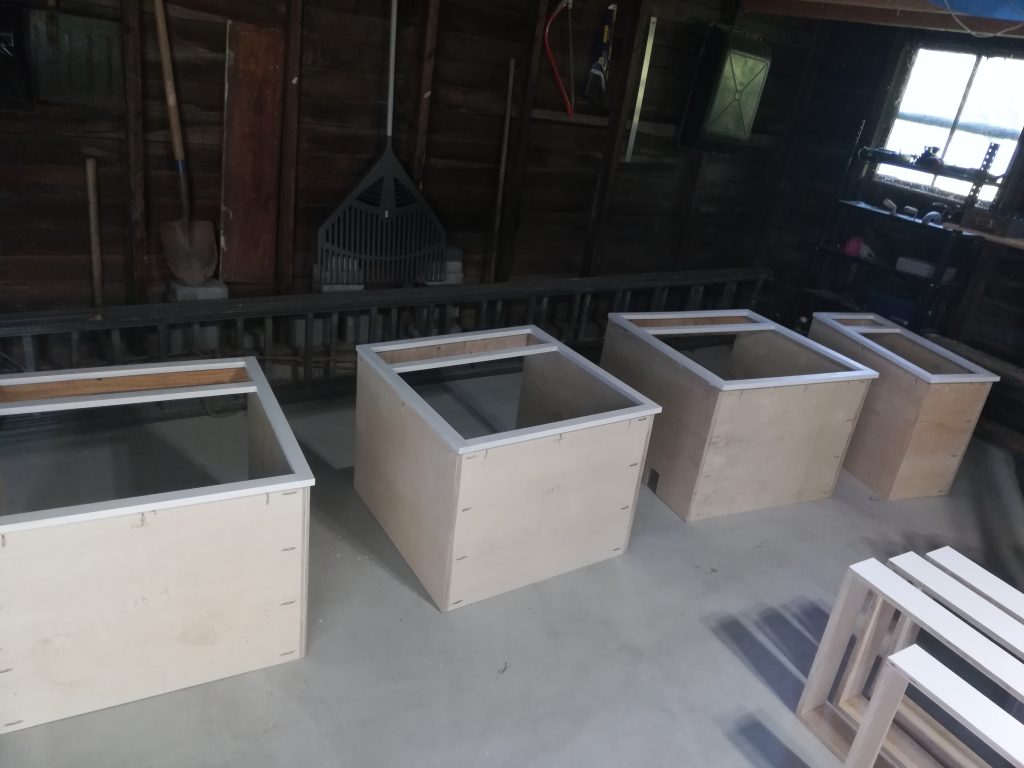
Once your cabinet box is done, it’s time to start assembling your face frames!
Building and attaching the face frames
When it comes to face frames, do keep in mind that they are in fact optional. However, they add a TON of structure and sturdiness to cabinets, so I would recommend them. There’s nothing like solid wood to reinforce a structure.
I found that once I’d assembled the cabinet boxes, they were still a little rickety, as in I could flex the joints a bit. However, once I got the face frames attached, the cabinets were rock solid.
I built my face frames based on my desired drawer and door dimensions. Personally, I LOVE deep drawers, so I made a bigger opening for the drawers in my cabinets. I decided ahead of time I’d use 5.5″ tall drawer boxes, so I made the opening 6″ tall. This leaves SO much room for all the things you want to put in there, without the drawer getting stuck as they tend to do when we pack them full of stuff!
These were my plans for the face frames:
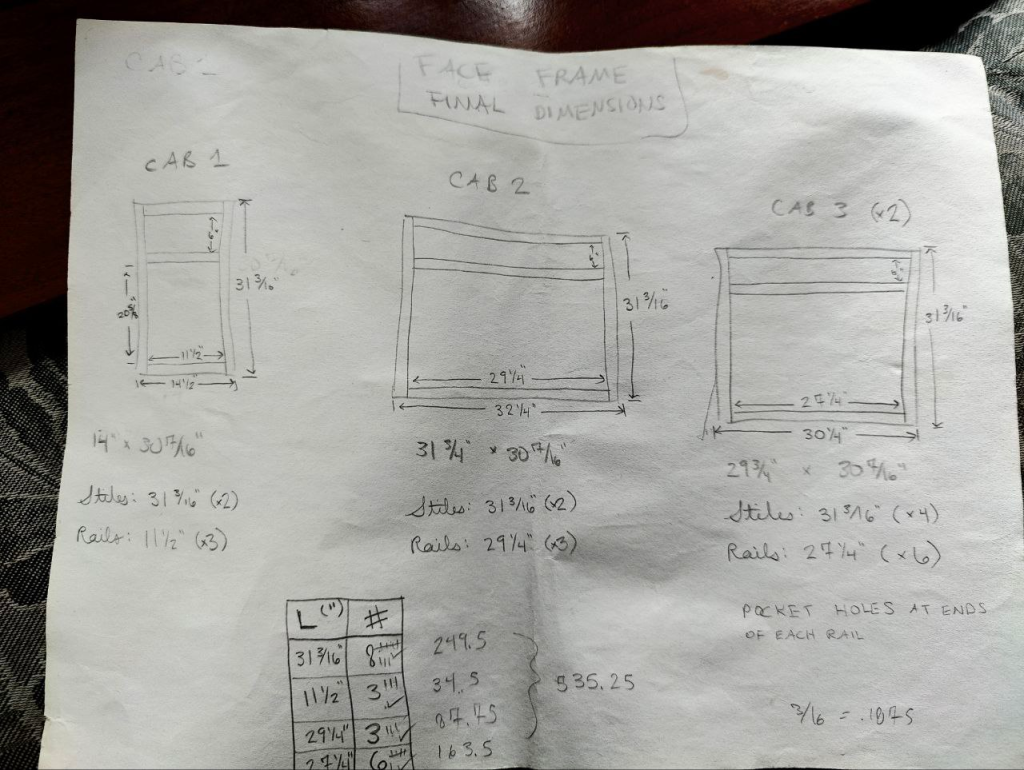
This is what I LOVE about building things myself – I can totally customize everything to my own specifications!
For the face frames, I used 1″x2″ pieces of solid poplar or maple, depending on which cabinet I was building. I cut them to size with my chop saw (a miter box would work, too) and assembled them with pocket screws and glue. This was honestly one of the easiest parts!
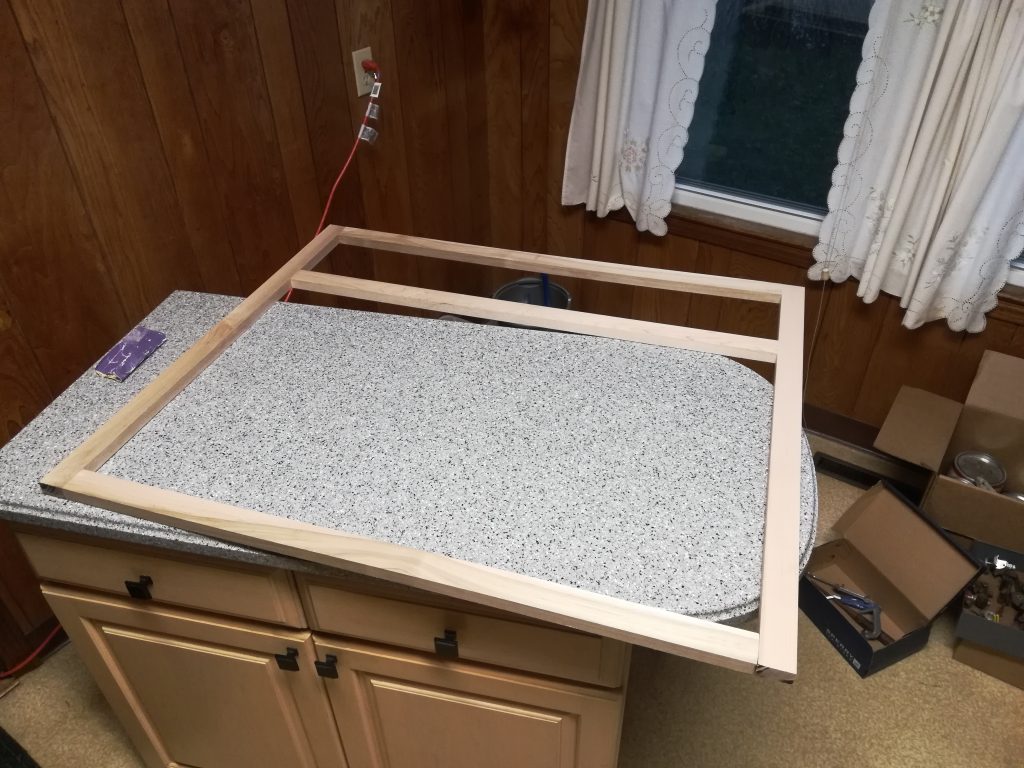
To attach the face frames, we just needed to clamp them on to our cabinets and attach with pocket screws and glue all the way around the box. Now you can see why we needed the front support pieces, else there would not have been anything to secure the tops of the frames.
Now that the face frames were attached, it was time to paint or stain them! For these cabinets, we went with an off-white cabinet and trim enamel paint. I did multiple coats, sanding in between, and the finish came out super smooth!
For my maple cabinet, I stained the face frame (I used Varathane) to match the other cabinets upstairs, followed by oil-based polyurethane.
Side note: I found out the hard way that maple does NOT stain well. It tends to blotch. So, I would highly recommend AGAINST using maple if you want to stain your wood.
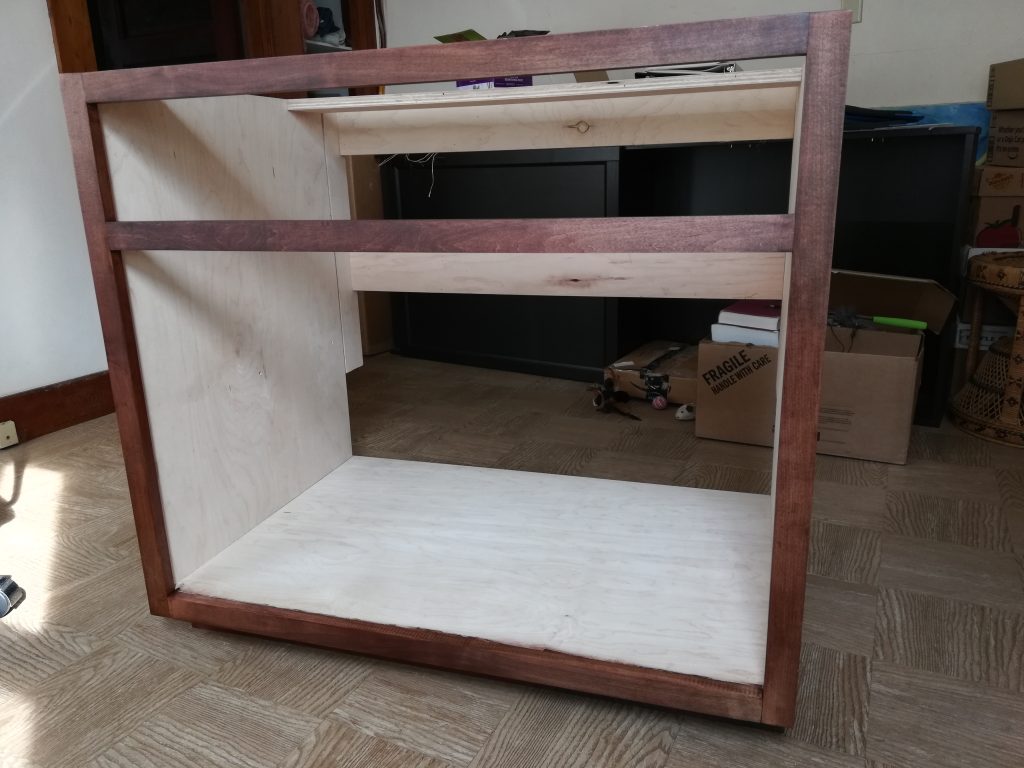
I also polyurethaned the remaining surfaces of all the cabinets (inside and out) for added durability and sealing from the elements.
Constructing the drawer boxes
I decided to spend a bit more money on solid poplar wood for my drawer boxes instead of simply using plywood. My reasoning was that if I had to cut the plywood pieces, it would be a lot more work, and solid wood just made me happy.
Plus, I was being an absolute crazy person with the maple cabinet (the first one I built) and decided I needed to make dovetails to construct the drawer box… so I spent two days in a row cutting them by hand. Let’s just say I learned my lesson and assembled my drawers with pocket screws once we did the other cabinets! But my dovetails did come out rather well for my first try, and I am very proud of them!
To make the drawer boxes, I bought 1″x6″ poplar and cut them to size with my chop saw (again, you can do this by hand if you need to).
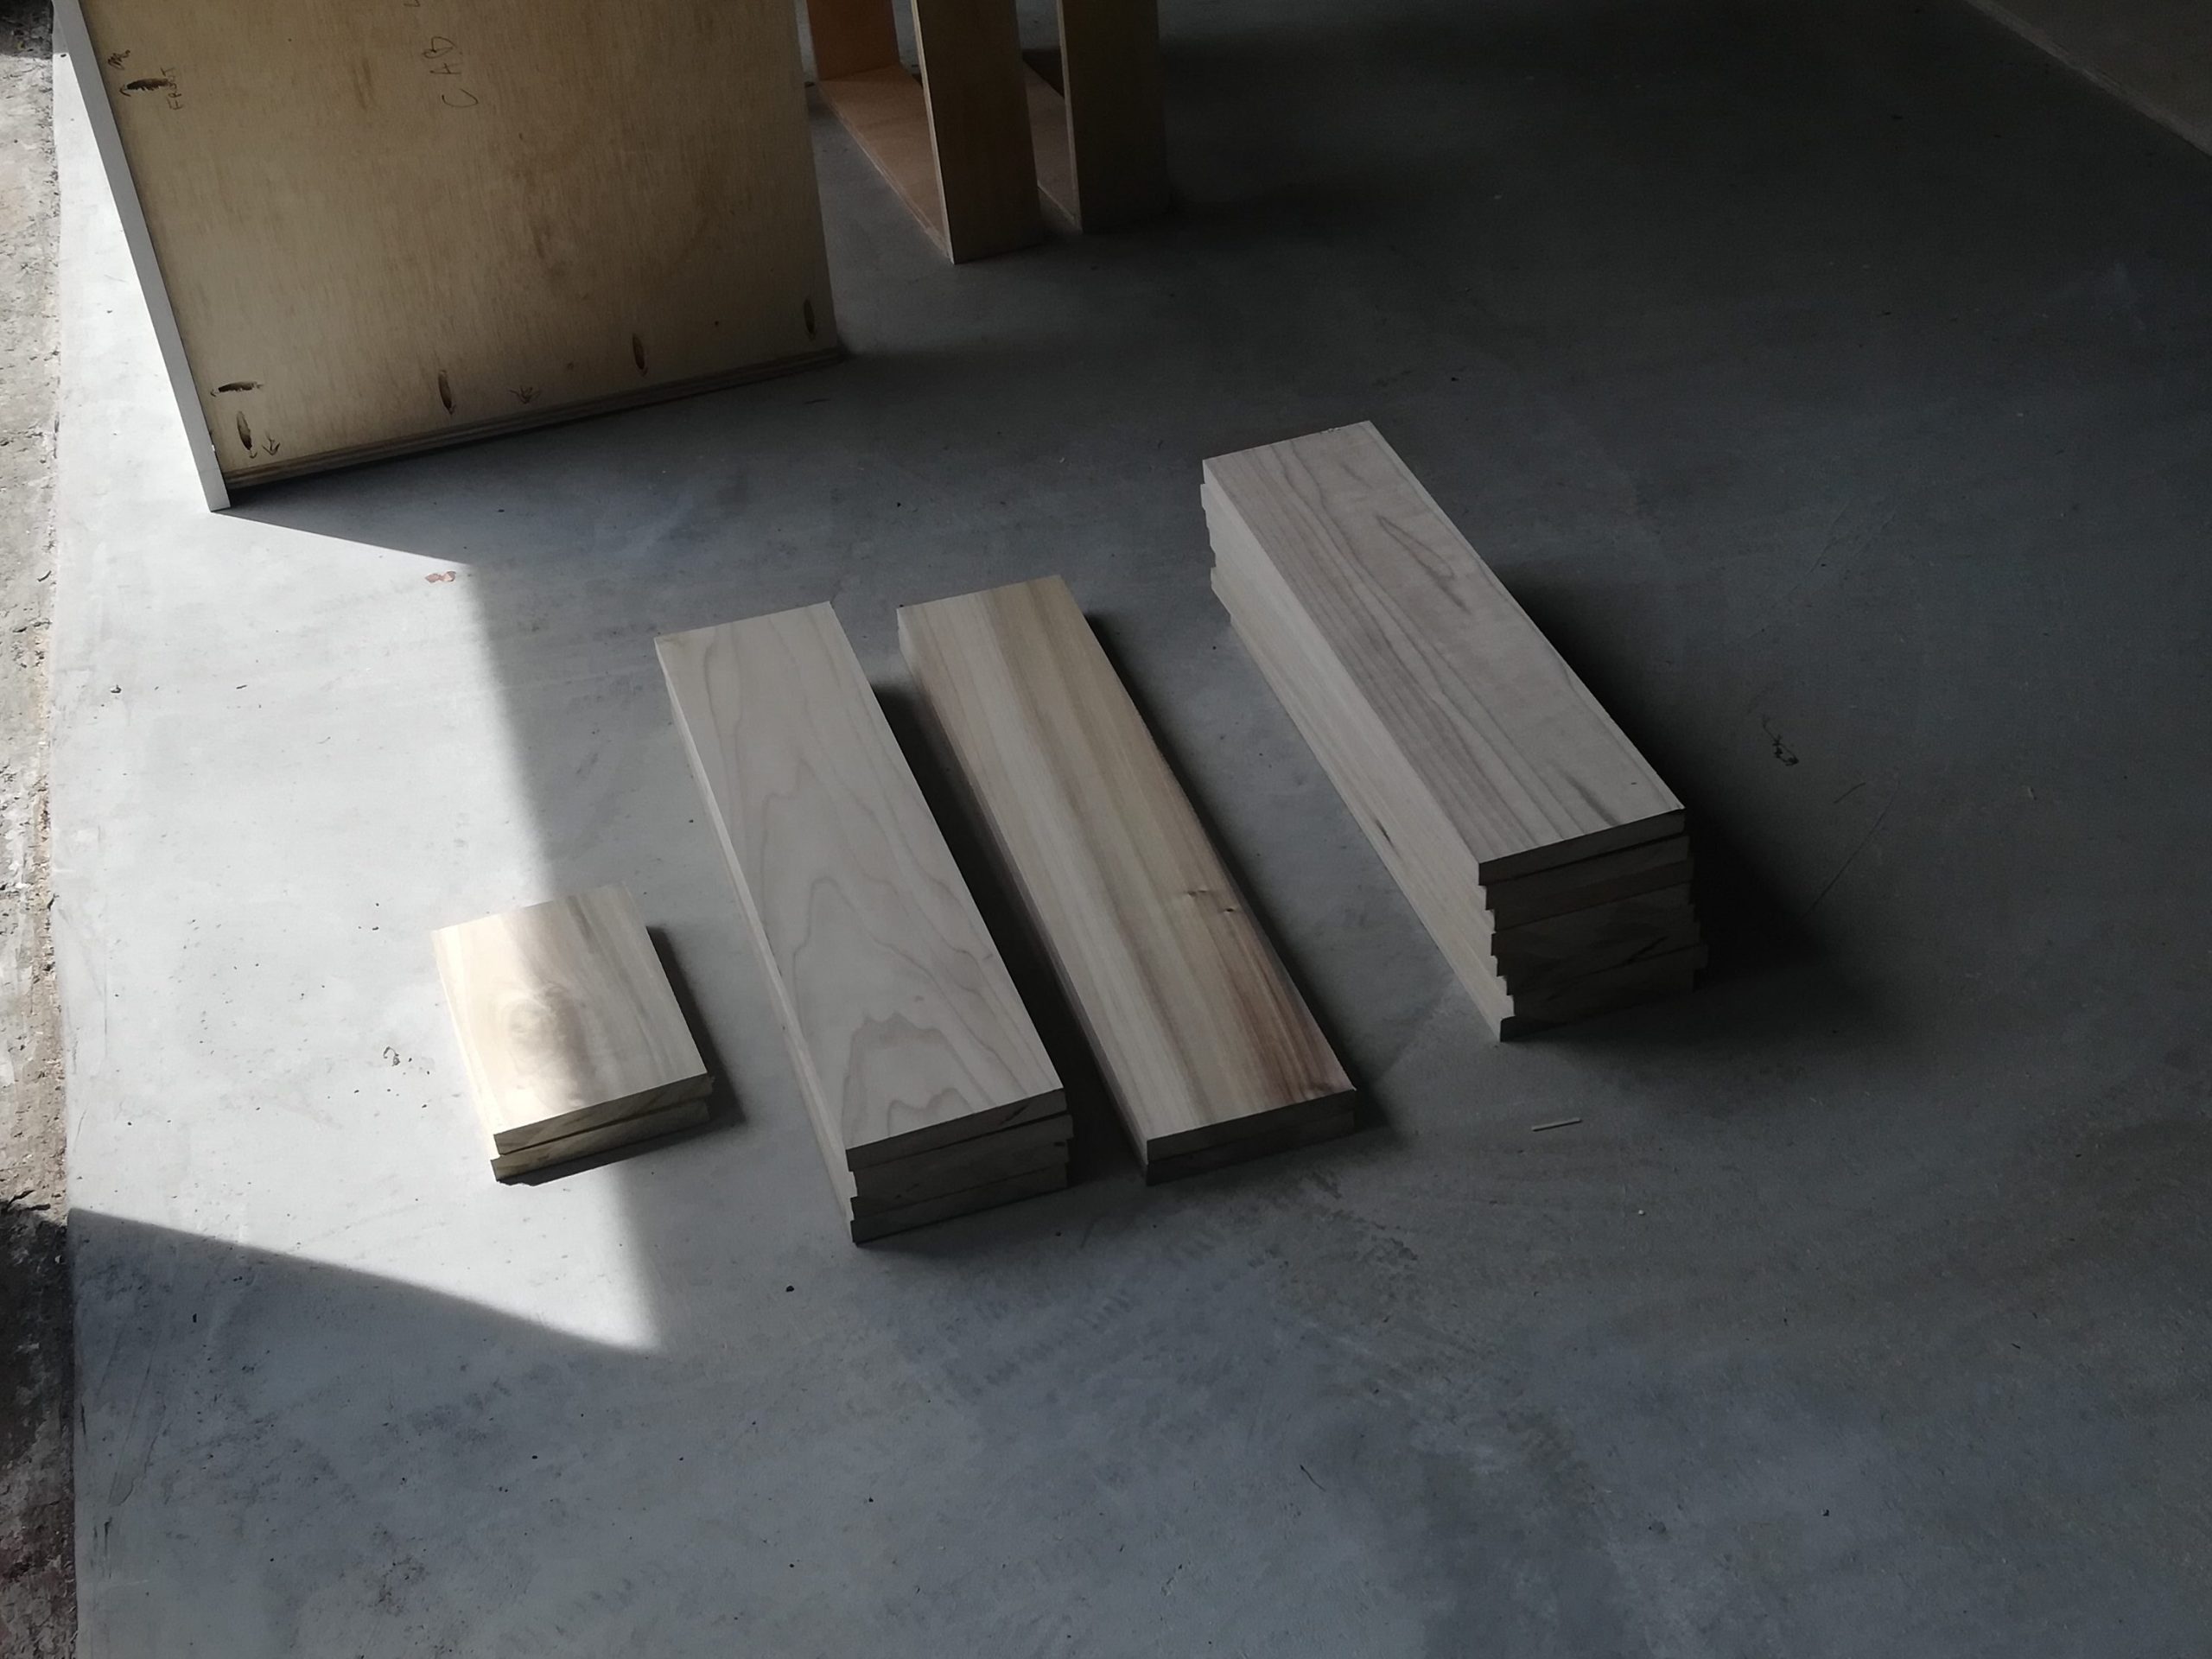
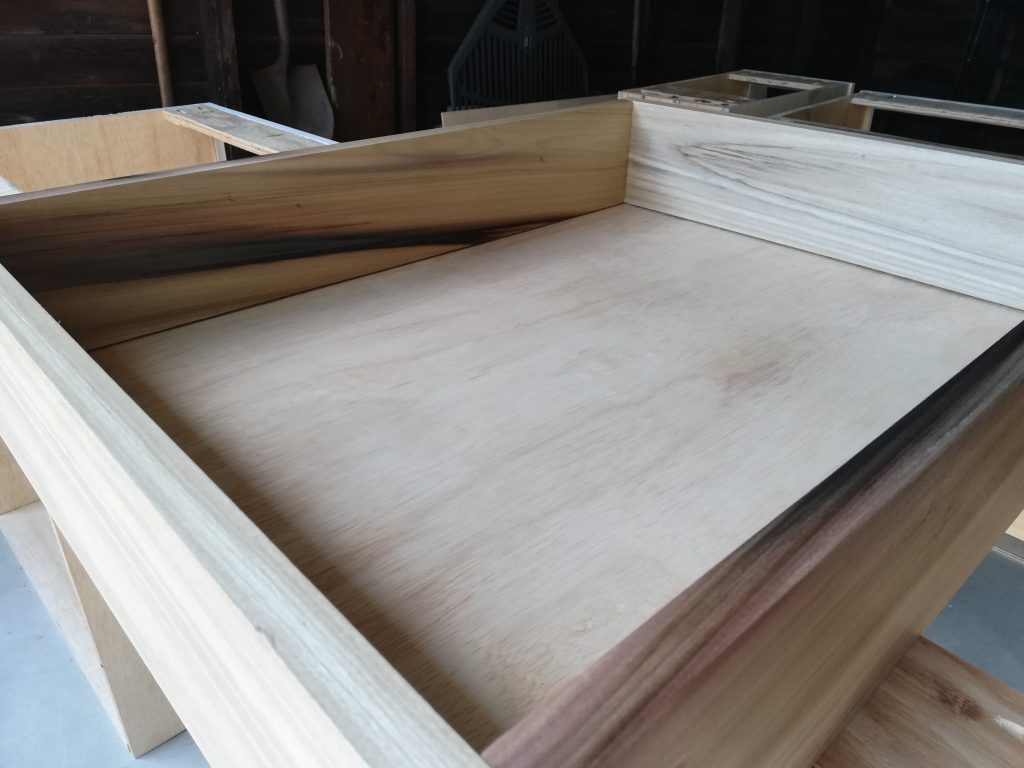
Then, I used my router to create grooves for the 1/4″ plywood bottom panels to fit into. Once I cut the plywood panel to the correct size, I attached the four sides of each drawer box with pocket screws with the panel inserted into the grooves as they were each assembled.
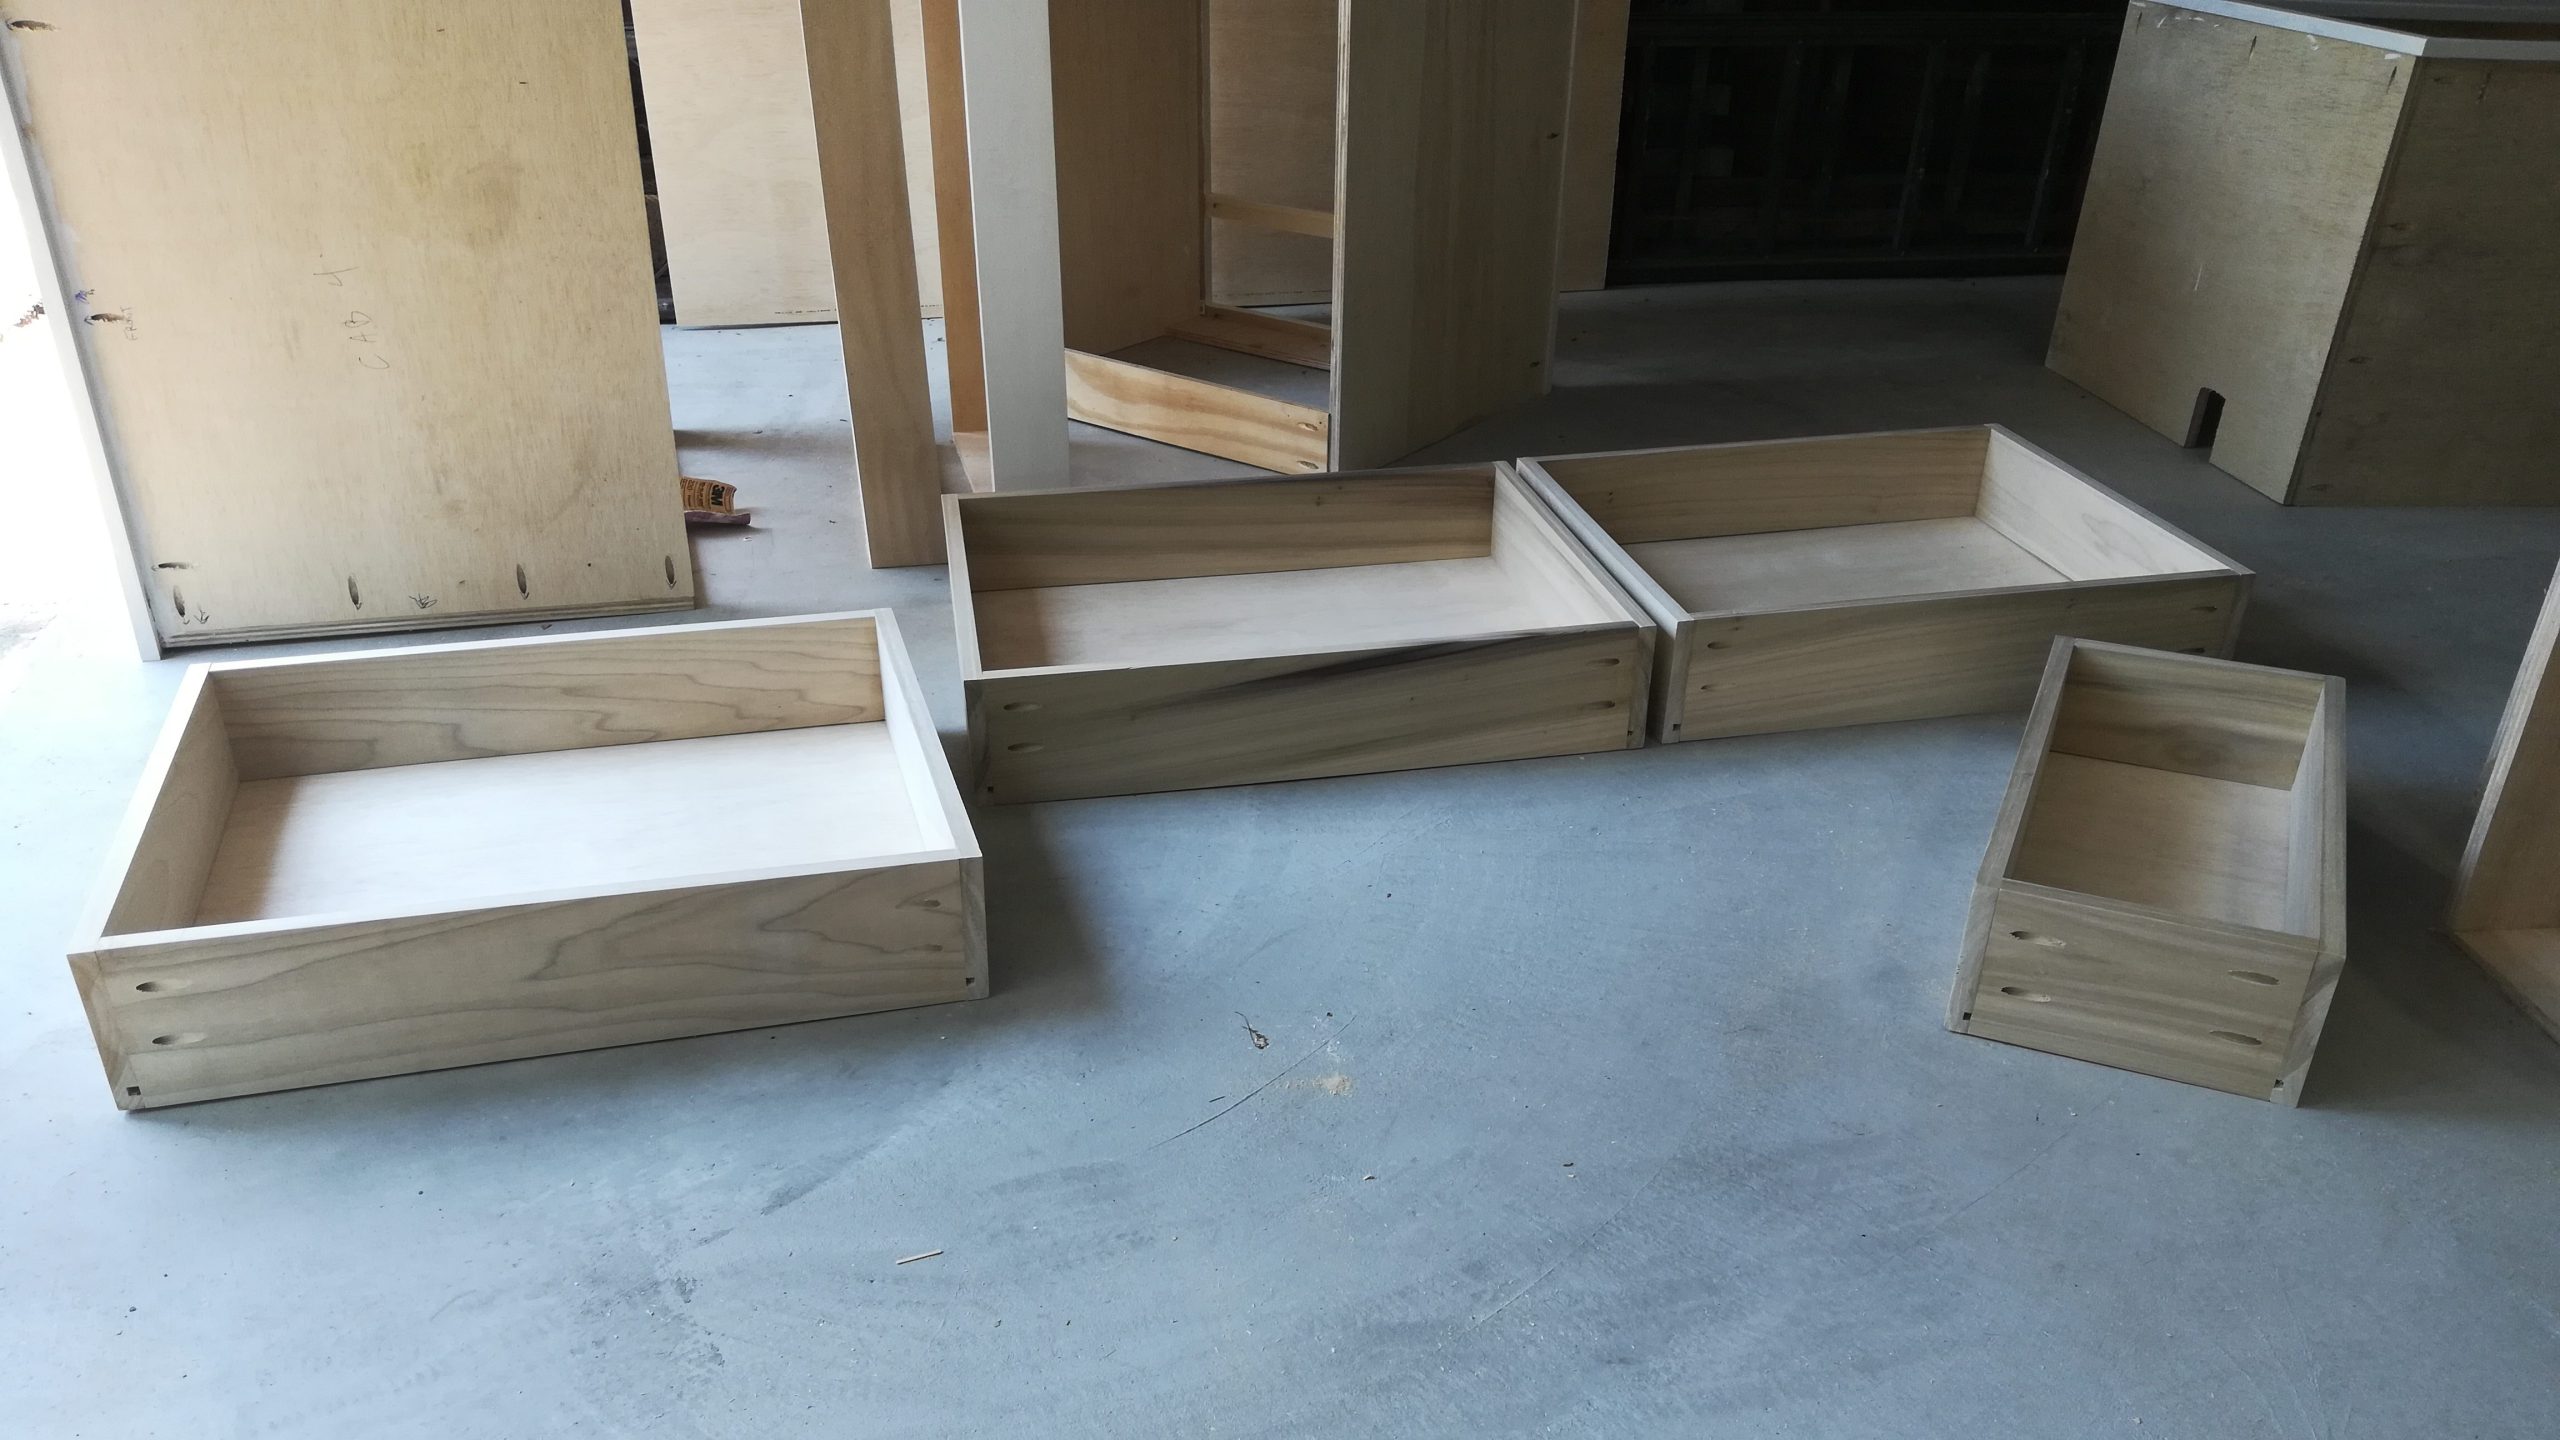
The nice thing about the pocket holes for your drawers is you really won’t see them, since they are either in the back of the drawer, which no one sees, or they get covered by the drawer fronts.
I thought this box in particular looked so pretty!
I also constructed toekick boxes in a similar fashion, just without the need for a bottom panel and with plywood instead of poplar.
Installing the drawer boxes
I have to admit, this part is super finicky and annoying to do, but not actually impossible.
To mount our drawer boxes inside of the cabinets, we bought some drawer slides on Amazon. We did need to add little strips of board to the inside of the cabinets so they would be flush with the face frames.
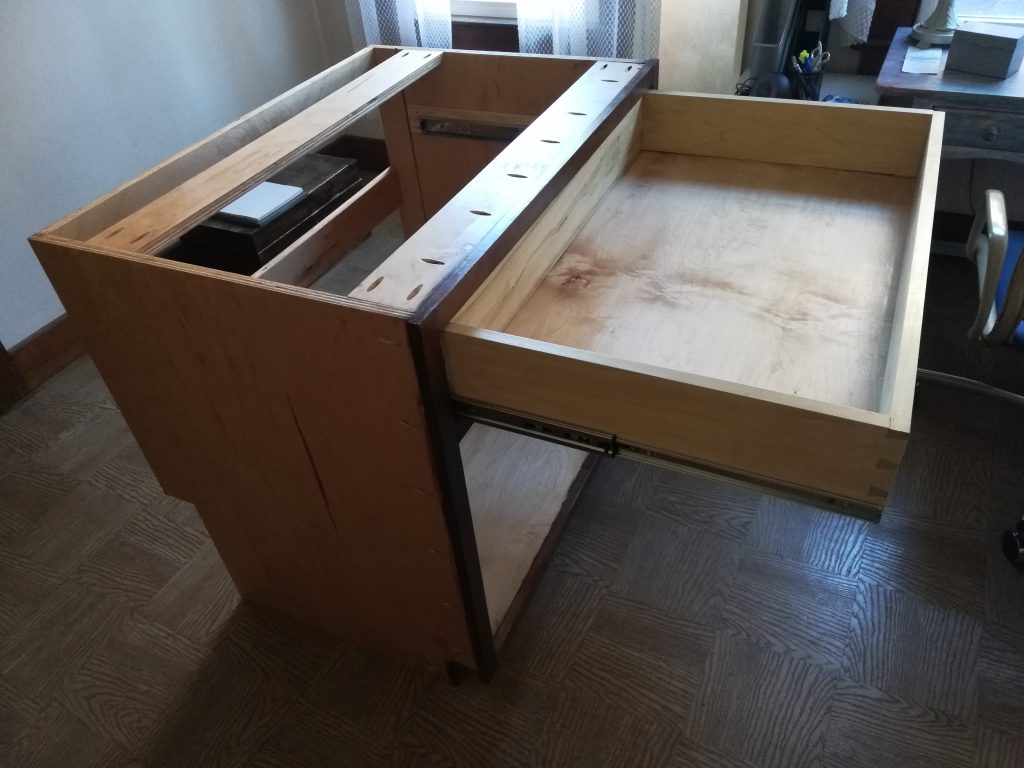
Basically what we needed to do was install the slides inside the cabinets, make sure they were level, and then install the corresponding part of the slides to the drawers themselves.
I’d go into it more here, but it would take probably its own fair share of a blog post to explain, so let me know if you’d like me to share our process and I’ll write about it separately!
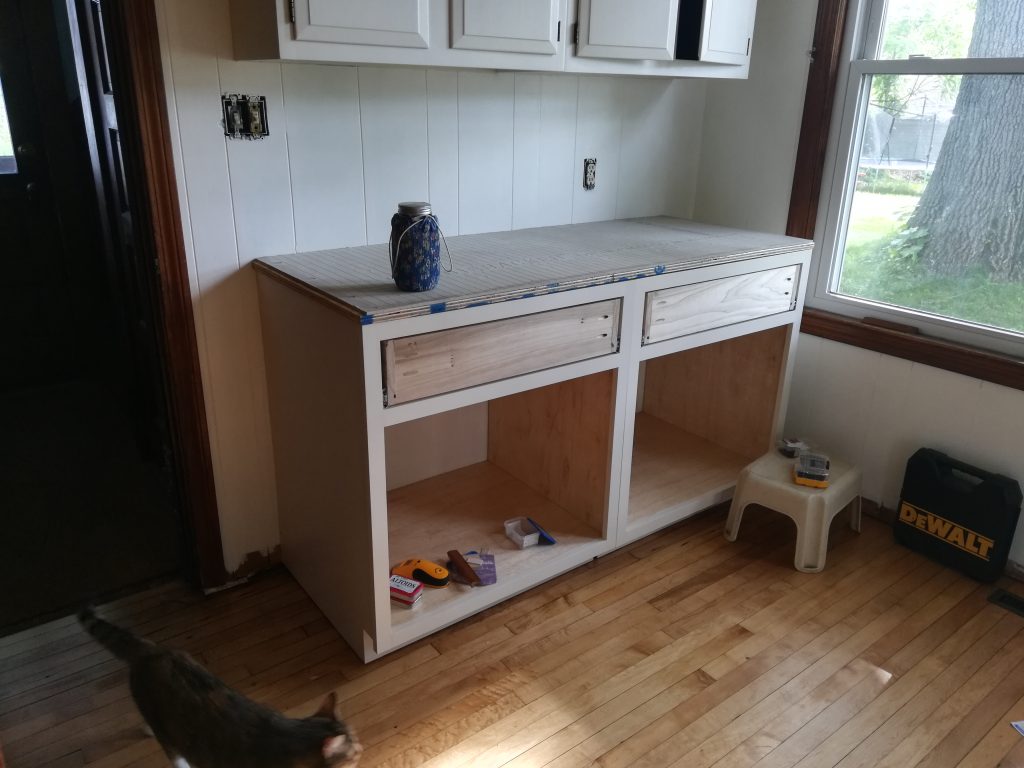
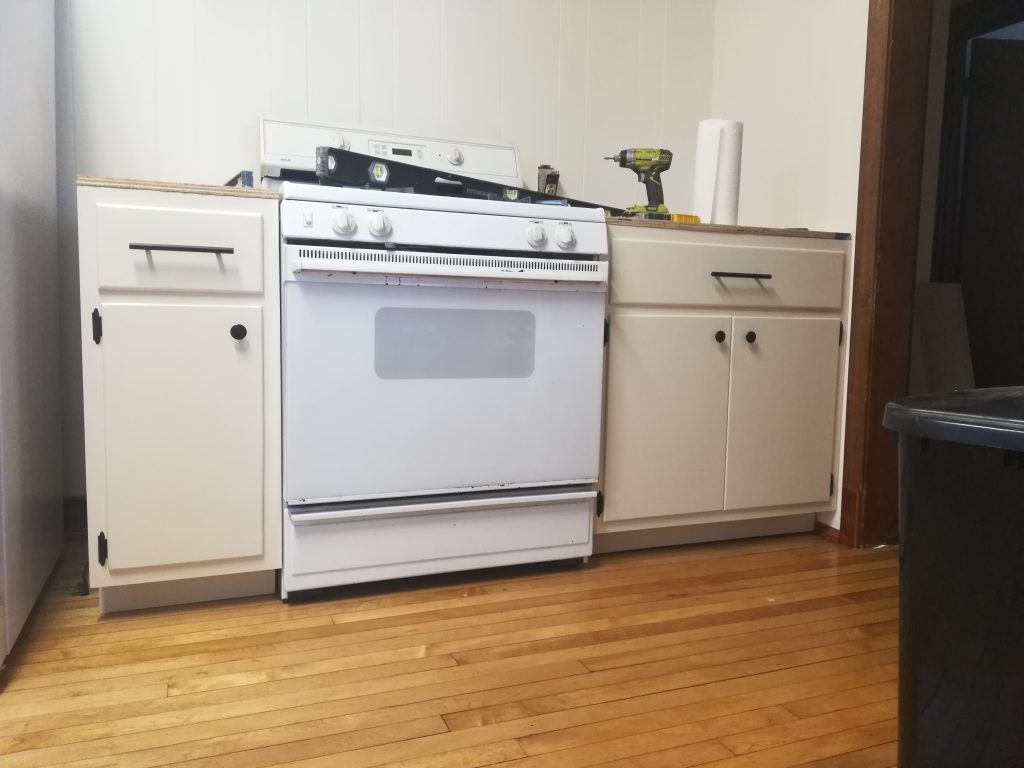
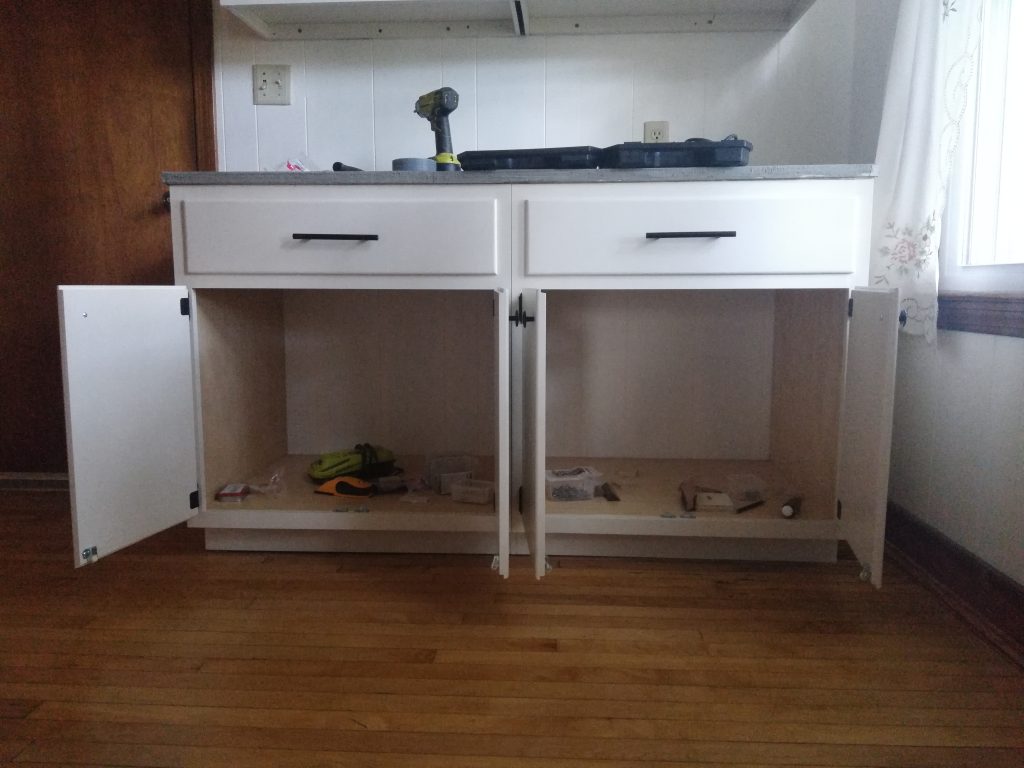
You can see in the above picture that the drawer boxes are installed!
At this point we were able to actually install the cabinets, which you can also see in the picture.
To install the cabinets, we first leveled the toekicks (our house is over 100 years old, so our floors are pretty wonky). We used various shims to level it properly.

Then, we screwed the toekicks into the wall, placed the cabinets on top, checked again for level, and screwed them into the wall as well.
Making the doors and drawer fronts!
This is probably the hardest part of making a cabinet. If you look at most cabinet doors, they are constructed with advanced methods of joinery, using router bits I didn’t have.
For my maple cabinet, I was set on making more of a proper cabinet door, so I made shaker style doors with solid maple and a plywood panel, plus a solid maple drawer front.
For the paint-grade cabinets, we decided to keep things super simple and make plywood slab doors and drawer fronts. These were slightly inset with rabbets and had a rounded edge profile. I used a router to create these features.
Here they are after I constructed and painted them:
And… after installing them to the cabinets!
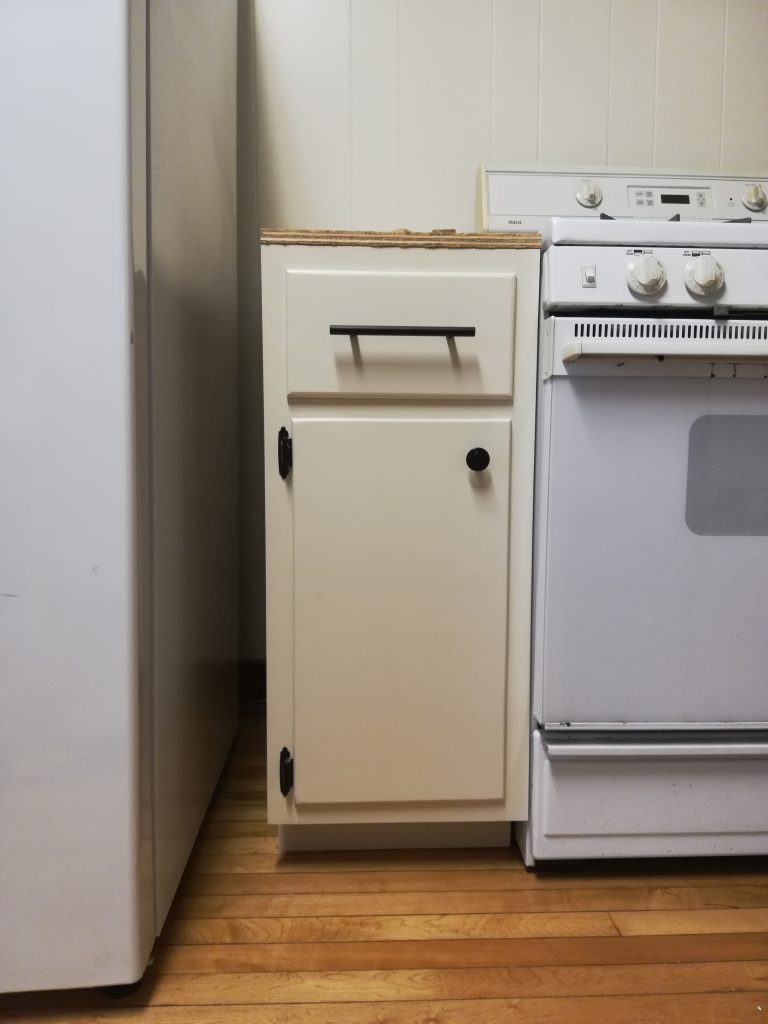
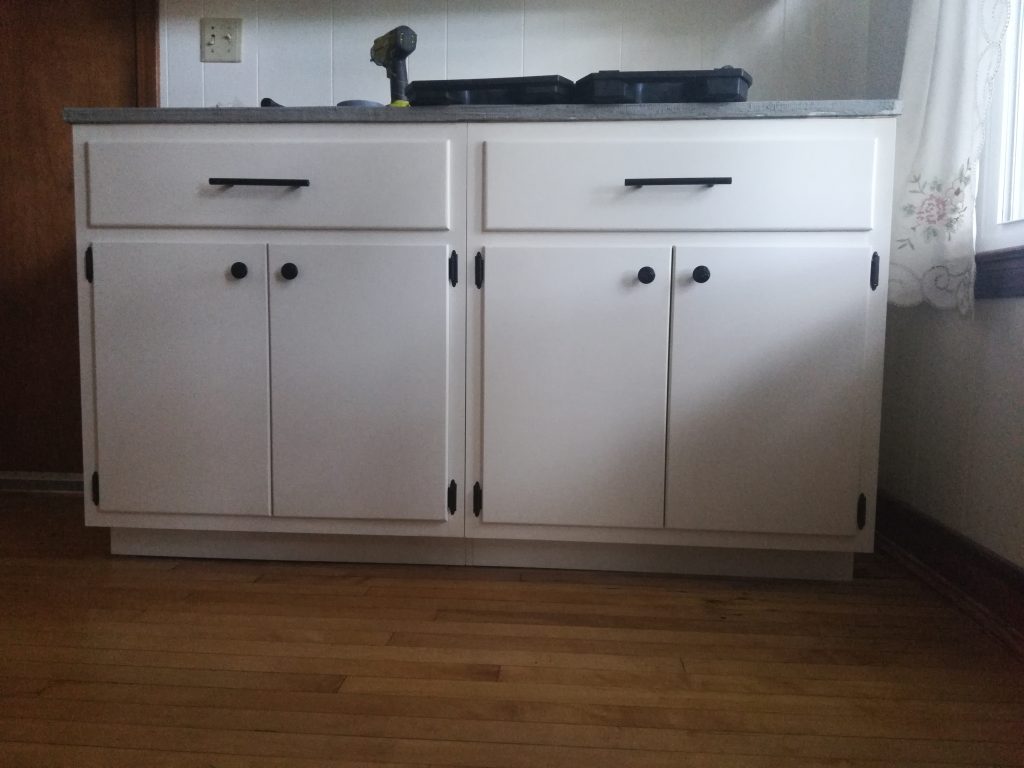
To mount the doors and drawer fronts, we used these hinges, these drawer pulls, and these knobs. We also used these door catches to keep the doors closed.
There is some controversy over whether or not it’s a good idea to make your doors and drawer fronts from plywood alone. Well, it just so happened that we had existing cabinets in our house that were made exactly like this! Huge slabs of plywood with rabbets, and they have all maintained their shape well (they’ve got to be at least 50 years old). The thought is that they could warp with time but, clearly, our house demonstrates they actually hold up quite well.
I do think the door catches have a lot to do with this. And it helps to have door catches on top AND bottom to really hold their shape and prevent warping. Plus, using decent plywood can make a huge difference, I’m sure!
The cabinets are done!
Yes, it was a ton of work and took a few weeks to complete. But we love being able to say we made our own kitchen cabinets! Plus, to get custom cabinets made to size like these would have cost a fortune. We much prefer to make our home look beautiful without breaking the bank!
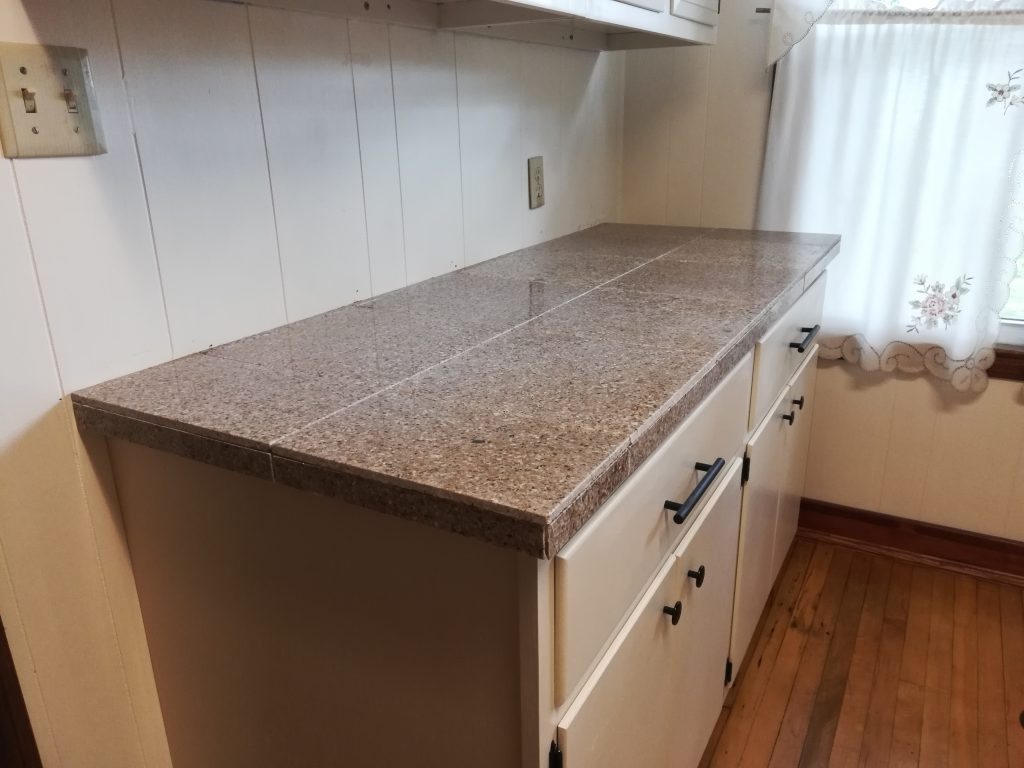
After we installed the cabinets, we also made countertops with granite tile! If you want to read about that, this post goes over it in detail.
I really hope this has inspired some of you to try your hand at building kitchen cabinets! If you have just a few tools and the necessary space, it is totally doable!
Let me know if you have any questions or would like me to post about some of the process in more detail. I so appreciate you being here and wish you all the best in your endeavors!