This year’s perfect DIY anniversary gift for my husband! ♥
Disclosure: I am an Amazon affiliate and this post contains affiliate links, which means I may earn a commission (at no extra cost to you) if you purchase products mentioned.
The people in my life know that I am really big into making gifts. I probably got this from my mom, who has NEVER been known to buy a card from the store, for example. She is a prolific artist, and designing her own cards comes quite naturally to her. I remember, for one of her anniversaries, she spray-painted the shed in the backyard: “I love TIM” – my father’s name, complete with surrounding hearts.
Let’s just say I definitely have followed in my mother’s footsteps when it comes to making gifts!
And this year, I decided last minute to make a DIY anniversary gift for my husband. And he loved it so much!
Keep reading to find out how I did it!
Getting started…
We all have a plethora of special occasions sprinkled (or sometimes, less conveniently, clumped) throughout the year: birthdays, mother’s and father’s days, anniversaries, and Christmas. For me, it seems there is always one around the corner! (This reminds me, my dad’s birthday is in nine days…)
Often, I feel a bit stumped with the repetition of figuring out what to buy for people. That’s when the idea of making something appeals to me as so much more wholesome!
But it can often be difficult to figure out what to make that someone would like. You also have to be careful that your idea isn’t too ambitious for the amount of time it takes to complete. Those memorial plaques I made for my dad and sister were stressing me out right before Christmas, for example. It’s important to pace yourself and start early if you’re going to make a gift for someone.
For our anniversary this year, I decided to keep the gift simple and small, as I had only a few days to complete it. The idea of putting something on wood (probably my favorite medium) really appealed to me. I thought about putting images on wood, and starting researching.
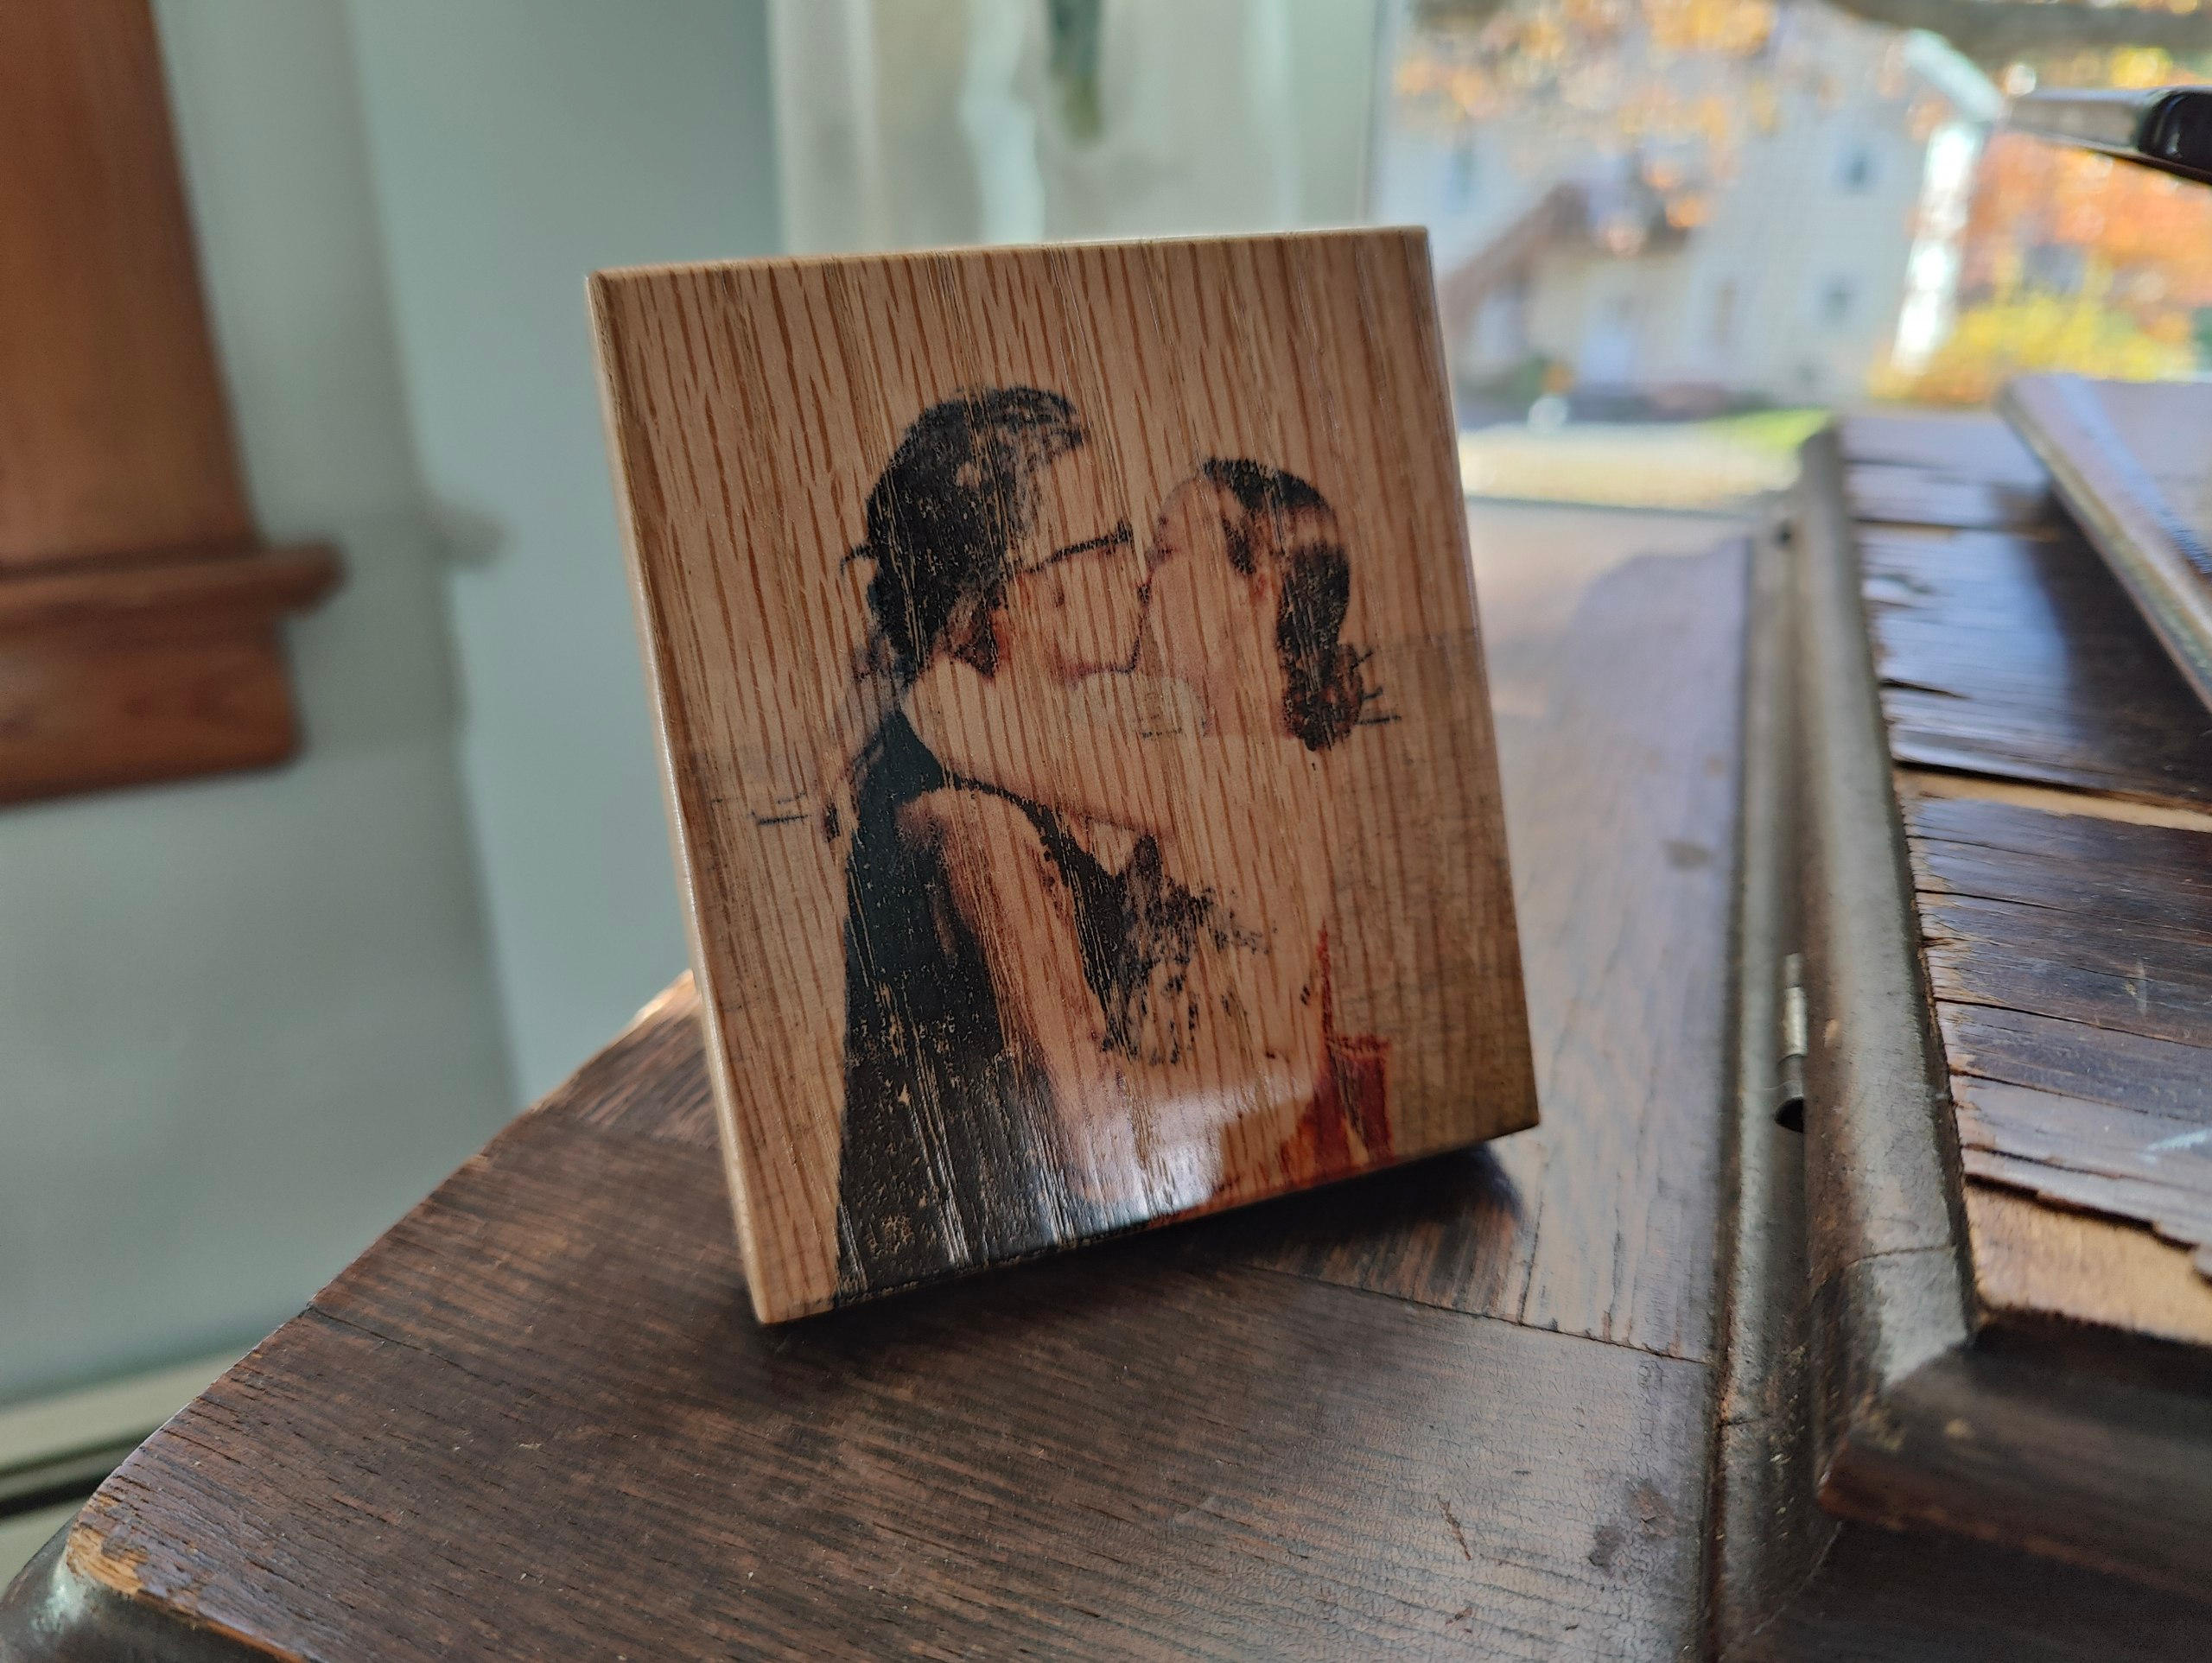
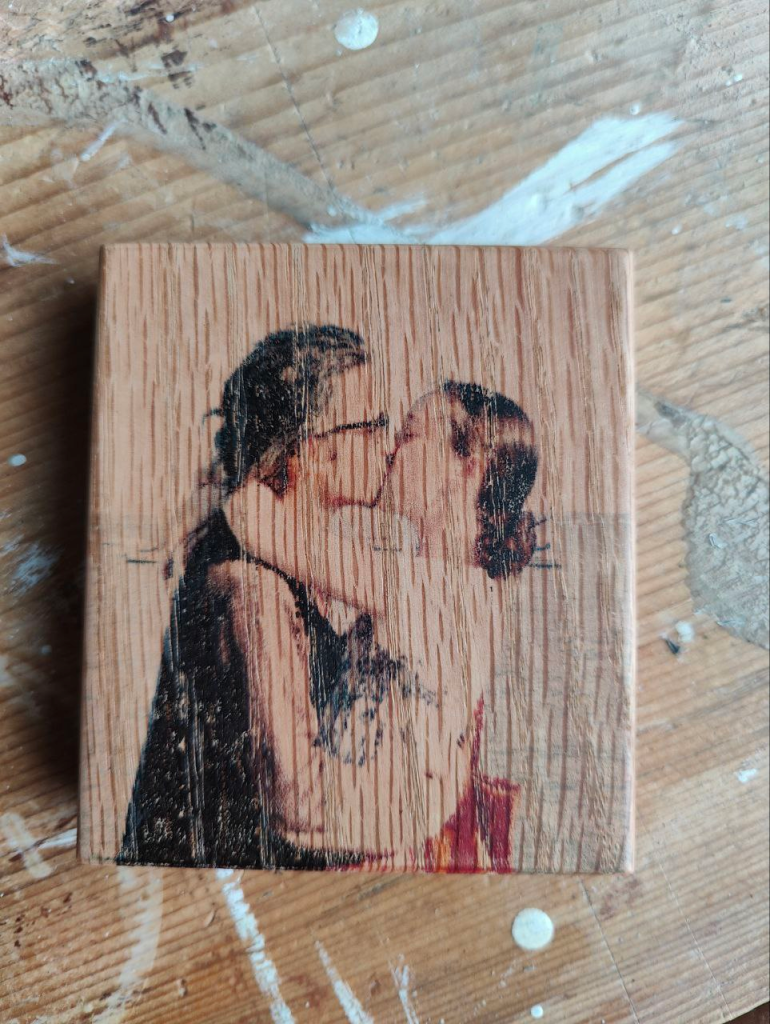
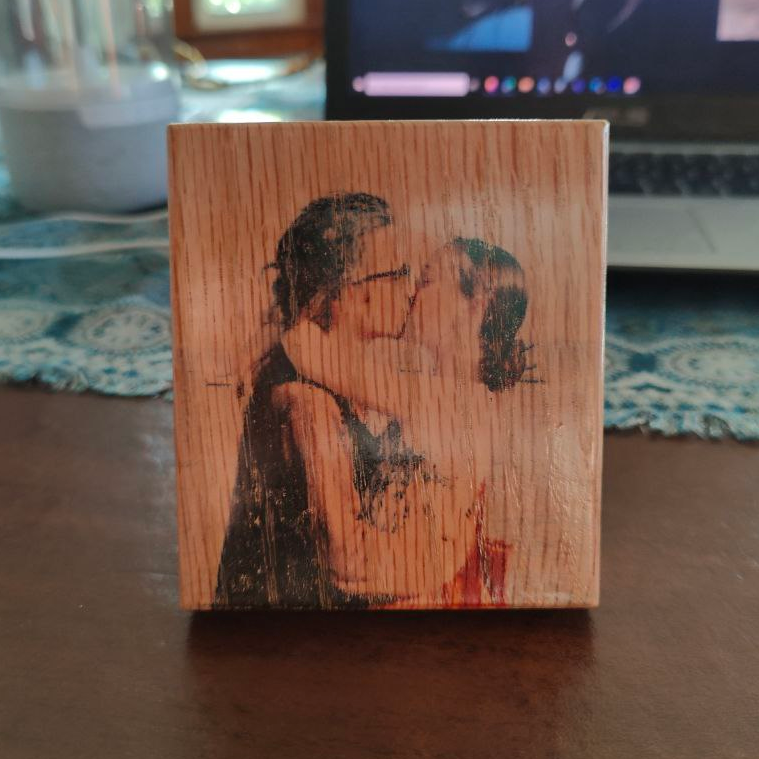
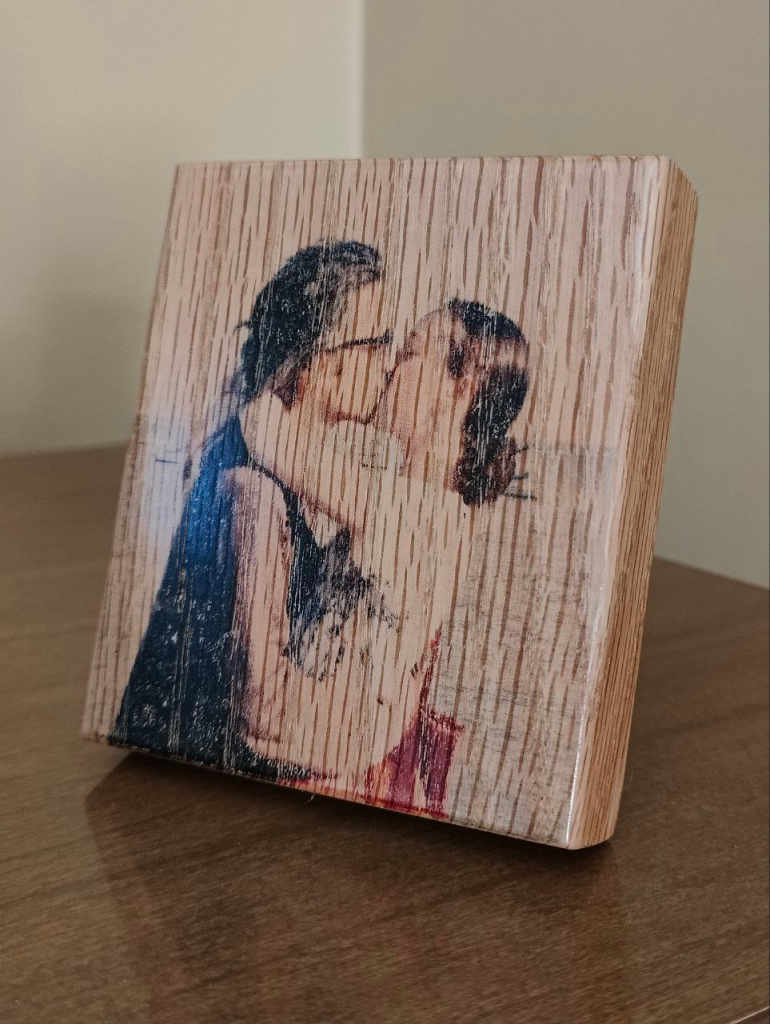
I decided it would be amazing to use this picture of us, taken by my sister of us on the rocks by the sea…

As I researched…
As I did some researching, my idea slowly came into focus. I found out laser printers are definitely better for transferring images to wood. However, I came across a very simple method which involved using an ink printer, which is what I already had.
This video by a woodworker guy on YouTube (Steve Ramsey) with whom I was already familiar seemed super simple! The only thing I needed to obtain was sticker paper. The method was basically to print your image onto the glossy side of sticker paper (the paper that’s leftover after you’ve pulled the stickers off). Then, you carefully press it onto your wood, and the wood absorbs the ink! This works because sticker paper doesn’t absorb ink.
I was able to find sticker paper at my local Michael’s. Something like this is basically the same thing. You just need the leftover sheet after the sticker was been removed, so don’t worry about the quality of the paper. And you can reuse the same sheet over and over! Just remove any leftover ink with rubbing alcohol.
Preparing the wood

I picked out a piece of 1″x4″ oak from my garage which was leftover from making thresholds for my house. I cut a piece off such that it produced roughly a square shape. Then, I sanded the edges down by hand just slightly to create a bit of a rounded edge. I do have fancy router bits, but I thought this project required simplicity instead.

I sanded down the entire piece of wood and, after testing the printer-transfer method on a few pieces of paper, I transferred it to the wood! And I loved how it came out!
Some finishing touches…
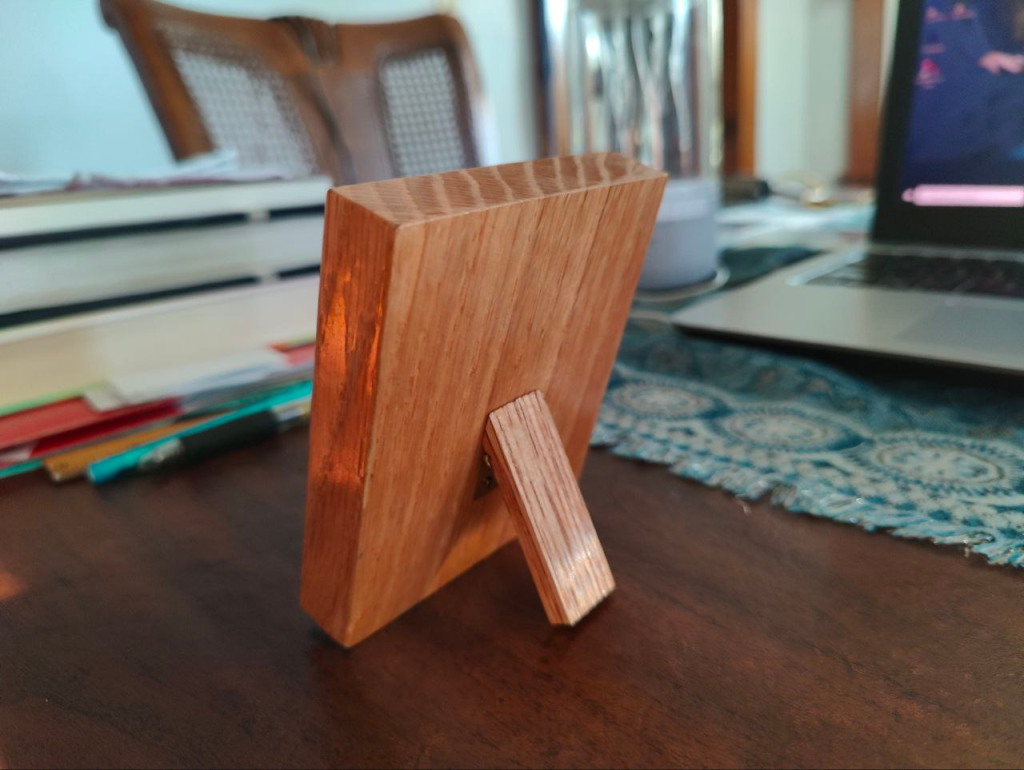
Now all that was left was to add some kind of finish to the wood (that wouldn’t mess with the ink) and figure out how to prop it up.
I sort of rigged a picture-hanger thingy by attaching it to a small piece of oak with epoxy. When I made more of these as Christmas gifts later in the year, I ended up attaching a proper hinge instead.
For the finish, I used oil-based polyurethane – just one thick coat because I didn’t have time to do several. It honestly didn’t need more than one, either, because it’s not going to be stepped on or used like a floor or furniture.
Oil-based poly can be good for things like this, since it doesn’t tend to dissolve inks like water- or alcohol-based products could. I think shellac or water-based poly would definitely have made the ink run!
Here’s the finished gift:
Needless to say…
It was such a lovely experience to surprise my husband with this on our fifth anniversary. I am always so excited to give gifts, but especially more excited if I’d made it myself!
Over the years, I’ve gotten better at surprising him with gifts. He used to be able to predict everything, but he definitely didn’t see this one coming!
This was also a very simple project, and I plan to make them as gifts for others this coming Christmas. When you make a gift, it is truly one-of-a-kind, and you infuse it with your own creativity and essence! I really do think effort and creativity speak louder than money… lol!
I wish you all the best with your own creative endeavors!