How we tie down our kayak for secure transport
Disclosure: I am an Amazon affiliate and this post contains affiliate links, which means I may earn a commission (at no extra cost to you) if you purchase products mentioned.
If you’ve read my recent post you’ll know that, this past summer, my husband and I went kayaking almost every weekend! For us, since we (unfortunately) don’t live within walking distance of the water, it means we needed to transport our kayak to the water each time.
Thankfully, our state is full of public boat ramps and we were able to bring it to so many lakes and seaside spots.
But the task of transporting a kayak can be a bit nerve-wracking at first. It’s hard to get the image out of your head of the kayak becoming airborne, detached from the car, and falling onto the highway behind you. At first I was very nervous!
However, after doing the proper research about kayak transport, I felt so much more confident. And, now that we’ve done it so many times, it’s just routine!
Getting a roof rack
Our first task was to get a roof rack for our Honda CRV. Most crossbars require side rails for installation, but we found one on Amazon which didn’t require the side rails and saved us some money. Here is an assortment of the different racks they offer for various cars.
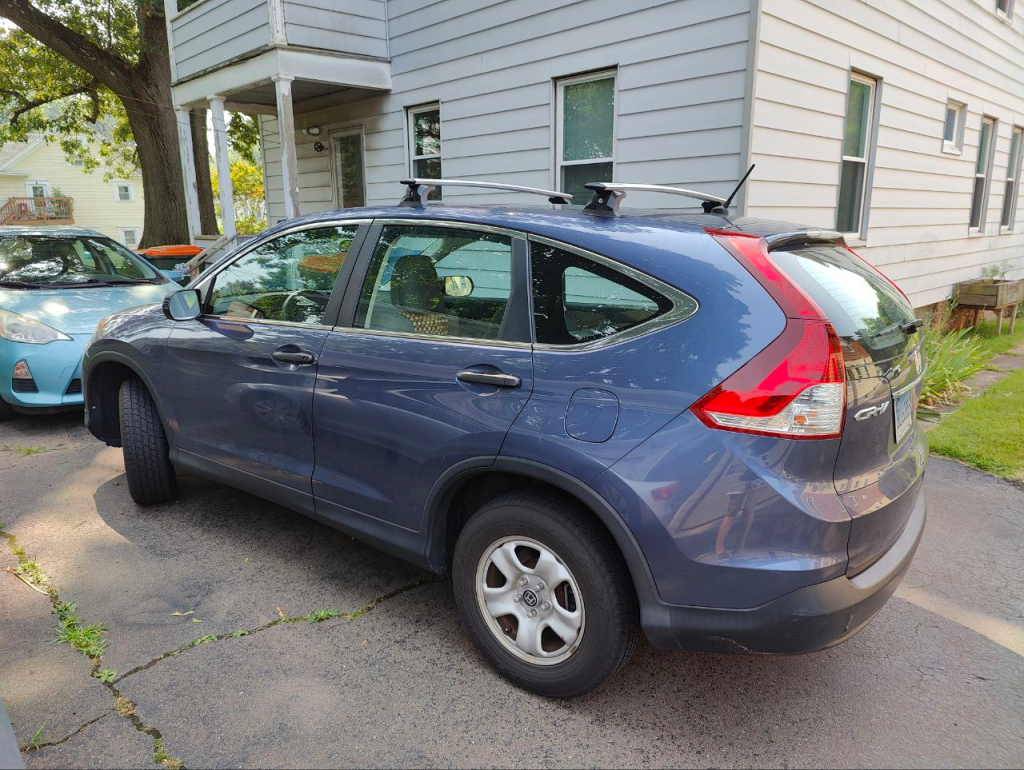
See how it simply installs flush with the roof of the car?
It was also pretty easy to install. We didn’t even need any power tools. This is a simple DIY. Just measure carefully!
You have to pull up the weather stripping and find the two sets of bolts underneath, cut the stripping (just a handsaw works best), and attach the roof rack. The instructions were great and we got it done in around an hour.
Tie-downs
After we got the roof rack, all we needed were tie-downs. My research told me cam buckle straps are preferred to ratchet straps (which can over-tighten and damage your kayak).
We started with a $5 set from Walmart, but when they started to degrade, we invested in these nicer ones by Rhino. They’re great because they are super thick and have a silicone casing around the metal part which means you can throw the buckle over the car less carefully, haha.
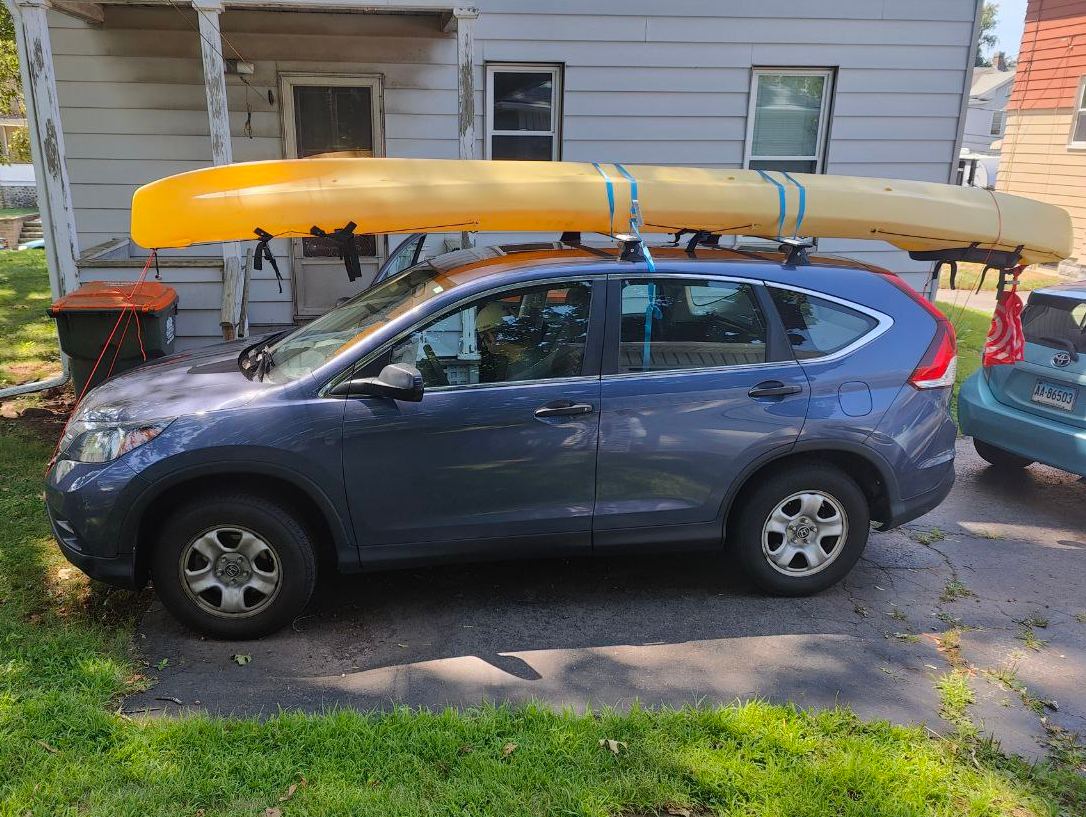
What we do is place the kayak on top of the car (we flip it upside-down first), loop the strap around one side of the cross bar, throw it over the kayak, loop it around the other side and then tighten. Hopefully you can kind of see what I mean in this picture:
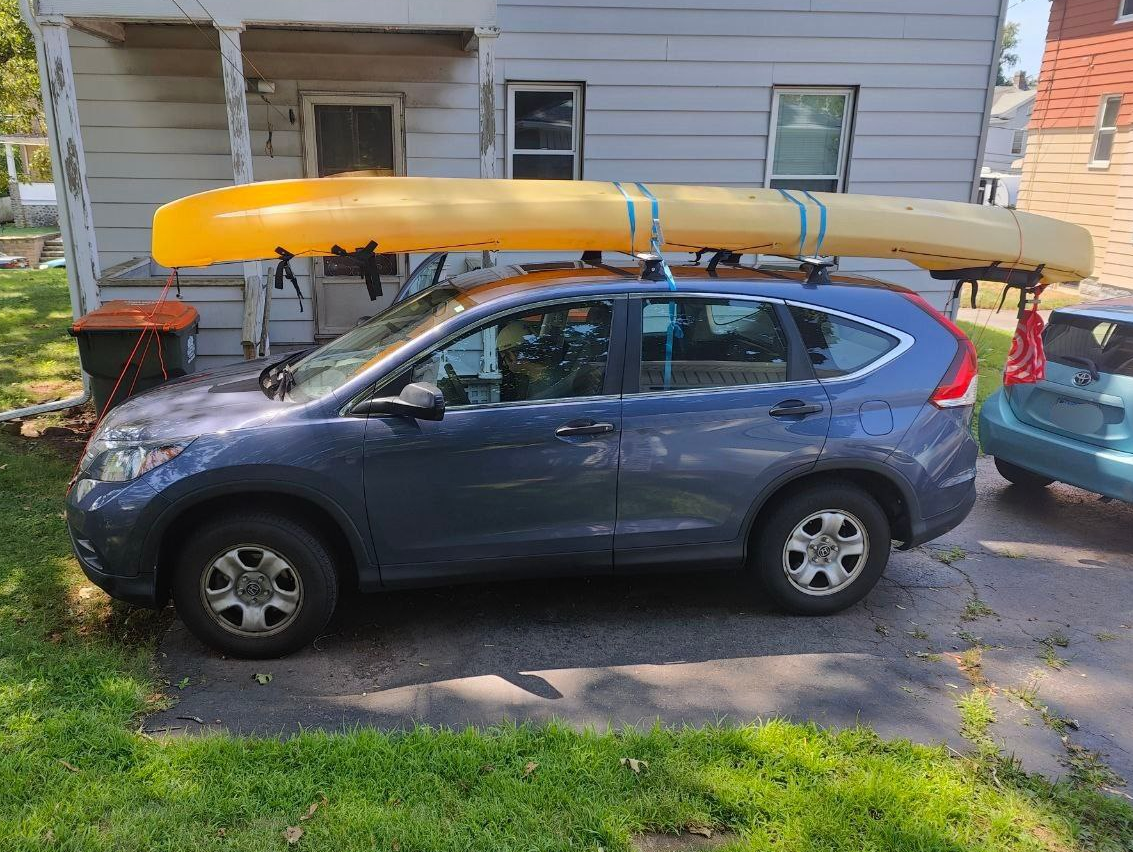
Try to make sure the weight of the kayak is evenly distributed across the two bars. For us, this means the kayak sticks out the back, as our kayak is over 16 feet long. Which brings us to the next point…
Legal requirements for “protruding loads”
As I said, our kayak sticks out past the end of our car quite significantly. Legally, this is totally okay, but depending on your state, you need to put a flag on the end of the kayak (during the day) or a red light (at night). In our state, it applies if you’re over four feet past the end of the vehicle during the day and any length past the end of the vehicle at night.
If you search “protruding load laws” followed by your state you should be able to find your specific laws.
We use a reusable Target bag that I sewed closed for the flag and a battery-powered bicycle light during night travel. I always keep extra batteries on hand.
We once drove with it on a four-hour car ride at night and had no issues.
Bow and stern lines
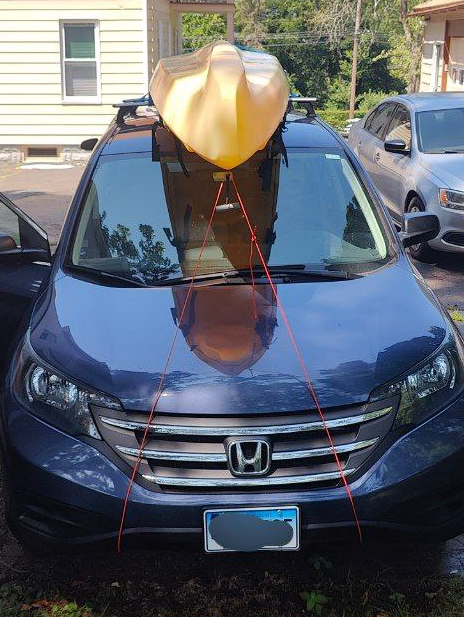
What I came across in my research also greatly emphasized the importance of lines tying down the bow and stern of the kayak to the front and back of the car.
The front line is the most important, as driving (especially at highway speeds) creates a lot of wind resistance coming up the hood of your car and at the bottom of the kayak. Although our roof rack is rated at 165 lbs, which is far more than the 70 lbs our kayak weighs, this airflow can cause a lot more force to be exerted upon the rack, resulting in potential failure.
The front line helps to balance this out. It doesn’t need to be super strong like the straps or even super super tight, just enough to hold your kayak in place and take pressure off the roof rack. We still tie it pretty tight but it’s mostly there for extra support.
How to tie your bow and stern lines
We use paracord. Thankfully, our car has two loops in the front underneath which provide a sturdy place to attach the line and one loop in the back. I know some cars don’t have such convenient attachment points, so they also sell products which secure underneath the hood and trunk.
I tie a taut-line hitch, a knot which allows you to tighten the line. I learned how to do it from this video at timestamp 8:28. (This video is really helpful if you want to transport a kayak without a roof rack!)
A final check and we’re ready to go!
Once we’ve got everything nice and tight (especially the cam straps), we do a final check. Push on that kayak really hard, and the whole car should move with it. If the kayak moves, it’s still too lose and needs to be tightened more.
And a final note: Driving cautiously is always good, but drive especially cautiously with a kayak on your car. We try to stay under 60 mph on the highway just to be safe.
All in all, it’s become quite easy for us to haul our kayak on top of the car and go off to our aquatic destinations! Don’t be discouraged if it takes you a while the first few times to tie it down. At first, we thought it would be too cumbersome to do each time, but now we have it down so well that, between the two of us, we probably get the kayak secured in about five minutes. Definitely under ten minutes. It’s pretty easy once you get the hang of it!
I hope I have inspired some of you to give it a try! We’ve been having so much fun kayaking!