
Making your own soap bars: It’s easy, saves money, and is super fun!
Disclosure: I am an Amazon affiliate and this post contains affiliate links, which means I may earn a commission (at no extra cost to you) if you purchase products mentioned.
Guys, I was thrilled to discover that making your own soap bars is actually a super simple process!
The more I go through life, the more I notice that I want to have control of all the ingredients that go into the products I use… so learning how to make soap was a total score! And it’s so easy and simple, I’m never going back to buying it!
The basic gist is this: Soap is made by reacting oils with lye. And this is how people have been doing it for centuries.
Now that I’m making my own soap, I am saving money and also getting that fantastic feeling of satisfaction I always get when I make my own things!
I even formulated my own recipe for this soap that I’m going to share with you guys! Plus, I’m going to show the math for those who are interested. 🙂
So, without any further ado, let’s dive in!
Related: I started making my own super simple DIY dish soap bars and I LOVE them!
Why make your own soap?
Some of you might be wondering if making your own soap bars is worth it. Sure, I’ll admit it’s not exactly the most expensive thing out there!
Well, the truth is that you will save money making it, especially if you’re like me and you tend to buy premium bar soaps like Dr. Bronner’s, for example. (This is my favorite Dr. Bronner’s bar!)
If you click that link, you’ll see these soap bars will run you around $5 a bar!
In contrast, the cost of homemade soap is generally based on the expense of the oils used (since lye isn’t very expensive). My particular recipe comes out to approximately $1 a bar!
And though you might be able to find bar soap even cheaper than this, those less expensive brands often have added fragrances and chemicals which are not ideal for our health.
I’m a total health nut nowadays (due to my autoimmune disease), so I do my best to keep things as healthy as possible, especially products I put into or on my body!
And my soaps are super simple and made without toxic ingredients (yes, I will explain the lye part – bear with me!).
So yes, making your soap is definitely worth it if you want a healthy, natural soap which doesn’t break the bank! Plus, it’s a super easy and fun process, and you learn so much along the way!
How is soap made? Isn’t lye toxic?
If you have heard of lye, you’re probably wondering how I think a soap which requires lye as an ingredient is non-toxic and healthy! Indeed, if lye touches your skin, it will burn you badly. It’s super caustic.
But the thing is, while lye is used in the process of making soap, none of it is actually leftover in the finished product. Literally no trace!
This is because soap-making uses a chemical reaction called saponification. We’re taught in chemistry that, once a chemical reaction takes place, the initial products become completely different substances by the end! In fact, chemical reactions are also irreversible, which really proves how the initial substances are completely transformed during the reaction.
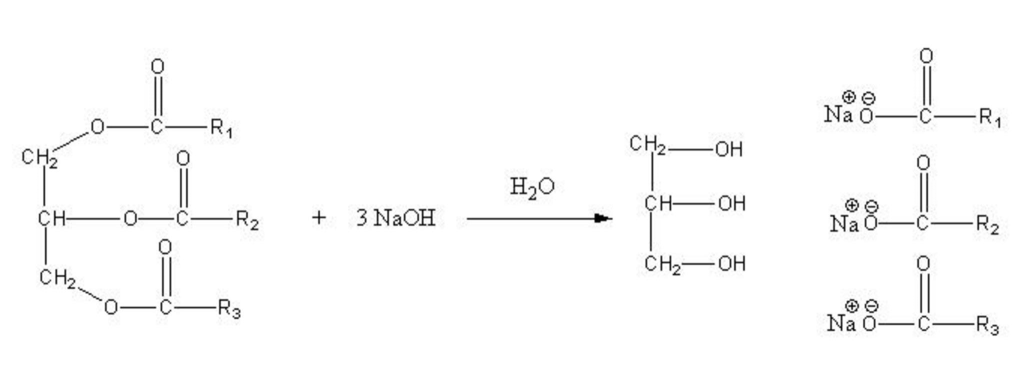
To make soap, lye is mixed with water to create a super basic solution (think the opposite of acidic). Then, this lye solution is mixed with oils and/or fats. If done with the correct ratios, saponification takes place and the oil and lye are fully converted to soap! It’s that simple!
So, think of the lye less as an ingredient of the soap and more as something used to process the oils into something else.
And as long as you’re careful handling the lye while you’re making the soap, you’ll be totally safe from any harmful health effects! It just takes a bit of care and caution, like a lot of things in life. 😉
The ingredients: Calculating the recipe!
All this math stuff I’m going to get into here is not necessary to understand in order to make soap, so feel free to skip it!
Some of you might know that I have a degree (that I almost never use) in mathematics. Well, times like these are opportunities for me to actually use my degree!
Being totally new to soap making (other than making dish soap bars already), I decided to do some research into how it actually works. I found this book, Natural Soap Making by Elizabeth Letcavage, which really helped to explain it!
She gives tons of different recipes for different soaps and also gives you the information on how to calculate your own recipe if desired.
Picking the oils for the soap
The first step in making soap is figuring out what oils/fats you want to use!
I had heard about castile soap and how gentle it is on the skin, so I was initially interested in making that.
However, I found out that traditional castile soap is actually made purely from olive oil, and that it can be a little harder to work with, take longer to cure, etc. I haven’t tried it myself, so I can’t attest to this.
But, in the end, I decided to go with a recipe which used olive and coconut oils, rather than pure olive oil. I used 60% more olive oil than coconut (by weight) to keep the soap gentle on my skin.
I’d bought a big bottle of olive oil at the store and figured I’d try to use the whole thing for the soap I was making. So, that meant I had approximately 850 g (30 oz.) olive oil, and I decided to use 510 g of coconut oil.
Calculating the correct amount of lye
Now I had to figure out how much lye I needed!
This calculation isn’t completely straightforward, because it depends specifically on the oils in the recipe. Each oil/fat has a certain “saponification value” which is used to calculate the correct amount of water and lye.
The equation for the lye is basically just the weight of each oil multiplied by its saponification value and then added together.
For my soap, this meant I needed to do this calculation:
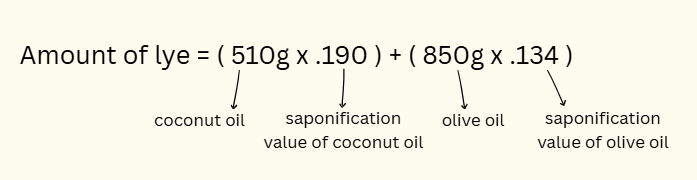
If you have more oils/fats, you simply add them in the same manner, multiplied by their respective saponification value. (Remember “Please Excuse My Dear Aunt Sally” from math class! Always do the calculations in the parentheses before adding!)
This equation calculated to 211 g of lye.
“Superfatting” the soap
However, I also wanted to slightly “superfat” my soap. Lol, isn’t that a funny word? Reminds me of the documentary “Supersize Me”, but instead it would be “Superfat Me”, lol!
Anyway, superfatting just means you add slightly more oils/fat for the soap recipe than you actually need. This leaves some residual oil in the final soap product, making it more moisturizing than it would be otherwise.
The amount of lye we calculated above would exactly react with the oils in our recipe and everything would then be converted to soap. This can be great for cleaning (a dish soap, for example), but for hand/body soap, I would like some more moisture!
A common method of superfatting is to leave out 5% of the lye we calculated above. So I ended up with 200 g lye in the final recipe.
Calculating the amount of water needed
Now that I’d calculated the amount of lye, all I needed was to figure how much water I needed!
This one isn’t quite as exact as the lye calculation. I saw differing opinions on how much water to use and how to calculate it when I did research.
I went with a relatively simple method and it worked fine for this soap! This method was to calculate the amount of water based on the total weight of the oils being used. Specifically, it would be 38% of the weight of the oils. That led to the following calculation:
( 850 g olive oil + 510 g coconut oil ) x .38
( 1360 g total oils ) x .38 = 517 g water needed
(Keep in mind the .38 is just another way to write 38%.)
Precautions to take when making soap and the necessary safety gear
Okay, so I know I’ve been emphasizing how easy making your own soap bars is, but I didn’t say it’s totally risk-free! And you’re probably already aware of how dangerous lye can be if mishandled.
However, this doesn’t mean you need to be afraid when making soap, just cautious!
Keep in mind lye will seriously burn your skin, eyes, or any part of your body if it makes contact, whether in its dry crystal form or dissolved in water. This means you need to cover up any vulnerable skin while making soap!
Personally, my safety gear includes:
- Long pants and sleeves (that I don’t care too much about in case the lye gets on them and damages them)
- Long rubber gloves
- Safety goggles (an absolute must!)
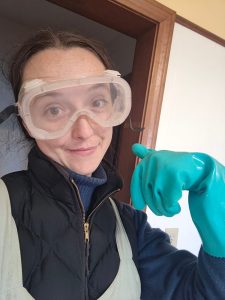
Additionally, you’ll want to mix your lye in a ventilated area since it can give off some toxic fumes (I mix it outside). More on this later!
But please rest assured: If you take these precautions, soap-making is very safe! Plus, the lye is neutralized very quickly in the process, so the time spent handling it is minimal. Remember, once it is mixed in with the oils, the mixture becomes something different entirely!
Equipment and ingredients
Aside from the safety gear discussed above, there are a few things you’ll need when making your own soap bars. This, of course, includes the actual ingredients for the soap, plus anything used to mix the ingredients and then to shape them once poured!
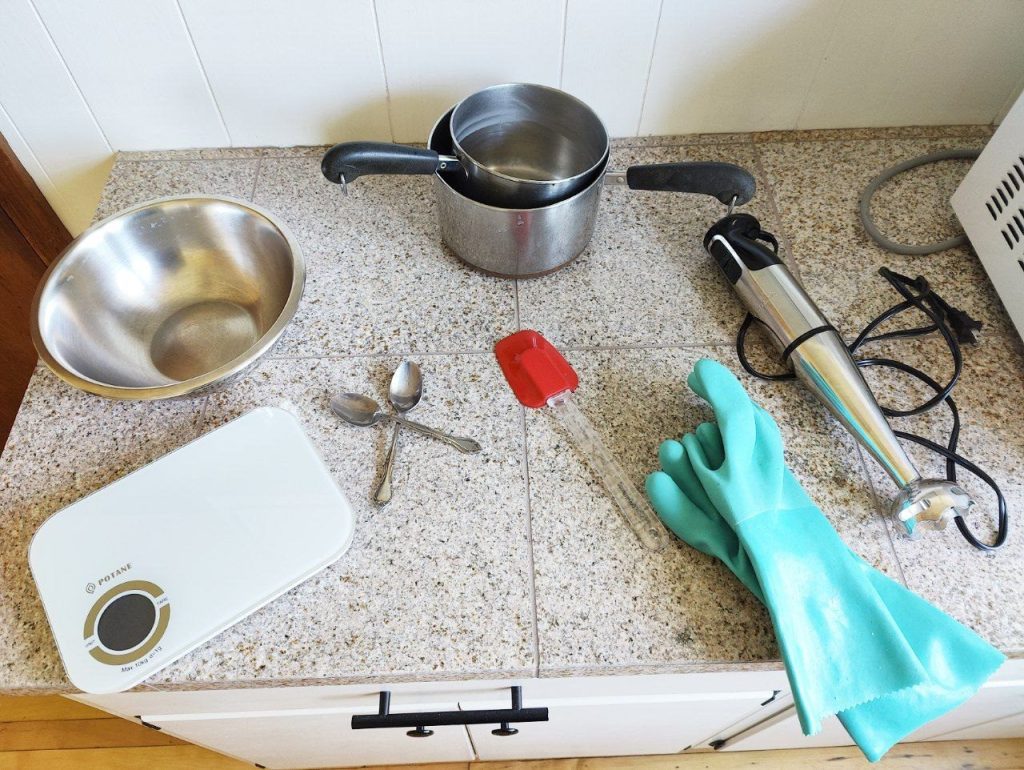
Here is the exhaustive list of all the equipment I used:
- Kitchen scale to precisely weigh your ingredients
- Stainless steel pot/large stainless bowl to heat/melt your oils and mix your ingredients
- Stainless steel bowl to mix your lye and water
- Stainless steel utensil (an ordinary spoon is fine) to mix lye and water
- Thermometer for checking the temperature of oils before adding the lye
- Immersion blender to mix lye solution and oils
- Rubber/silicone spatula to get every bit of soap out of your pot and into your molds!
- Soap molds to pour your soap into (link is to rectangular mold; the other two I got at Aldi so I can’t link them!)
And these are the ingredients used to make the soap:
- Olive oil: Definitely don’t feel like you need to get primo olive oil. I got the cheap stuff at my discount store, maybe around $12 for 32 oz., to keep the recipe affordable.
- Coconut oil: I used refined, again to save money.
- Lye (sodium hydroxide, NaOH) – I prefer to use this really cheap crystal lye drain opener
- Water
- Essential oil of your choice! I used peppermint (here’s the peppermint oil I use – it’s a nice big 4 oz. bottle and will last you forever!)
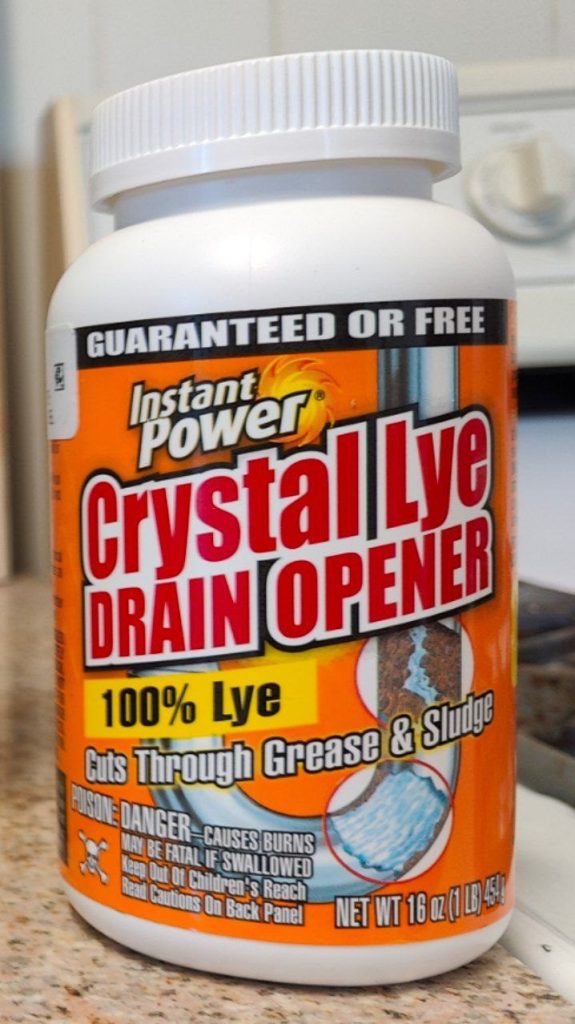
This is the lye I linked in the list above. I’m always interested in spending the least money possible, and though this lye is obviously not marketed for soap-making, it’s precisely the stuff you need! I found this out by doing some research. Basically, as long as it says “100% sodium hydroxide” on there, it’s 100% lye. Some drain opener products are not 100% lye, so read labels carefully or just purchase this one. It’s very inexpensive and there’s enough in there for two batches of the soap we’re making in this recipe!
The step-by-step process of making your own soap bars
I’m going to go into as much detail as possible here so you guys feel as confident as possible making your own soap bars for the first time!
It really is quite simple. Let’s do it!
Weighing your ingredients
Carefully weighing the ingredients is probably the most important part of getting good results when making your own soap bars. Since we’re working with a chemical reaction, it’s very important that the ingredient weights are in the right proportions to each other!
I like to get my oils weighed out first. I typically melt the coconut oil in the microwave and then pour it into my large stainless bowl to weigh it. Then I tare my scale and weigh in the olive oil as well.
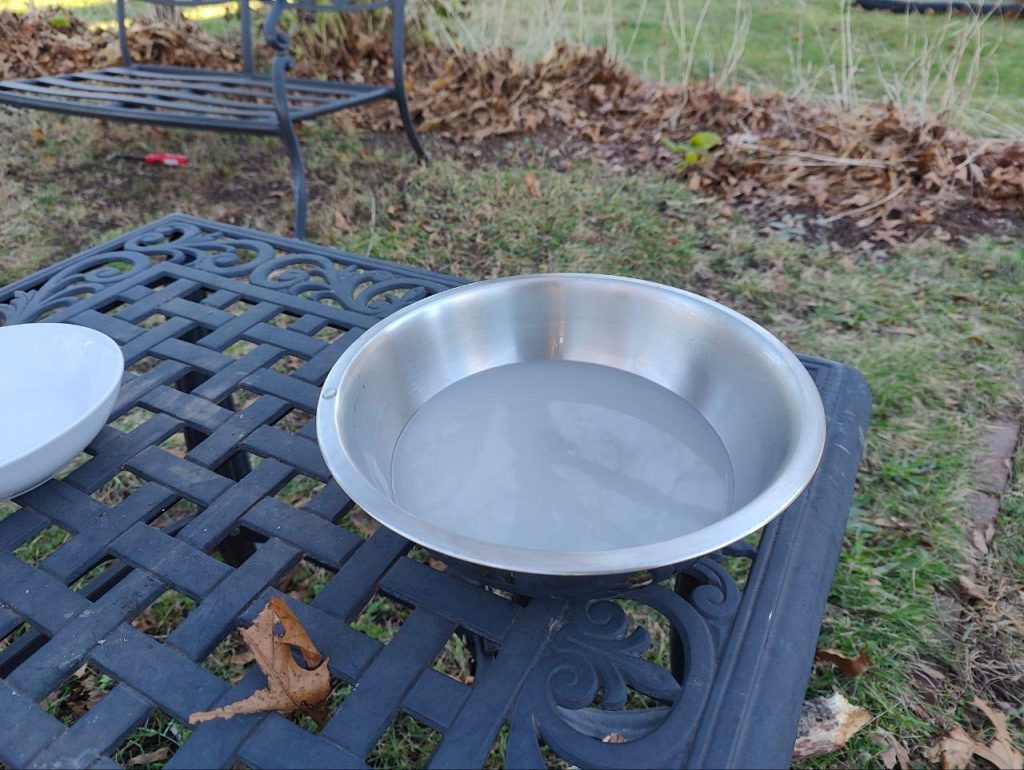
Next up, I weigh out my water into my stainless steel bowl. After donning my safety gear, I also weigh the lye crystals into a smaller bowl. I then take these two bowls outside for mixing.
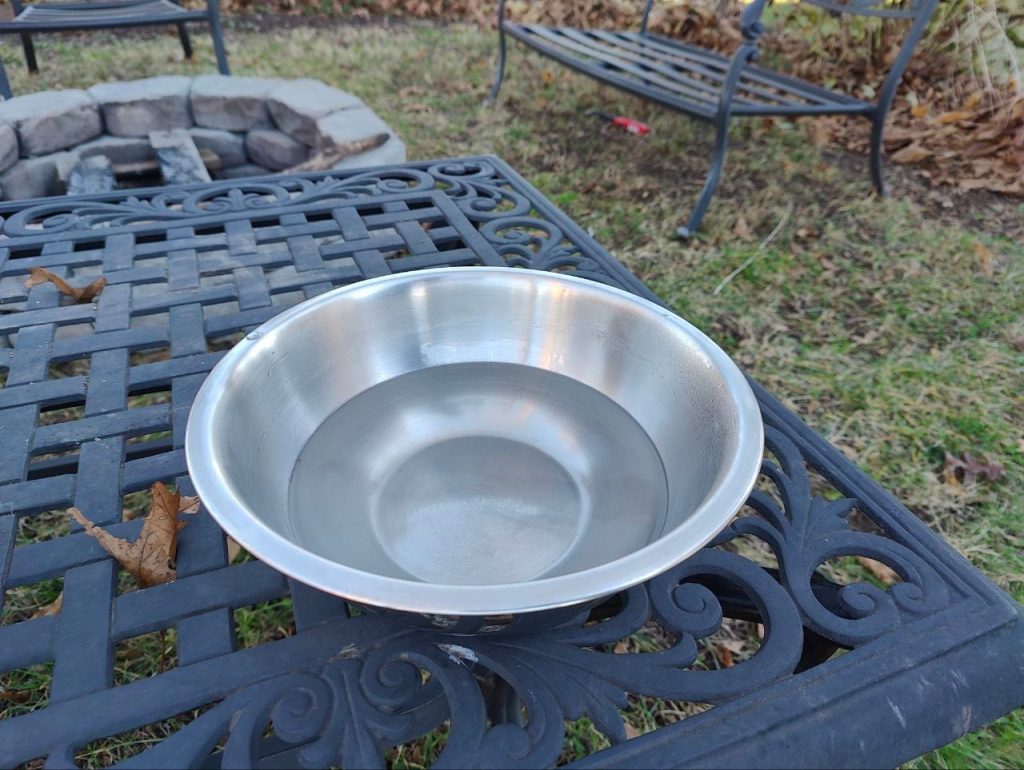
Making the lye solution
Her are my two bowls outside, ready to be mixed!
If you can’t do this outdoors, I’d recommend you do it next to an open window. Make sure there is adequate ventilation! Having a respirator on also isn’t a bad idea if you’re inside.
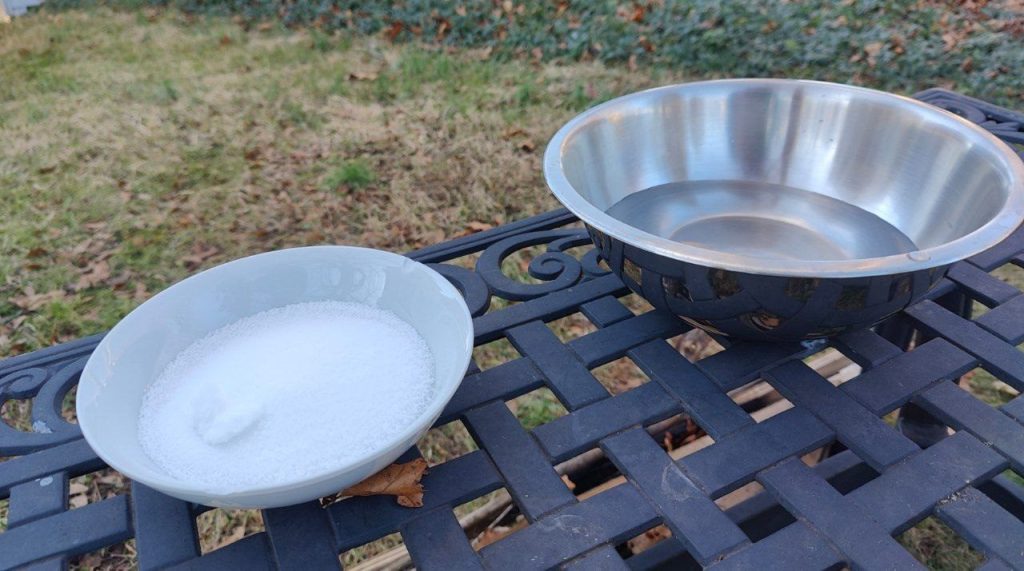
To mix the lye solution, I slowly add the lye crystals to the water (never do this the other way around!), mixing as I add them. The solution will heat up, so be careful since the metal bowl can get pretty hot.
The solution will be cloudy when first mixed but will eventually become clear.
I let it cool outside for around 15-20 minutes and then bring it inside.
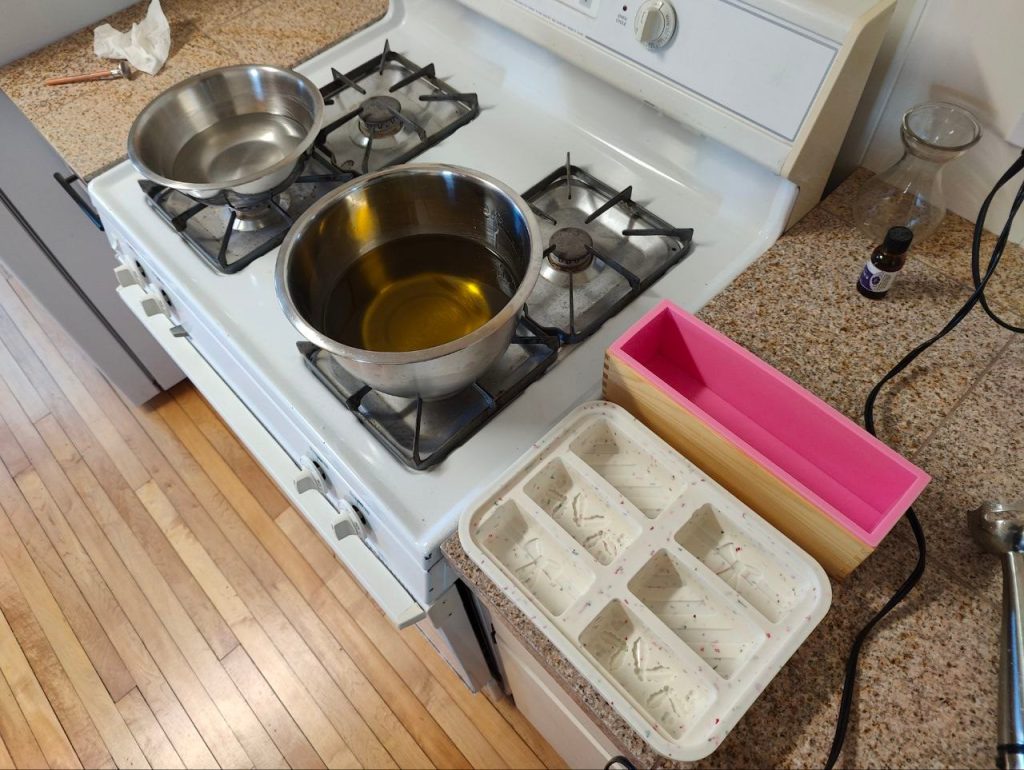
Mixing and pouring the soap
Once I’ve brought the lye solution in, I check the temperature of the oils. If they are less than 100°F, I heat them on the stove on low until they’re around that temperature. This part isn’t so exact, but I’ve heard that it’s good to have your oils around 100°F when they’re mixed with the lye. Certainly make sure they’re not significantly warmer than that (same goes for the lye solution).
Note: You want to make sure you have your molds set up before you start mixing the lye and oils, since you won’t want to wait to pour the soap batter!
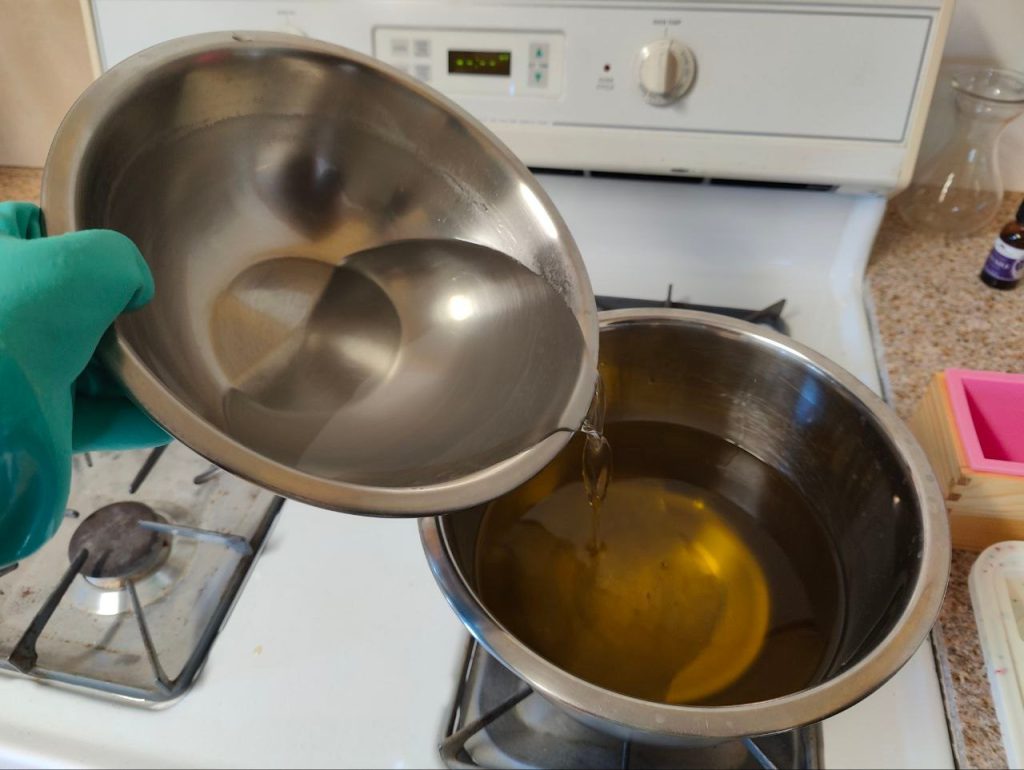
And then it’s time to mix! It’s pretty simple: Somewhat slowly add the lye solution to the oils:
Then blend with the immersion blender for around 10 seconds or until the mixture becomes thick and uniform:
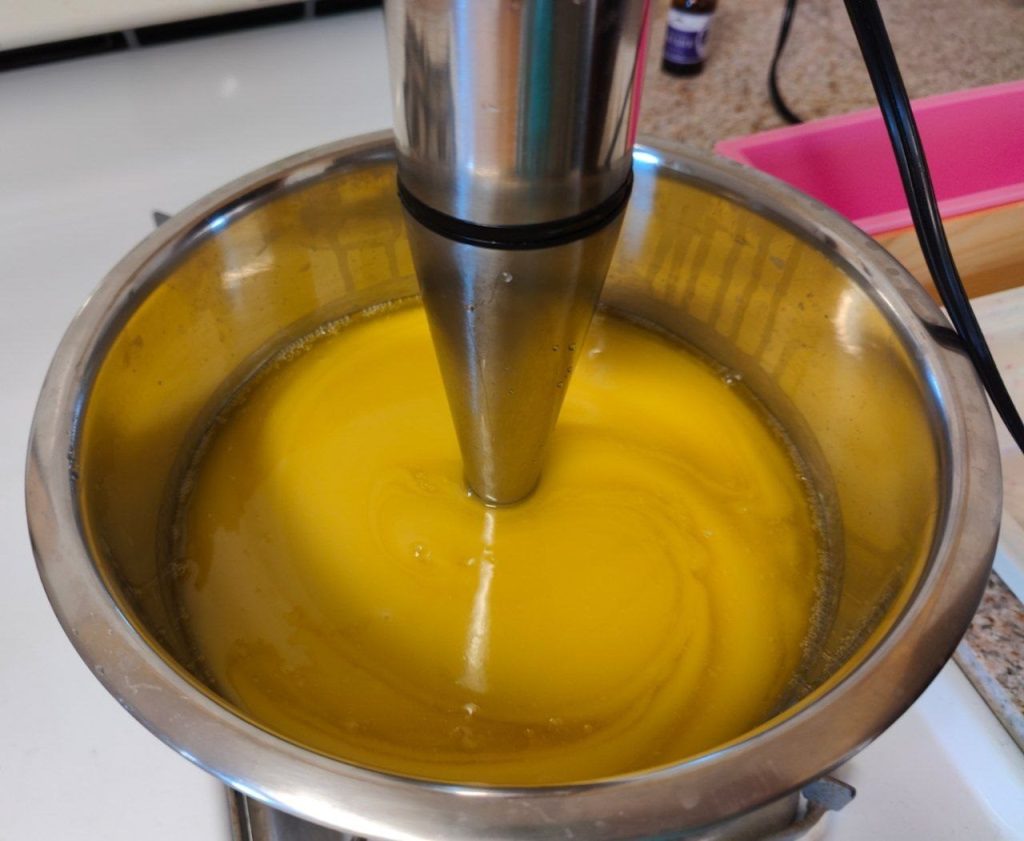
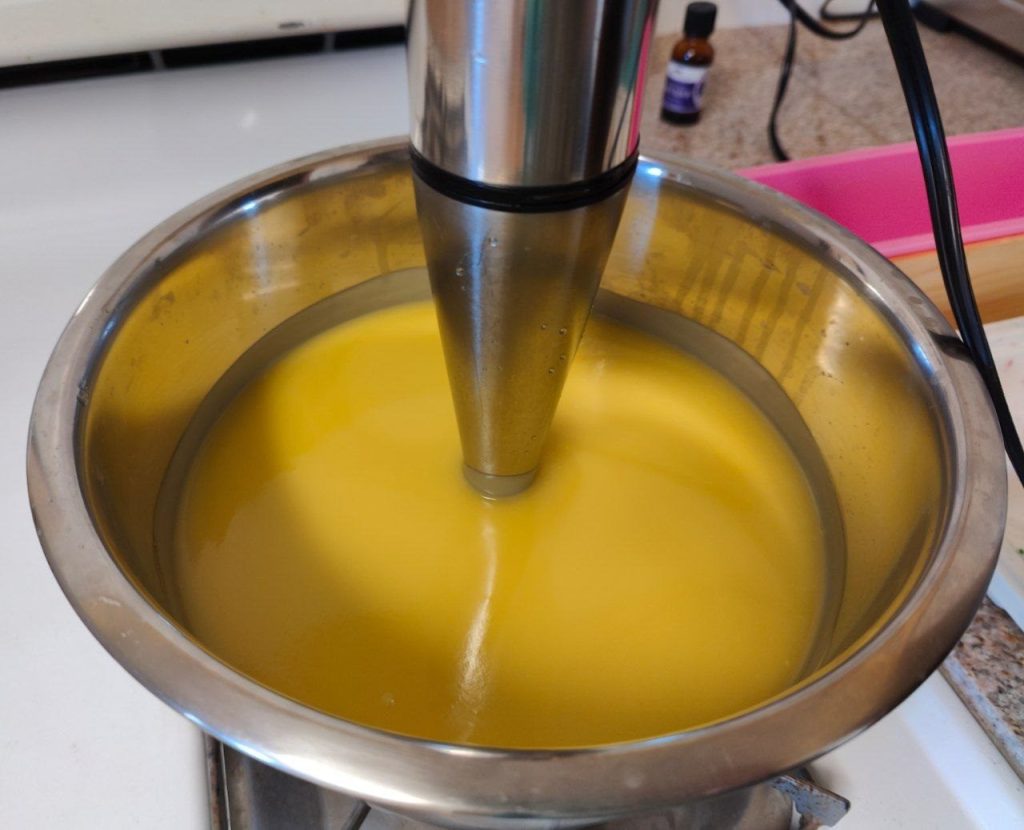
Now, add about 20 drops of the desired essential oils, mix for a few more seconds, and then it’s time to pour!
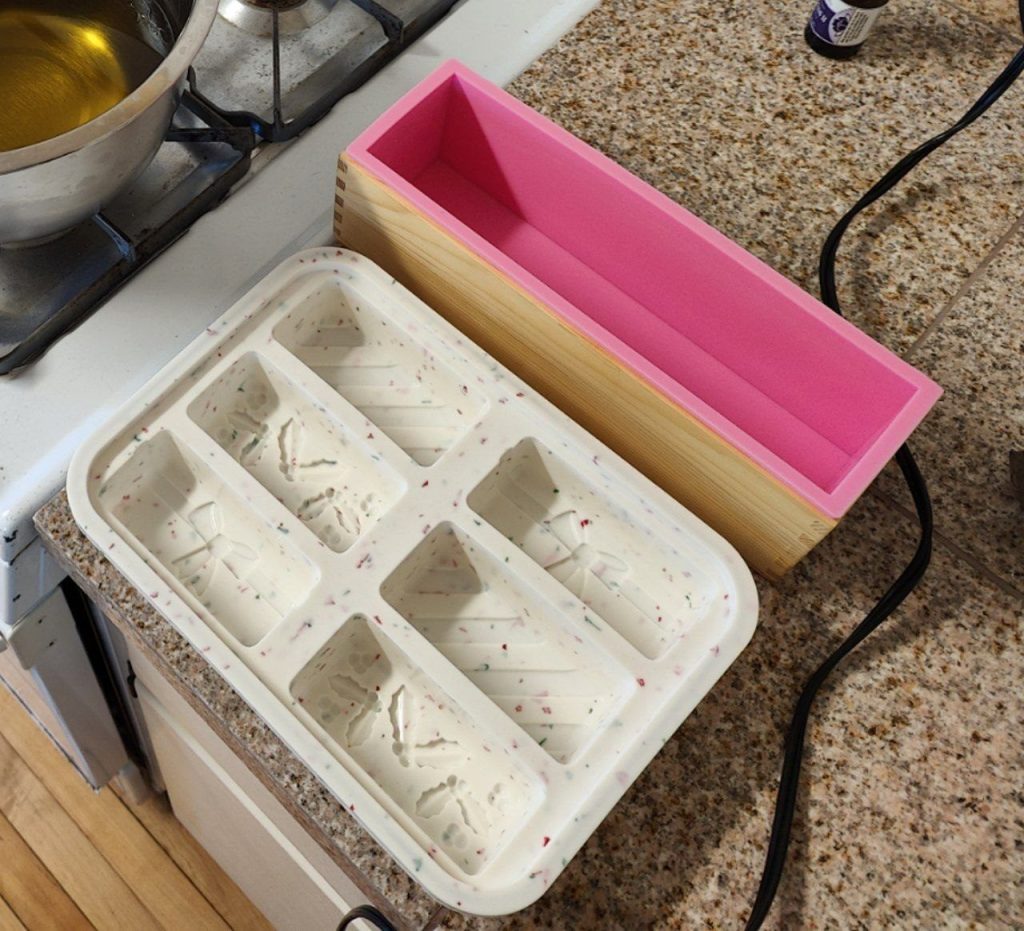
Pouring is pretty straightforward. Just pour into the molds! I like to use the silicone spatula to get every last bit out of my bowl and into the molds.
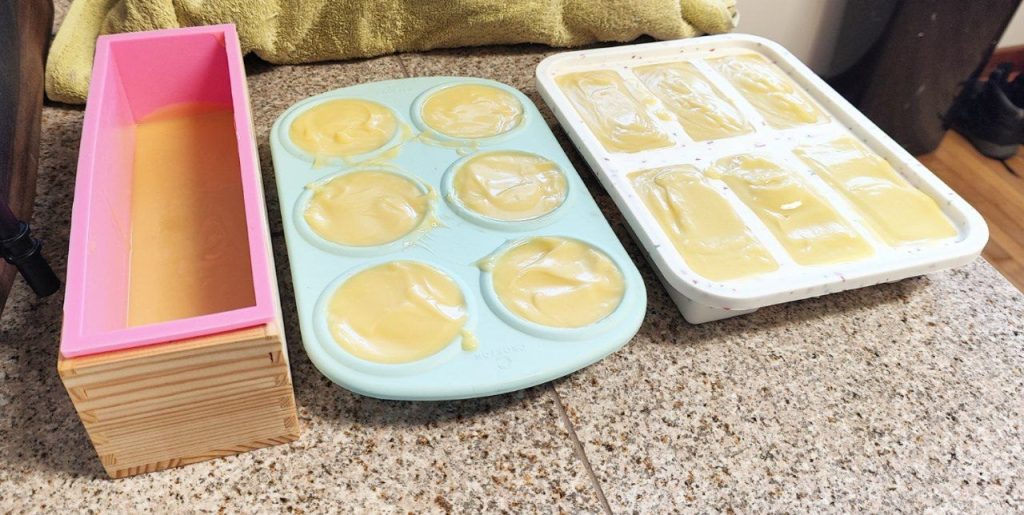
As you can probably see in the picture above I first filled the muffin trays and then put whatever I had leftover in the bigger mold. It’s always a good idea to have more molds than you need in case there’s some extra soap batter! Plastic tupperware can also be great in a pinch.
Demolding the soap!
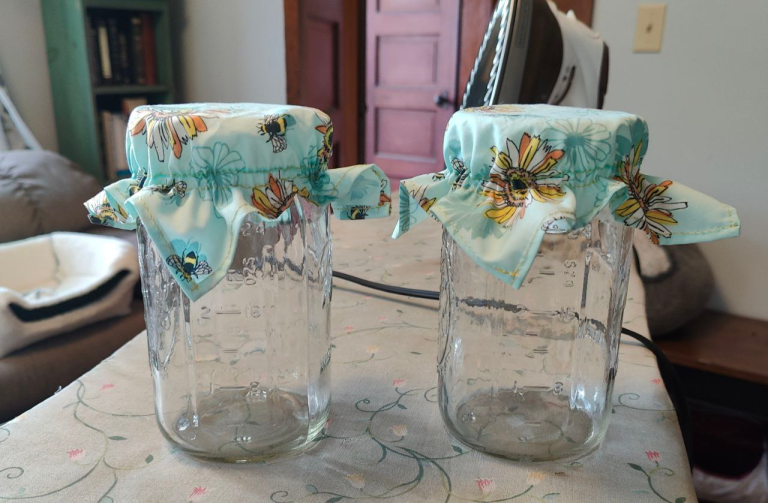
After you’ve poured your soap, you’ll want to leave it undisturbed for a day or so. You’ll notice that it will harden somewhat within a few hours, but it’ll only be ready for de-molding the next day. (You don’t want to demold it when it’s too soft for obvious reasons.)
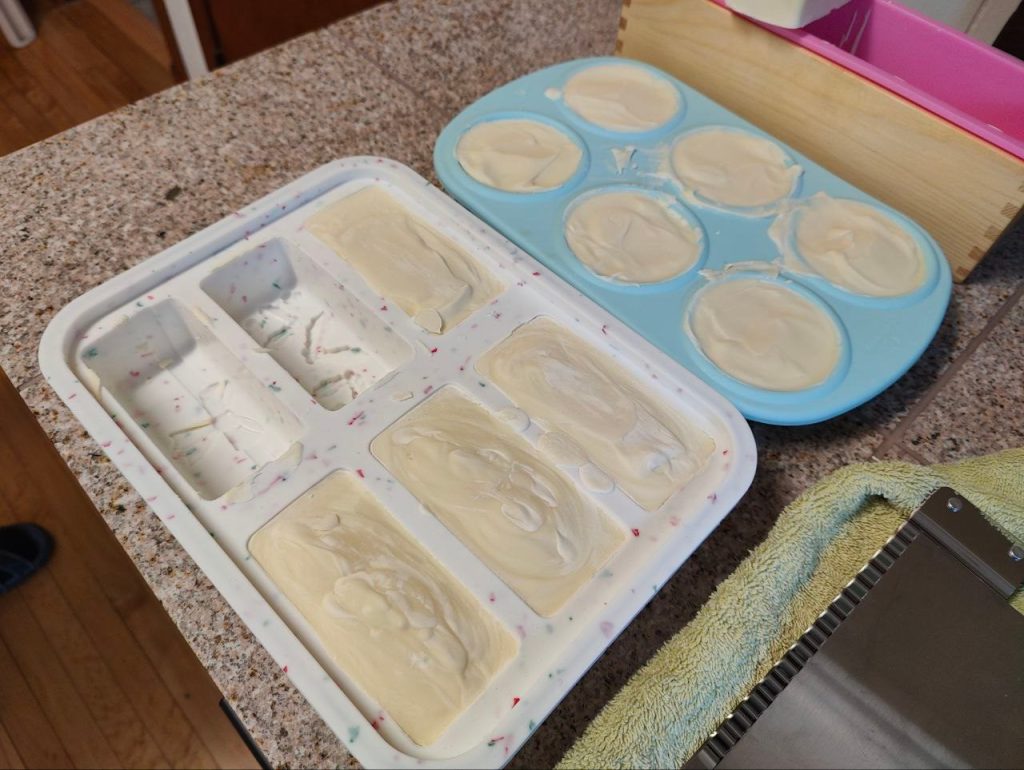
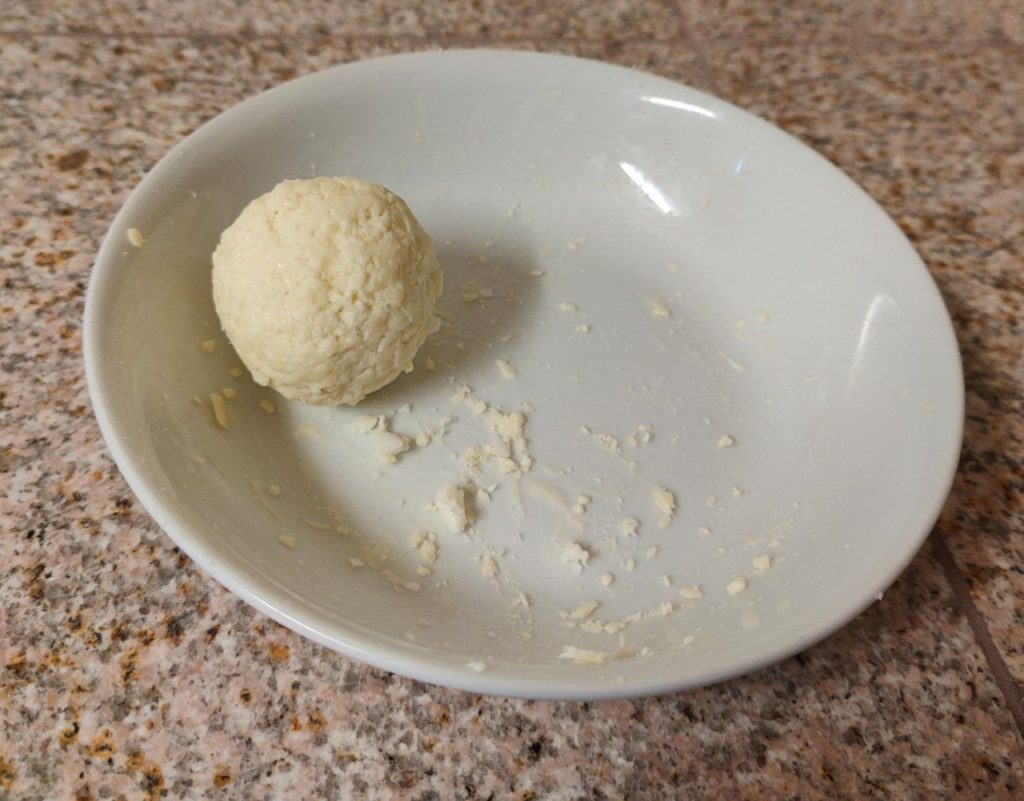
When you come back the next day to de-mold your soap, it’s pretty straightforward! Just take it out of the molds. If there are any messy edges, you can use a vegetable peeler to tidy them up a bit.
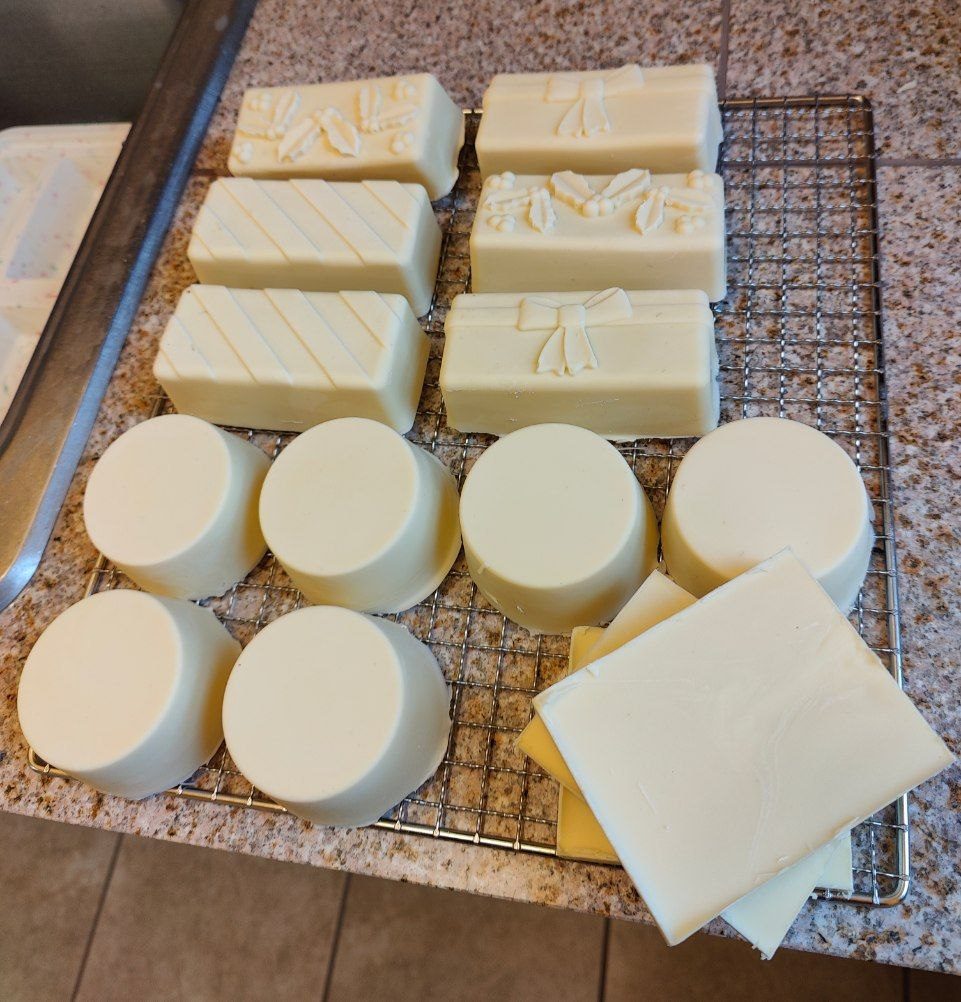
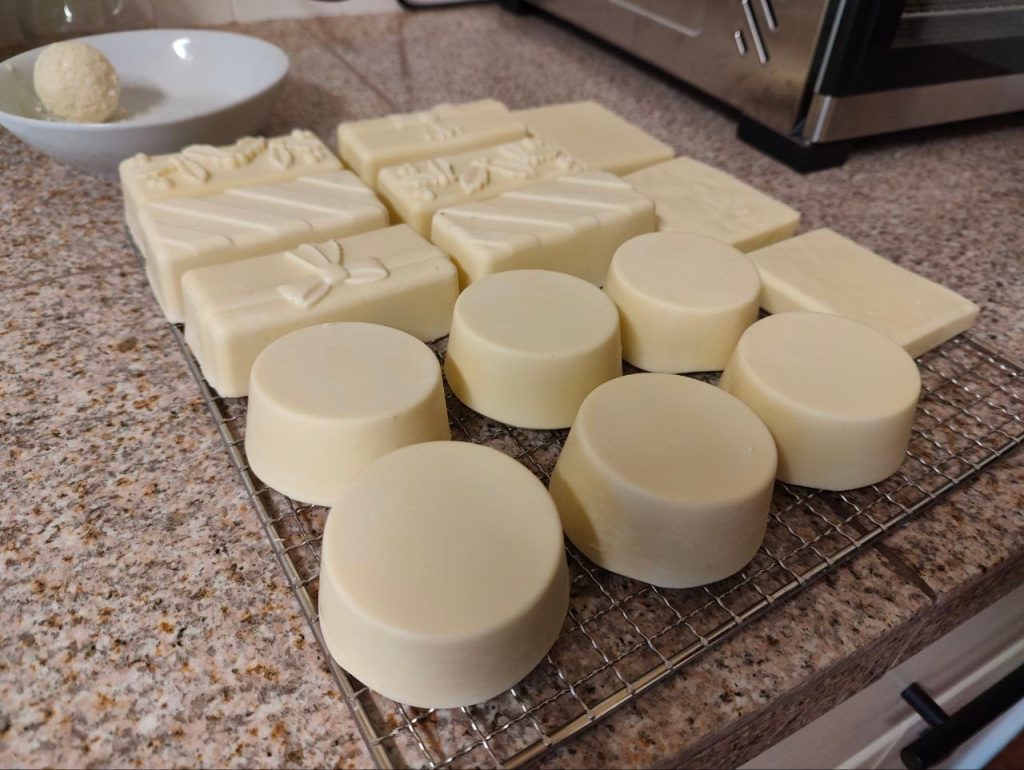
And any soap-peelings can be rolled into a ball so you don’t waste any soap!
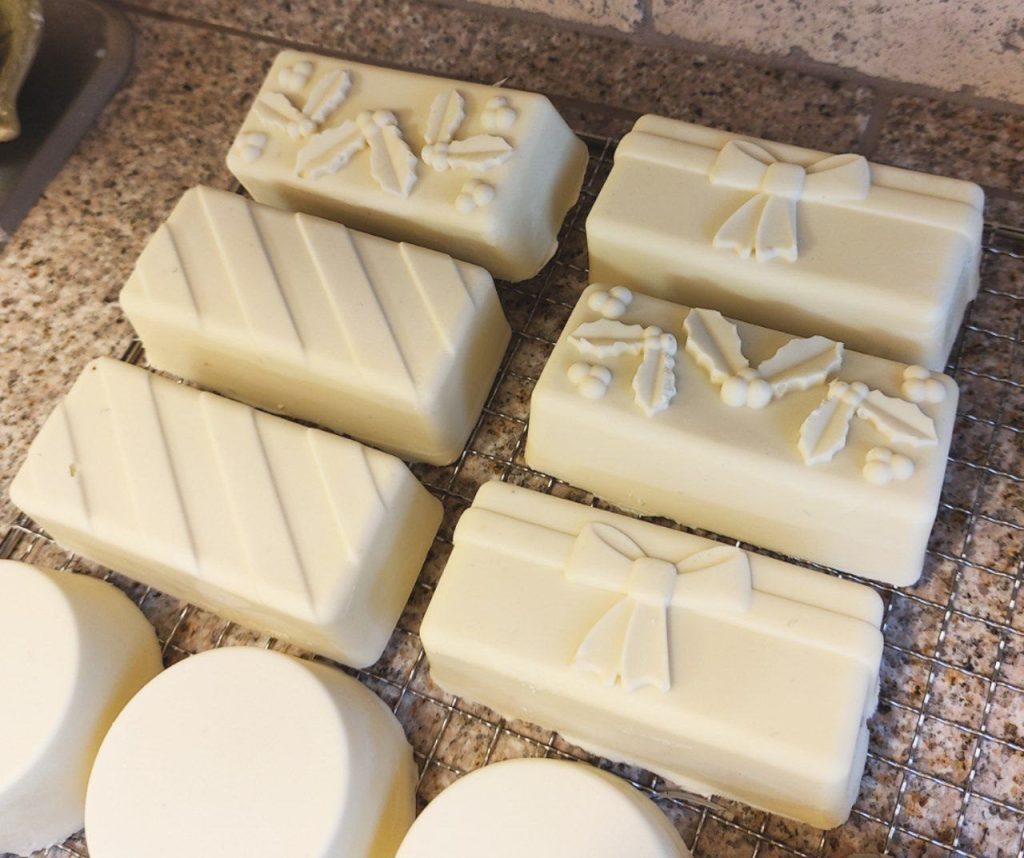
And I was just so excited to use the holiday-themed silicone baking tray to make gift soaps for friends and family this Christmas! (Related post: The 4 inexpensive and super wholesome DIY Christmas gifts I made this season!)
And believe it or not, I found the holiday mold at Aldi for like $5 or something! Aren’t they just so cute?! And perfect for the holidays?
Letting the soap cure
And now, the least fun part of the process, sadly… is waiting!
I did not know this before I looked into soap-making, but soap actually needs time to cure! At least soap bars.
How long a soap needs to cure depends a lot on the specific soap you’ve made (oils used, etc.). But for these, a month seemed sufficient. Even after 2-3 weeks, they were already sudsy and lathering up when I tested one! Apparently, though, the longer you let soap cure, the better it gets, so a month is ideal.
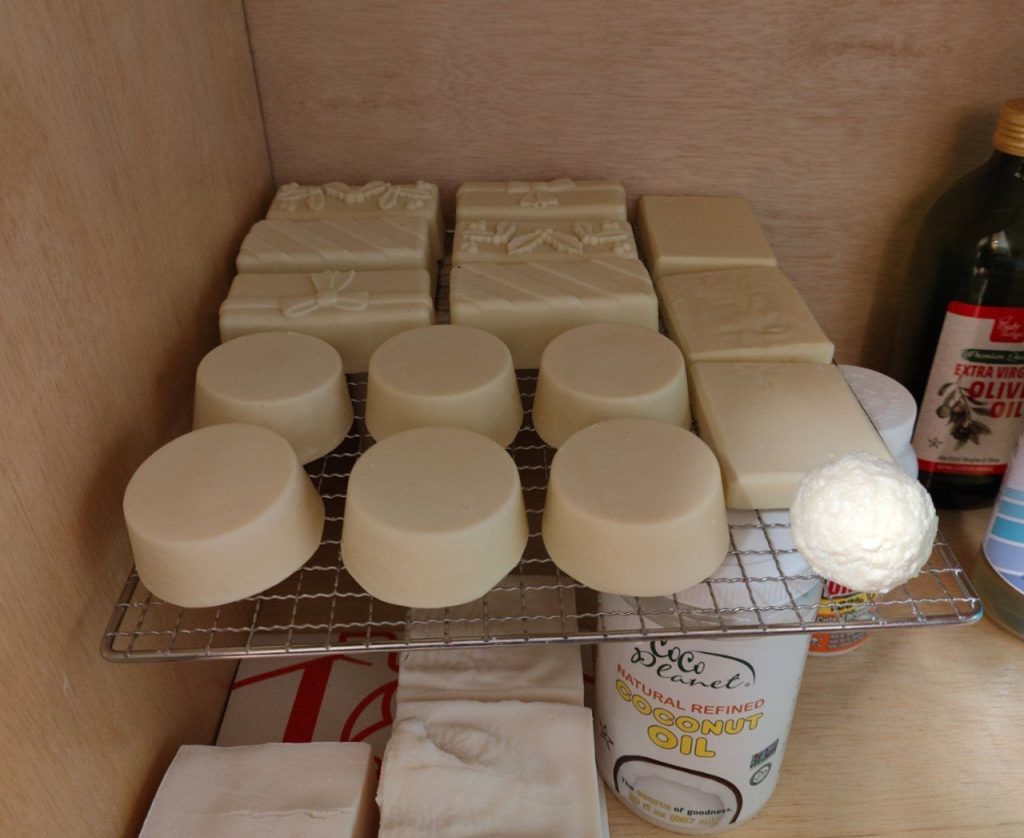
Leave the bars in a dark cupboard or something. I like to leave them on some parchment paper, a wire rack, or simply something they won’t stick to. You also want to make sure it’s a cool area.
Once the wait is over, it is SO much fun to use soap that you made entirely yourself!!!
Using your homemade soap!
So, I have to admit, though I made about 15 of these soap bars, I gave all but one away for Christmas! But I wanted to keep one so I could make sure they came out okay.
And let’s see how well they work…
I really have to say, these feel so different from any other soap I’ve used!
They lather very easily and produce plenty of cleansing bubbles, but they also feel so silky and smooth! I’m very pleased!
Here’s the shortened and more accessible recipe and directions:
Silky Hand/Body Soap Bars
Equipment needed:
- Kitchen scale
- Stainless steel pot/large stainless bowl
- Stainless steel bowl
- Stainless steel utensil
- Kitchen thermometer
- Immersion blender
- Rubber/silicone spatula
- Soap molds
Ingredients:
The following lists the recipe in ounces or grams, depending on your preference.
- Olive oil: 30 oz. / 850 g
- Coconut oil: 18 oz. / 510 g
- Lye (sodium hydroxide): 7.0 oz. / 200 g
- Water: 18.2 oz. / 517 g
- Essential oil of your choice: 20 or so drops
Instructions:
- Gather all your equipment and ingredients.
- Weigh olive and coconut oils into stainless steel pot/bowl, then melt on low heat if not already melted.
- Weigh water into your other stainless steel bowl.
- Put on your eye, breathing, and skin protection (i.e. gloves and long sleeves!).
- Weigh lye into separate bowl from water.
- In a place with good ventilation, preferably outdoors, slowly add the lye to the water (not the other way around), mixing with the stainless utensil, until clear. Let cool to around 100°F.
- Oils should be around 100°F for mixing; let them cool or heat to around this temperature if needed.
- With molds and blender ready to go, add lye solution to the oils, immediately blending with the immersion blender until combined and thick, approximately 10-20 seconds.
- Quickly add your essential oils, blend briefly again.
- Pour soap into your molds, using the spatula to help transfer every last bit!
- Put your soap in a cool and dark place for one day, then remove from mold and cut/tidy edges if desired.
- Keep soap in cool and dark place and wait around a month to use!
Well, there you have it! My in-depth post on making your own soap bars! If you try the recipe, please feel free to let me know how it goes down in the comments below!
I am really in love with how easy it is to make soap and how it saves me money! No more shelling out $4-$5 per bar for premium natural soaps without chemicals in them!
I wish you all luck with all of your DIY adventures, and happy soap-making!