My tried & true epoxy grout method
Disclosure: I am an Amazon affiliate and this post contains affiliate links, which means I may earn a commission (at no extra cost to you) if you purchase products mentioned.
Have you ever heard of epoxy grout? If you have, you know what everyone says about it: it’s expensive and extremely difficult to work with. While this is true, there are methods which make the process so much easier! (Learned only after having used it over and over and slowly figuring it out as you go….)
There is totally a learning curve with epoxy grout. I hope this post helps you feel encouraged to try it. The benefits of epoxy grout are very much worth the extra trouble (and cost) it takes to install it!
Also, I would totally recommend checking out TileCoach’s recent (and first?) video on epoxy grout! I was so excited to see him make a video on it.
Why use epoxy grout?
There is a reason people are willing to go through the extra trouble to install epoxy grout. Since it is not porous, it has excellent stain resistance, doesn’t need to be sealed, and is highly durable. This makes it maintenance free for years and years.
Occasionally you might need to spray some bleach on epoxy grout to kill mold that can grow on the surface (such as in a shower), but the mold won’t seep through the grout, behind the tile, and cause more issues like it could with conventional grout.
Epoxy grouting steps
The key to installing epoxy grout successfully is to follow a careful step-by-step procedure.
Personally, I have always used Laticrete’s Spectralock Pro grout, which consists of a true epoxy (parts A and B) and a sand (part C).
Weighing and dividing batches of epoxy grout
The most important thing I will tell you in this entire post is to NOT use the whole batch at once. Epoxy grout sets up so quickly while you are working with it and you will never get through the whole bucket. (I’m talking about the 9 lb size.) I found this post which detailed the method for divvying up the batch into four smaller portions, and I have created my own breakdown here:
Whole bucket
| Part A | 20 oz | 577 g |
| Part B | 20.8 oz | 590 g |
| Part C | 9 lb | 9 lb |
Quarter batch
| Part A | 5 oz | 142 g |
| Part B | 5.2 oz | 147 g |
| Part C | 2.25 lb / 2 lb, 4 oz | 2.25 lb / 2 lb, 4 oz |
Per ounce
| Part A | 1 oz | 28 g |
| Part B | 1 oz | 28 g |
| Part C | .45 lb / 7.2 oz | .45 lb / 7.2 oz |
Simply weigh out parts A and B each into four separate plastic ziplog baggies and you’re good. This way, you can take your time, do a quarter batch at a time (which is really all you’ll have time for), and won’t waste any of this expensive stuff!
Preparation
Before you mix together your grout, you’re going to want to have EVERYTHING ready. You have such a limited time to use the grout before it starts to get gummy and annoying to work with that you can’t afford to lose any time.
Make sure you have your grout float (I actually don’t prefer the epoxy grout floats and find them too hard to use well), margin trowel (to scoop grout out of the bucket, and also mix it), gloves, and sponge handy.
The grout also comes with two packets of powder for the two different cleaning steps. I like to get a bucket full of water with the first cleaning solution already mixed in so when I’m done grouting, I can immediately wash my tools.
Having white vinegar handy (preferably in a spray bottle) is also super useful. It takes epoxy residue off things super well.
Mixing
The directions tell you to use an electric mixer. You don’t need to, especially with a quarter batch. Put your gloves on. Per the directions, you mix together parts A and B in the bucket. Cut the corner of the ziplocs off and use the side of the bucket to squeegee every last bit out of the plastic bags!
I weigh out the sand in a yogurt container, then add around half to the epoxy and mix it all together by hand (you can use a margin trowel for this). Then add the remaining sand.
Extremely important: If you are tiling a wall, you will ABSOLUTELY want to take advantage of the instructions saying you can omit up to 10% of the sand for a more workable mix. Yes, it does mean you’re getting less bang for your buck of the expensive epoxy, but you will get such better results, and grouting will be so much easier! Gravity really works against you when grouting walls, and having a more workable grout makes all the difference.
Once the grout is mixed, you go to work. Lol. Immediately!
Grouting
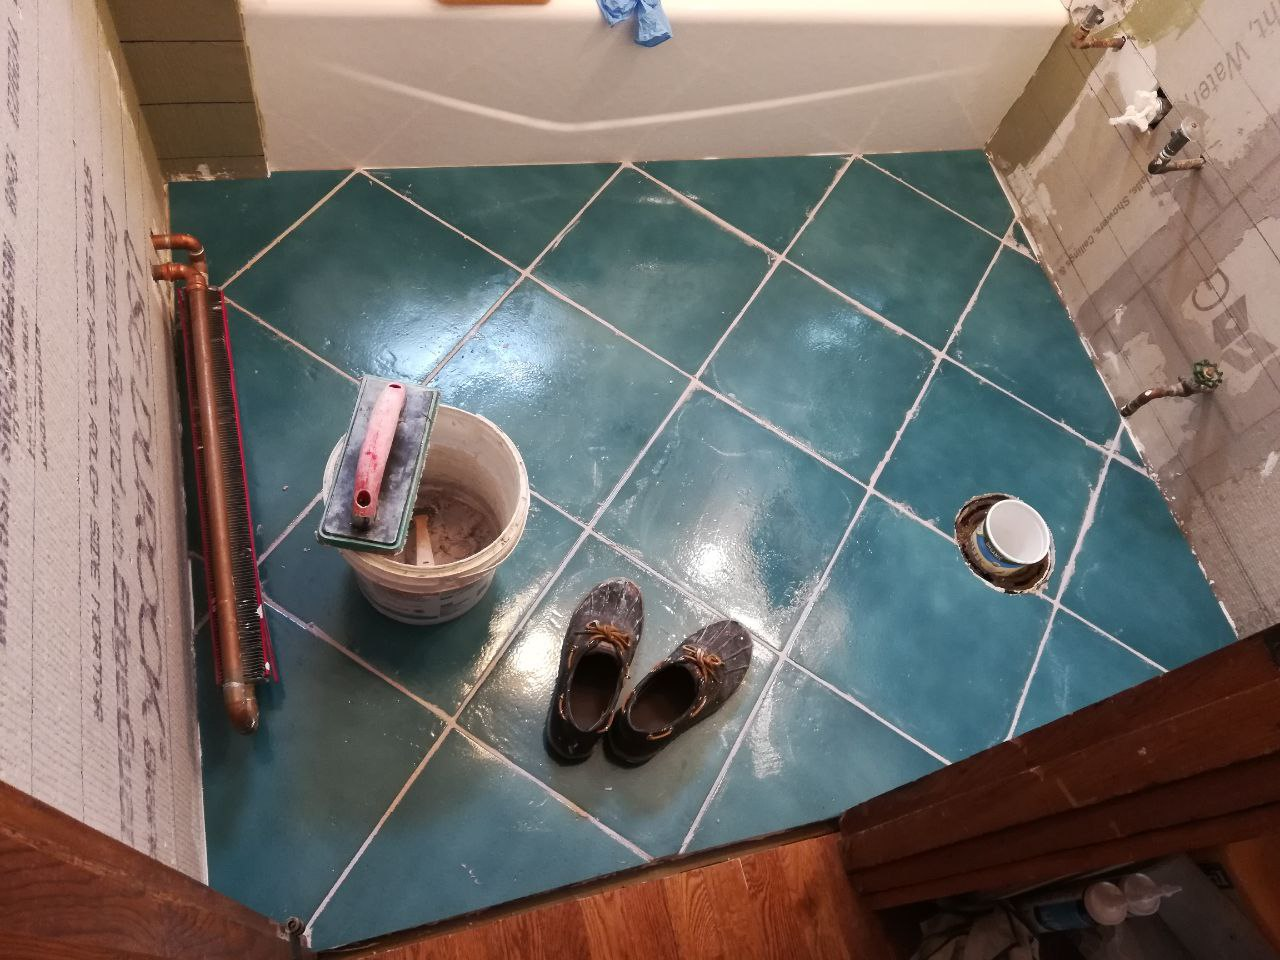
Depending on whether you’re grouting a floor or wall will really determine how difficult your job is. Floors are so much easier. This grout just tends to fall apart in pieces when you’re applying it to a wall. It will get all over the floor, so make sure to protect (or wash afterward) whatever surfaces are below.
You’ll notice that after about ten or fifteen minutes, the grout will suddenly not be as wet and it will be harder to work with. The grout gets harder, but it’s still possible to squeeze it into the joints if you’re grouting a floor.
For walls, however, it becomes almost impossible to get the grout into the joints with the grout float. Out of desperation, I tried a new trick that actually worked really well. This might not be the “right” way to do it, and it might void any warranties, so keep that in mind. But for my home, I am interested in the best outcome and the least sweat and tears necessary.
If you keep a spray bottle with water handy, you can spray a few sprits into the bucket to extend the workability of the grout. You’ll find with just a bit of moisture, it goes back to the original workability it had when it was first mixed.
My rationale for this? When you go to wash the grout, you end up incorporating some water, and that doesn’t ruin the epoxy. It’s not like water CAN’T touch the epoxy. Plus, this didn’t affect the outcome of my grouting; it came out just as well as the other times I used it. So… just my two cents.

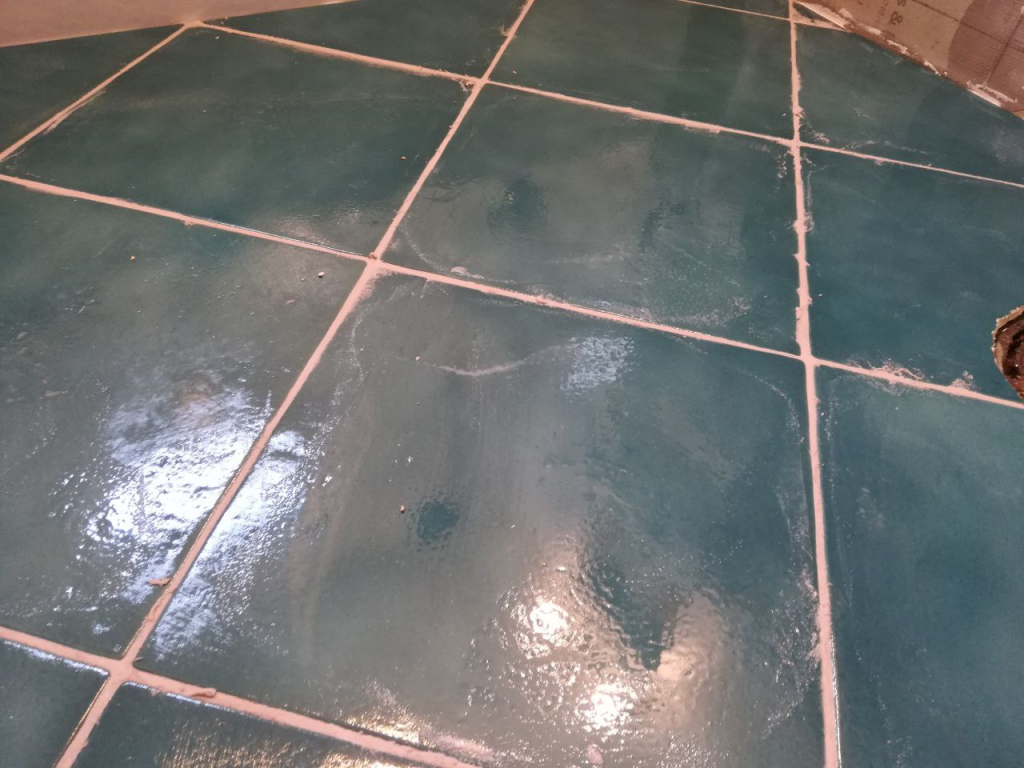
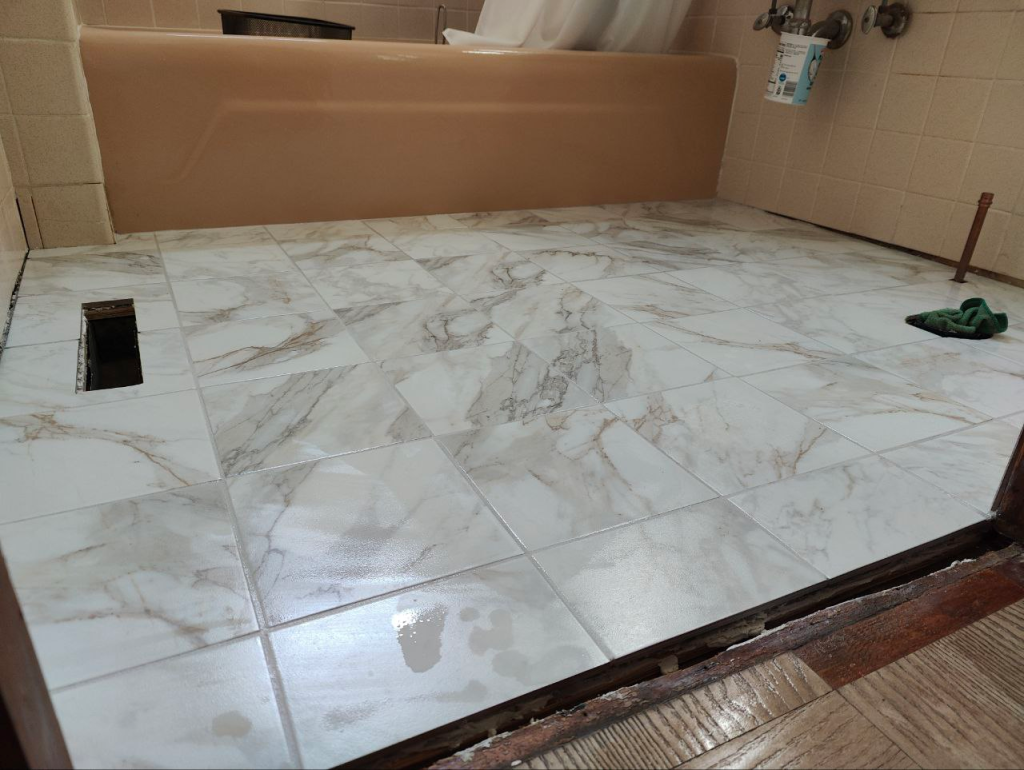
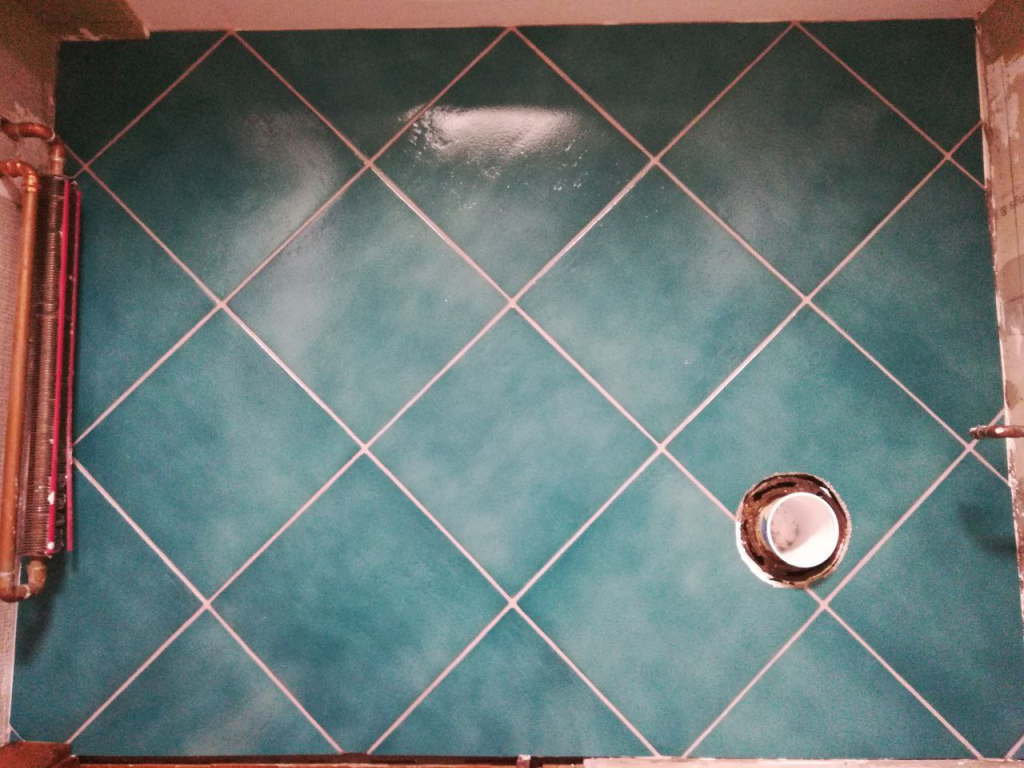
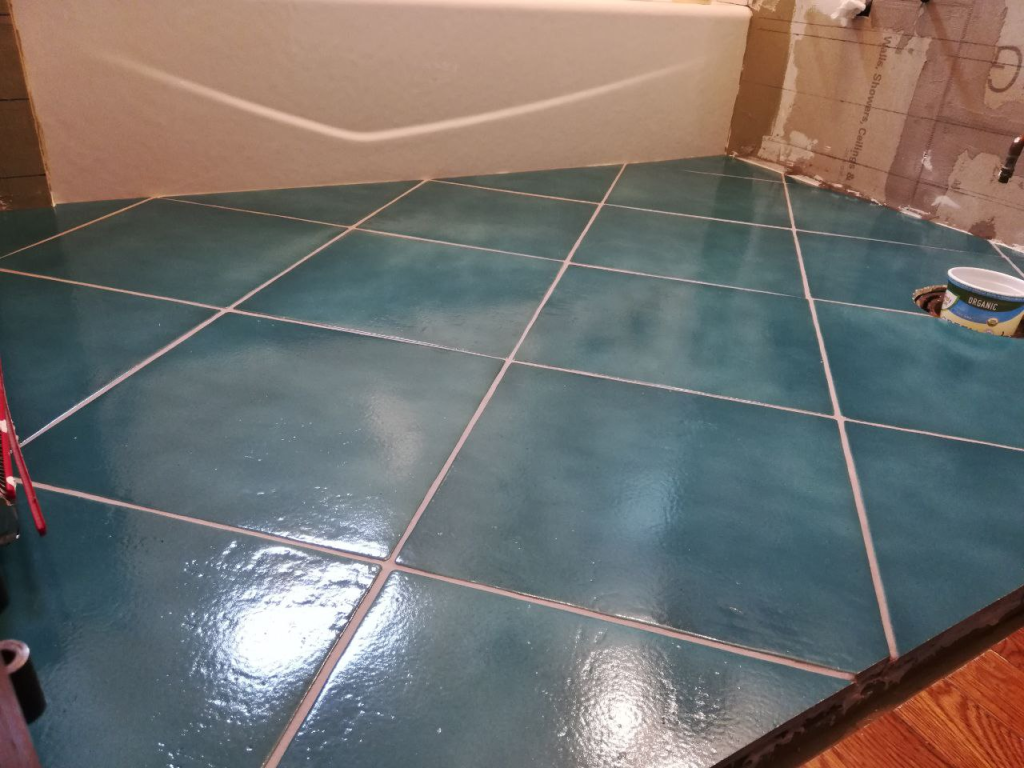
As you grout, fill up the joints nice and full so that you have plenty to work with when you come back to shape them, and make an effort to squeegee grout off the tiles with the float to minimize cleanup (especially the larger tiles). Your tiles should look something like the pictures above once you’re done grouting.
The first cleaning
The directions say to start cleaning 20 minutes after you finished grouting, or within one hour of initial mixing. I find that second part so funny. Just how fast do they expect you to work with this stuff?
I usually wait about 20 minutes, maybe even 30, before cleaning, and I have no issues. I like to make sure the grout has set up enough that I won’t just wash it out of the joints. It starts to change color and get a bit darker when it’s ready for cleaning, too.
Hopefully you have already added the first cleaning additive to a bucket of water. Use something like a 2 gallon bucket, fill it up halfway, and make sure you only use around a quarter of the powder if you are doing quarter batches (no need for exact measuring).
Now wring out your sponge pretty well, but not too well. You want some water to help here. If the grout is allowing you to work and shape it, it’s wet enough. If it’s super hard to scrub and you’re not getting anywhere, use a bit more water. You shouldn’t see water pooling up on the tile, but a bit of water does really help expedite the cleaning process.
Work patiently in circular motions and focus on shaping the joints and not pulling grout out of them. Keep some grout from the bucket handy and patch any low spots or areas you might have missed.
On your first run through the tile, just focus on the shaping and generally getting up any stray grout. After that, go over the tiles again and get up as much haze as you can, but keep in mind the second cleaning will take care of the rest. When you’re done, throw out the sponge.
The second cleaning
The instructions say to wait one hour after the initial wash is complete to do the second wash. Set a timer, have some lunch, and relax, keeping in mind the worst is already over, haha.
Add your second wash additive to your bucket of water. Your grout at this point should be pretty hard, but still malleable. It won’t come off on your finger if you touch it, but you can create an indentation with your fingernail if you gently try. So, still be gentle on this second wash. I use a microfiber for this step instead of a sponge.
I would recommend trying to use less water here, but still enough to get up the haze. Epoxy haze creates a plasticy-looking film on the tile if you miss some. Unfortunately, this has happened to me in inconspicuous spots. I try my best to be thorough with this wash and come back to double check a few hours later to make sure the tile looks clean. You can always use some vinegar to wash up residue you catch within 24 hours.
As you complete this wash, pay attention to what comes off on your cloth. When it starts coming up clean, you’re in good shape. It can still come up with some of the grout color because naturally the joints will still shed a bit. But if you watch it, you’ll get an idea of how you’re doing.
A final check
Like I said, try to come back for a second check just to make sure, once the tile has dried from the second wash, that you got everything. On this last project, I noticed residue in the shape of my sneaker prints on the tile a day later. I quickly sprayed vinegar and scrubbed it off the next day, but likely if I had noticed it a few days later it wouldn’t have budged.
Taking a flashlight and holding it various angles can help to show haze that doesn’t show in normal lighting.
All done!
Once you’ve finished epoxy grouting, it’s such a good feeling. You know you have a super great grout that won’t stain or get easily damaged. Pat yourself on the back – you took the difficult path that not many choose to follow… lol!
I really hope this guide helps others avoid difficulties that I’ve encountered. I must have epoxied around seven projects in my house at this point, so I’ve finally started to get a good process going.
And if you happen to need help with the rest of your tile installation, I have other posts which go over the entire process:
Definitely let me know if you have any questions in the comments below! Happy grouting!