Tiling countertops with granite, a great alternative to slabs!
Disclosure: I am an Amazon affiliate and this post contains affiliate links, which means I may earn a commission (at no extra cost to you) if you purchase products mentioned.
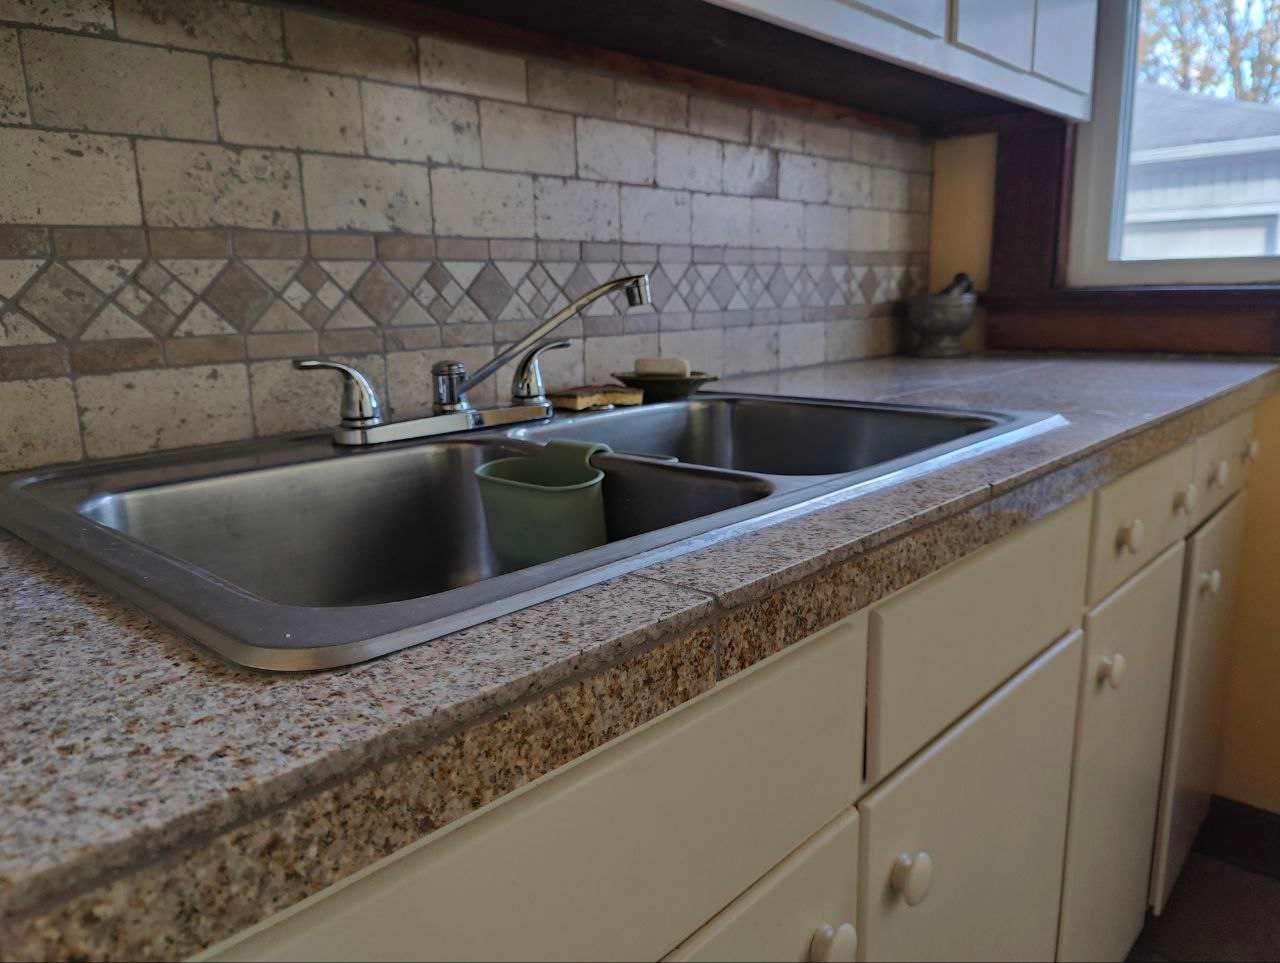
Do you love the look of granite, but hate the hefty price tag that comes with it? Well, look no further than tiling countertops with granite!
Unlike granite slabs, granite tile can be very inexpensive and it is also possible for the DIYer to install on their own.
I’m going to share with you how we tiled our kitchen countertops with granite without breaking the bank and what our process was for installing them!
Why granite tile is a great alternative to granite slabs
1. Granite slabs are expensive
We all know it’s expensive to install granite in your kitchen. Not only do you need to pay for the granite itself, but you need to pay someone to install it. Altogether, you’re looking at at least $40 per square foot.
Granite tile, on the other hand, can be quite inexpensive. I got black granite tiles for $11 a square foot, and pretty brown ones for around $5 per square foot! Both from Home Depot.
2. Granite slabs are cumbersome to install
Unfortunately, even for the avid DIYer, granite slabs are a bear to install. They are super heavy and need to be cut to size with the appropriate tools. What’s more, the edges will need to be finished with a certain kind of profile and polished, which also requires special tools.
Personally, I’m always up for a challenge but, with the cost and difficulty this posed, I decided to look elsewhere!
On the other hand, granite tiles are installed like any other tile. They are much lighter, easier to cut (with a tile saw), and don’t require any polishing.
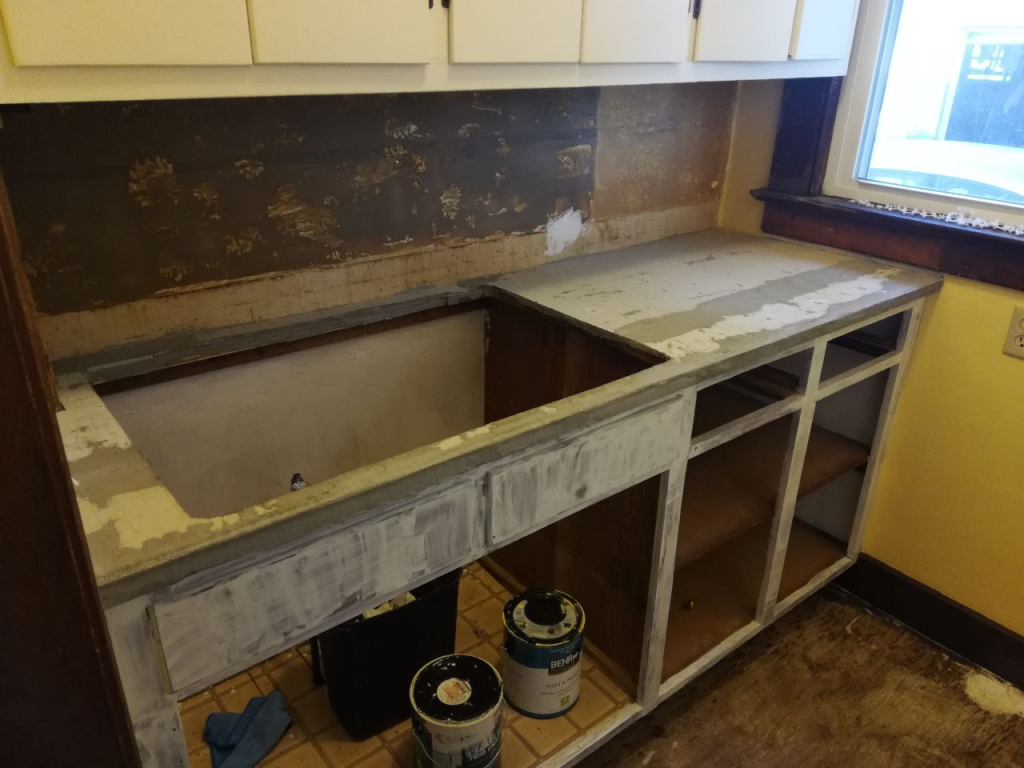
How we prepared our countertops for tiling
The one drawback with using tile is that it is definitely thinner and won’t stand alone on top of your cabinets like a granite slab would.
This means we needed to create a suitable surface (our substrate) to adhere our tile. We used a two-layer system: plywood screwed down to our cabinets followed by cement board.
Installing the plywood base
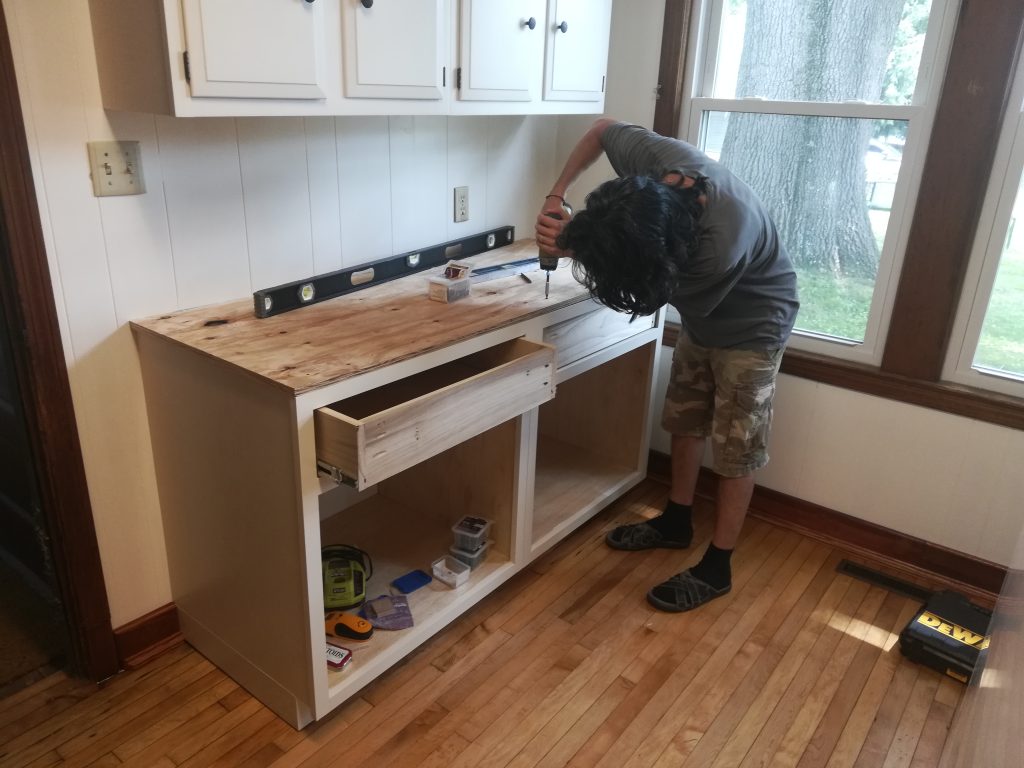
This picture shows my husband screwing down 3/4″ plywood with an impact driver to our homemade cabinets! Click here to read about how we made them.
It is important to mark where you actually can screw down your boards before beginning, as cabinets don’t just have a solid top. There are usually support pieces either in the corners or going across widthwise.
We knew that we were going to add cement board and tile to the edges of the countertops, so we kept the plywood on the shorter side to avoid the edges from hanging over too far in the finished product. See how it is basically flush with the cabinet?
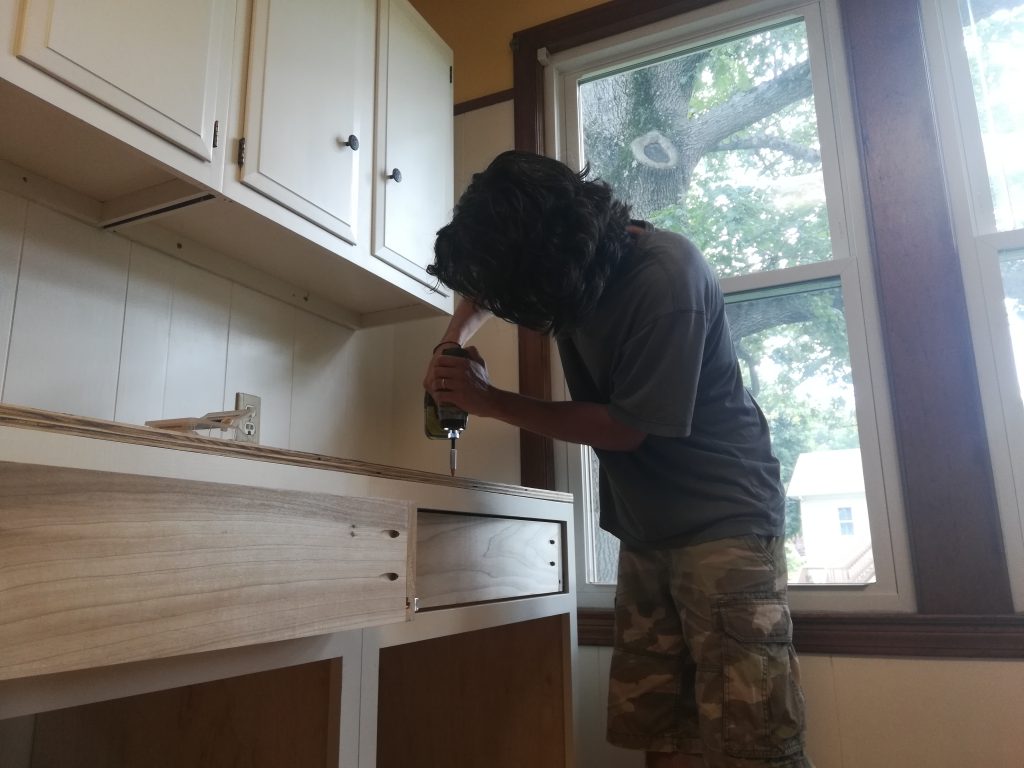
We screwed down plywood around our sink area, too.
Once we had the plywood down, the next step was to attach the cement boards!
Layering cement board over the plywood
You might be wondering we we didn’t just tile directly to the plywood. Sure, some people might do this, but my research has told me you’re much better off using either an uncoupling membrane or cement board between plywood and tile.
This is because wood and tile (whether it is ceramic or stone) expand and contract at different rates with temperature changes. If you tile directly to plywood, therefore, you are more likely to have issues down the road, such as cracking tiles or grout lines.
The great thing is cement board is super cheap! The bad thing is it is super annoying to work with. But it’s doable!
We used 1/4″ Hardiebacker fiber-cement board. We cut it to size, including strips for the edges of the counters. Then, we embedded it in a layer of thinset applied to the plywood and screwed it down.
The little edge strips need to be nailed in since they are too thin to be screwed. If you happen to have access to a pneumatic nailer, it will work better since it doesn’t require hammering which will often crack the cement board. (It’s very brittle.) But if you are careful, hammering still works.
You will also need to use fiberglass mesh tape and thinset to fill the gaps and seams between the cement board pieces, including the countertop edges. This helps to create a cohesive structure for the tile to sit on, minimizing gaps and movement of the cement board beneath the tile.
Simply fill the gaps with thinset using a putty knife or trowel, lay the mesh tape over it, and add a skim coat of thinset over the tape. Do you best to keep it as smooth and flat as possible. This essentially joins your cement boards together into a bigger piece of cement board!
Once we got to this point, the next step was to figure out our layout and start tiling!
Deciding on our layout for tiling countertops with granite
Before jumping into tiling, it’s always a good idea to consider the layout that works best for the space. Thankfully, tiles are easy to position on countertops to get an idea of where they will go best!
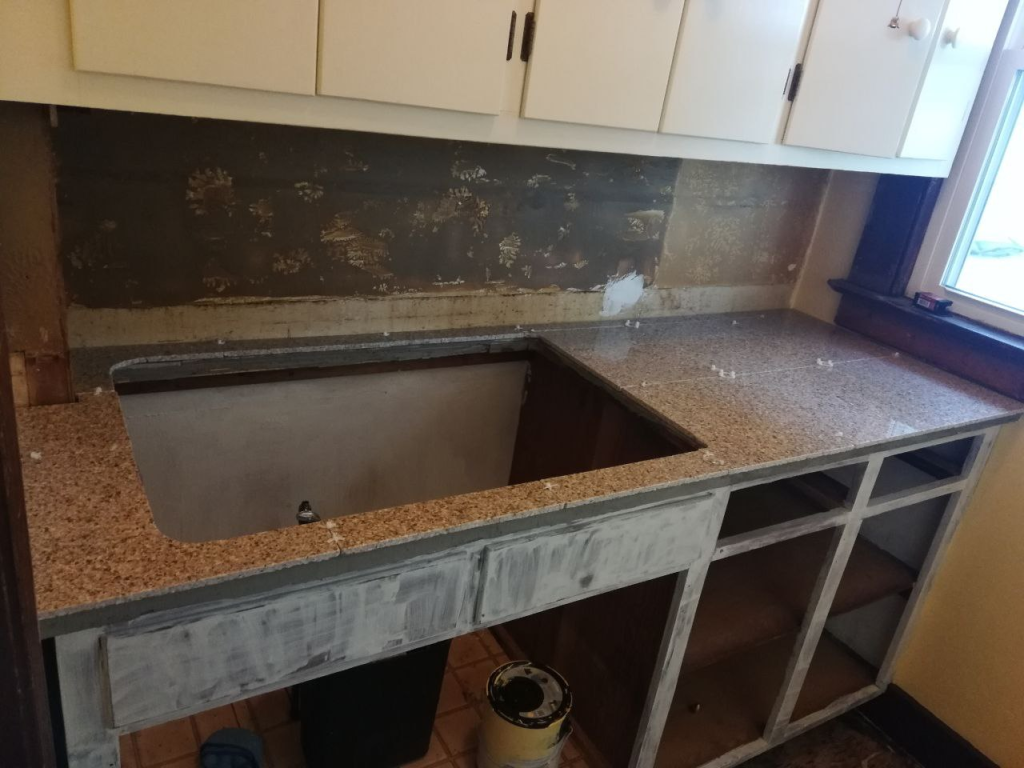
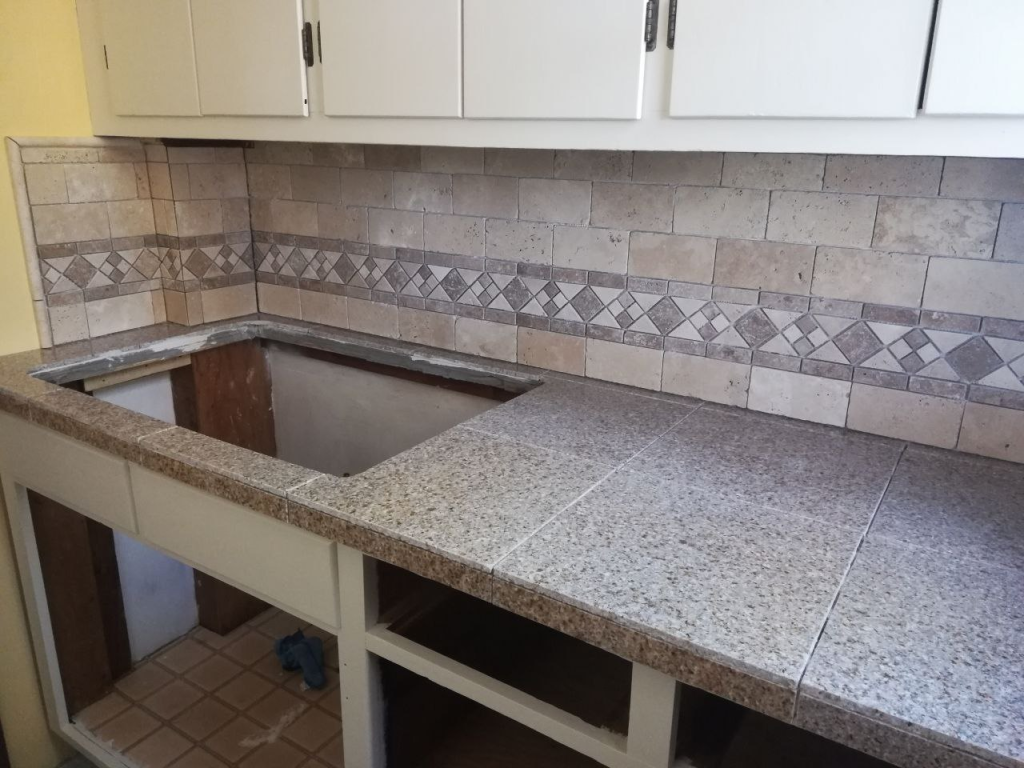
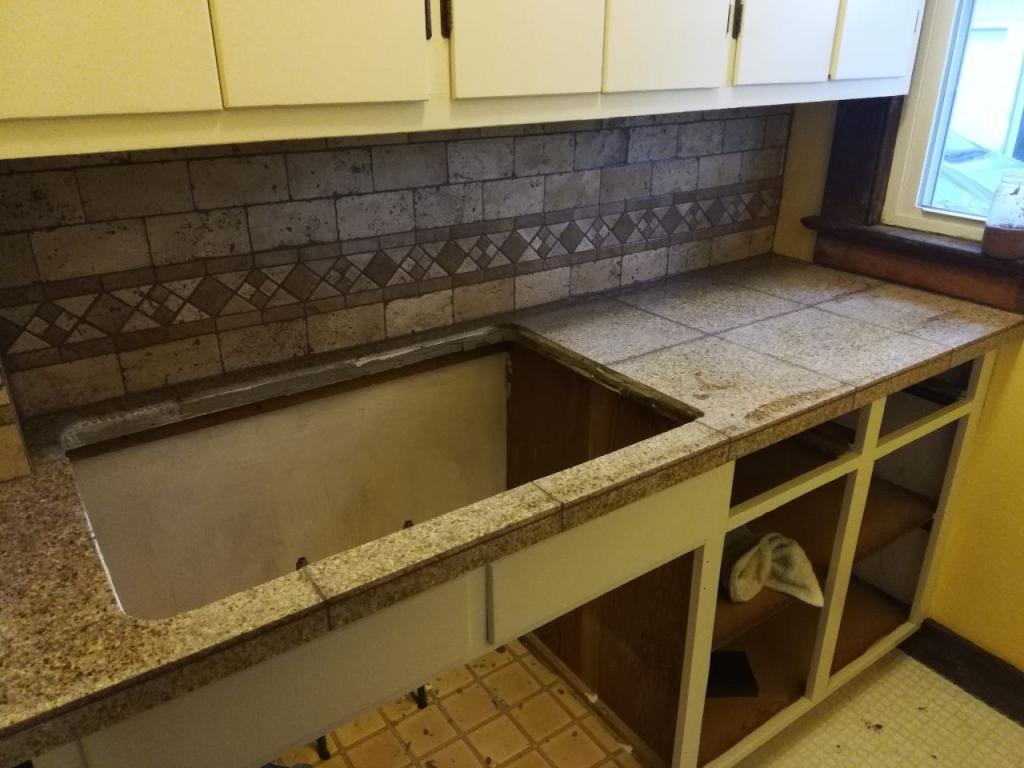
We wanted our tiles to overhang slightly so that they’d meet up with the little edge pieces we were going to install. Unfortunately, on one of our counters, this meant that two tiles fitting perfectly from the edge to the wall became two tiles plus a little strip. See what I mean? (There is a tiny gap between the tiles and the wall.)
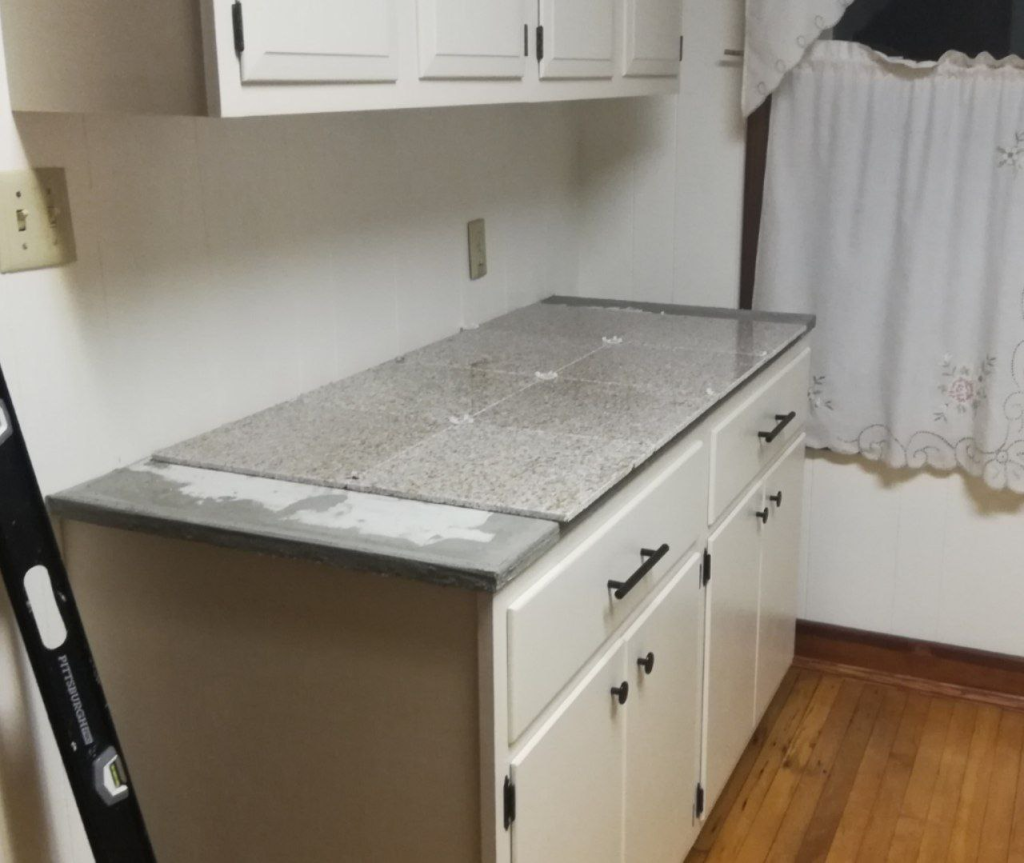
There are a couple of options when this sort of thing happens. You can widen the grout lines to account for it, but I really wanted to keep them as small as possible on my counters. Another option is to change the layout altogether and shift the tiles over by half, creating two larger cuts, one at the edge of the counter and one at the wall.
However, I did figure at some point we’d install a backsplash and it would pretty much cover the little strip of tile anyway. And I thought having two full tiles placed up to the edge would look better and was worth having the little strip in back!
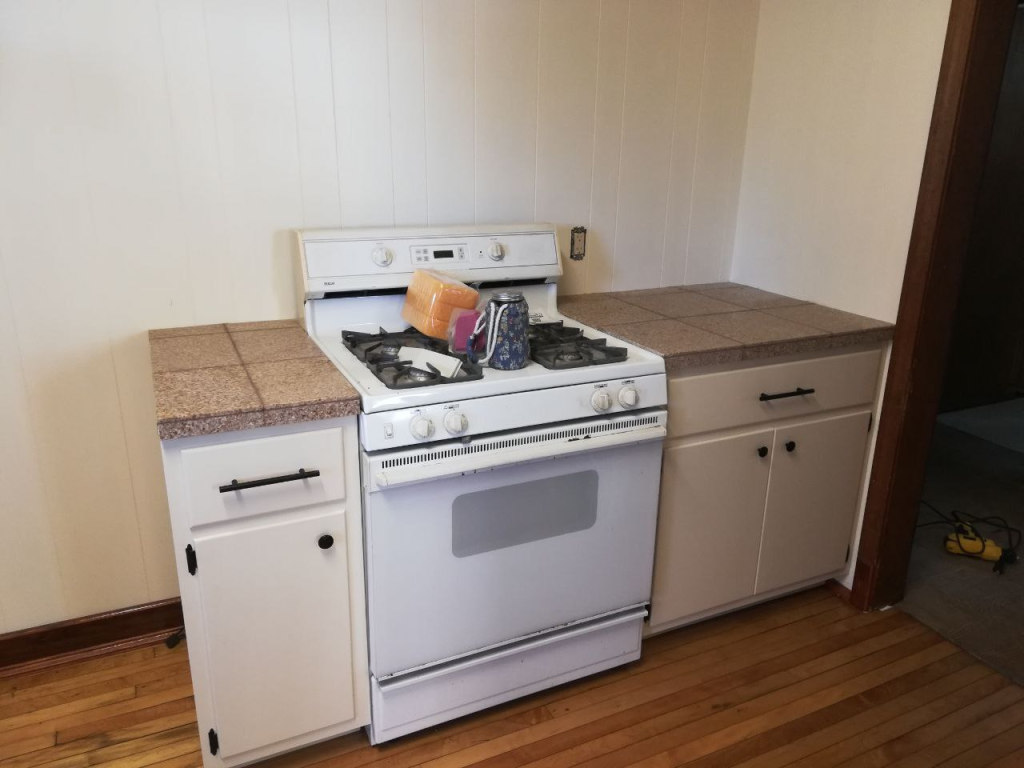
The other counters were a bit deeper than this one so, thankfully, we didn’t have as much of a layout problem. Though this little counter did require a bit of thinking, as it was just under one full tile wide. We decided to put the grout line down the middle and have two large cuts, rather than a full tile down the middle with sliver cuts on either side.
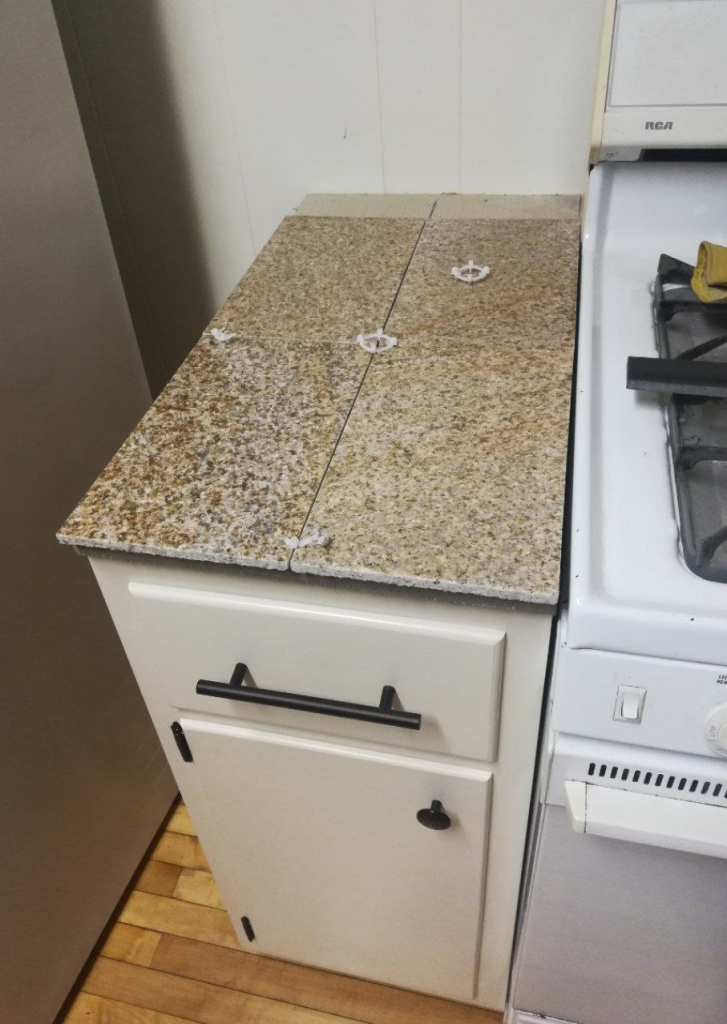
We used 1/16″ spacers for these tiles, which was a treat! That’s basically as small as you can go. These granite tiles are cut very straight and square so that allows for very small grout lines!
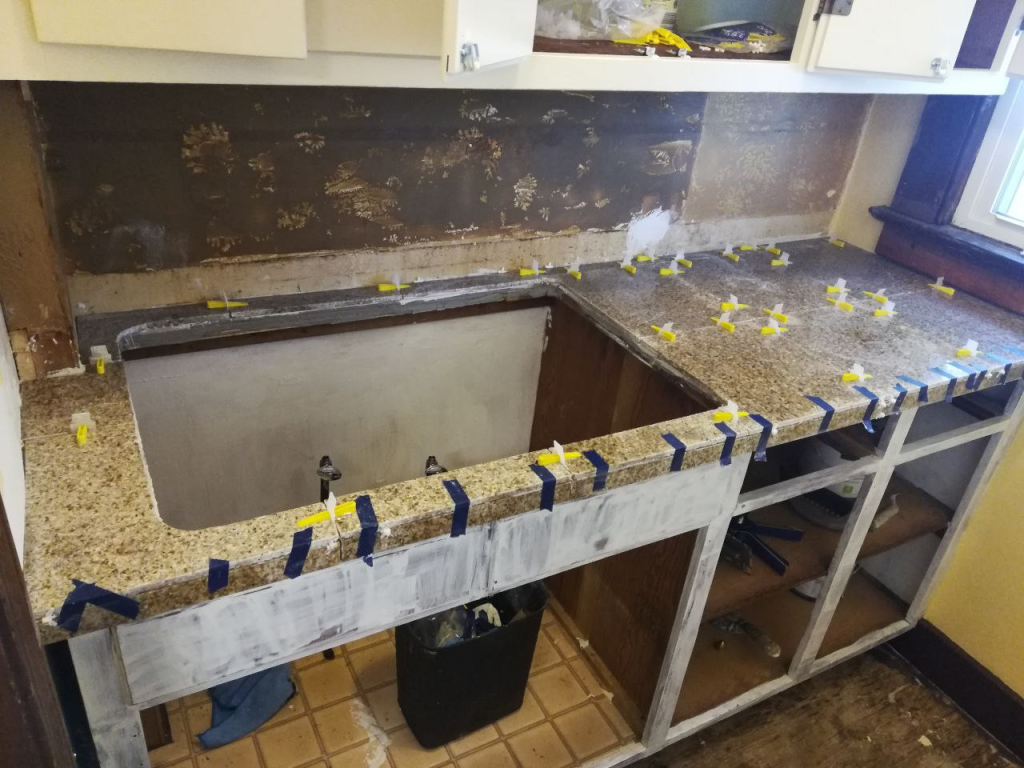
Here’s another picture of our tiles laid out before installing. We were able to make all of our cuts before beginning installation, which makes the process much easier. (Translation: less running to the tile saw while your thinset is drying!)
You can see we still needed to make the cuts for the tiles in back, which is why they’re sort of awkwardly propped up.
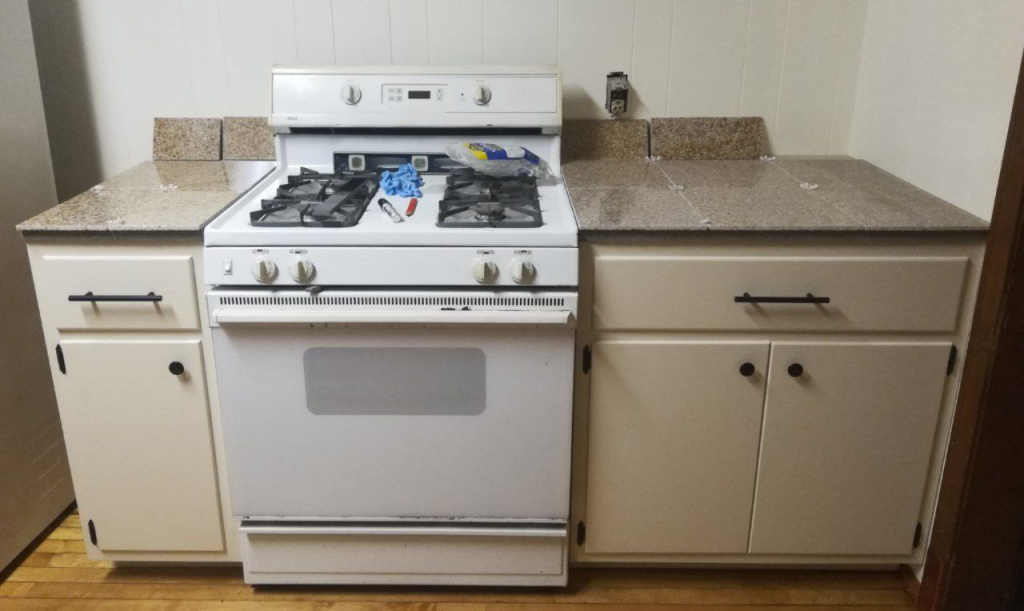
You can see in this picture that we have all the cuts made, even around the sink. The tile looks like it is installed in the picture, but it is simply laid out and ready to go!
We used my father-in-law’s fancy tile saw for all of this (thanks Papa!), but keep in mind that tile saws are very cheap to rent from the home improvement store for a day! I’ve rented the smallest one they have for I think around $30-$40. Just make sure you plan your layout and cuts ahead of time so you can get them done in one productive day of work!
Installing our tiles!
After we were done layering plywood with cement board and figuring out our layout, it was finally time to tile!
This part is pretty straight-forward if you have tiled before. The only part that is a little different is setting the little pieces of edge tile such that they don’t fall off. Stay tuned – I’ll show you my trick for that part!
If you haven’t tiled before, here is a brief overview of our process.
A general overview of the tiling process
- We mix up our thinset to a peanut butter consistency with our drill and a mixer attachment. They make a proper tool for this, instead of a drill, but we make do with our drill instead. We just make sure to keep it moving slowly as much as possible. You don’t want to mix thinset at a high speed!
- Using the appropriate trowel size, in this case a 1/4″x3/8″ square notch trowel, we spread the thinset on our surface to be tiled. We learned to hold the trowel at a 45° angle as we spread the thinset, and to only spread as much thinset as we can get tiles down within a few minutes of spreading. This is because the thinset can skin over if left spread for too long, which means the tile will not adhere to it when set.
- We set the tiles, one at a time, into the thinset. Slide the tile gently back and forth, perpendicular to the thinset ridges, to collapse them and create a full bond. Place spacers as you go. If your tiles are large, you might need to back-butter them before putting them down to get better coverage. These granite tiles were totally flat on the bottom, but we still added a skim coat of back-buttering. It’s probably not entirely necessary.

Using leveling clips for a super flat install
In addition to all of the above, we opted to use a floor-leveling system for our installation. These clips and wedges do a great job of keeping your tiles totally level with each other and eliminating lippage (when one tile’s edge is higher than the adjacent one).
Since this is a countertop, we especially wanted to make sure we got it perfectly flat. No one wants a bumpy countertop! It is quite hard to get tile SUPER flat, especially as a DIYer, without the leveling clips. Here are some pictures showing the leveling clips at work:
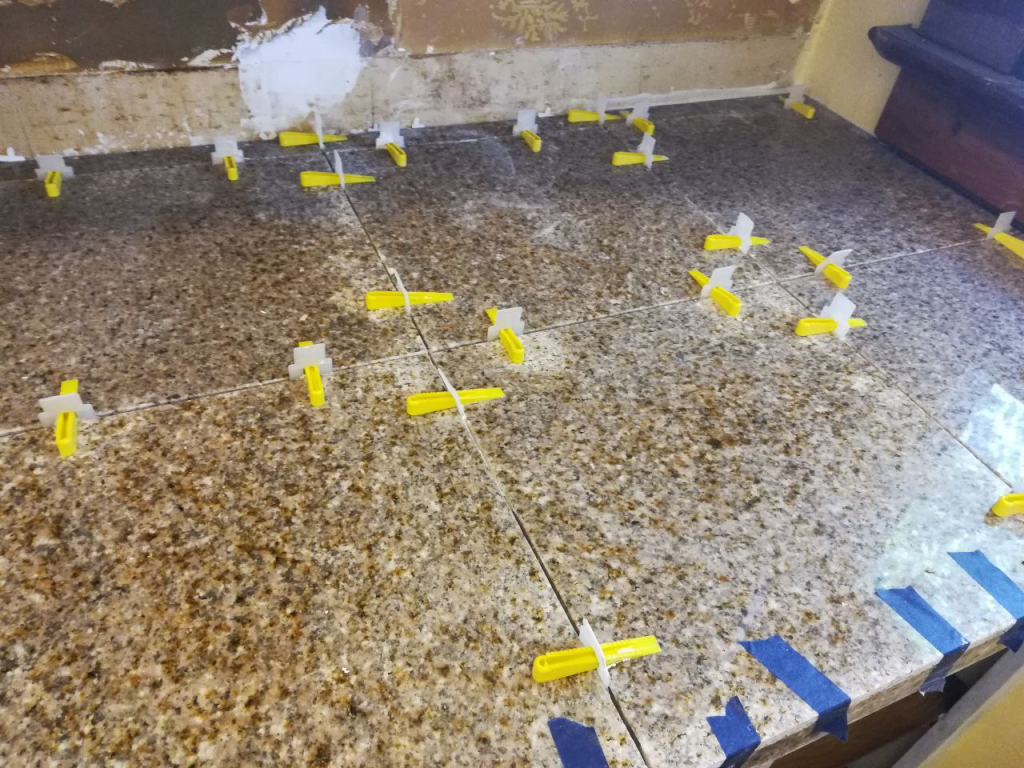
We used QEP’s leveling system with their tool to apply the wedges but, honestly, you can just use your fingers to apply the wedges and that’s often better anyway.
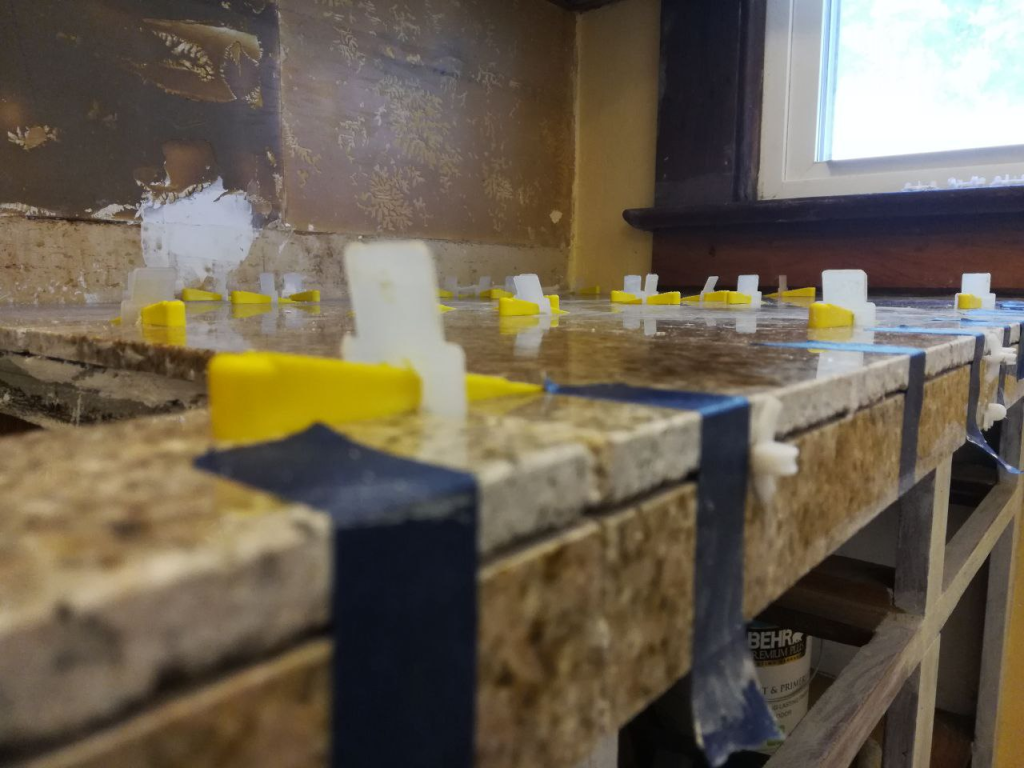
Installing the edge pieces
You can see in the picture above how we have little thin pieces on the edge of our countertop. These can be tricky to install, simply because gravity is not your friend on vertical surfaces!
Whenever I tile a wall or any kind of vertical surface, I always keep painter’s tape around. If you’re getting any kind of sagging, the tape can really ensure the tiles stay where they’re meant to!
To install each edge piece, we put our spacer between it and the overhanging horizontal tile, pushed the tile into the thinset, held it in place tightly, and used tape to secure it. This kept our tiles from sagging and maintained the tiny grout lines that we wanted!
Painter’s tape extra tip: I also use blue tape to mark my tiles for cutting at the saw! I find it to be an extra precise method and easy to see while cutting.
Preparing the tile for grout
After setting the tile, we waited a day and then came to remove the tape, spacers, and leveling clips. You remove the clips by hitting the yellow wedges with a rubber hammer. The tops of the white pieces simply break off, leaving the disconnected bottoms embedded and unseen in the thinset below.
At this point, there is usually a little bit of thinset to clean up as well. Inevitably there tends to be a bit of thinset haze on the tiles and a bit of excess thinset in the grout joints. The more we tile, the better we get at keeping our joints clean, but it is not easy!
I cleaned up this dried thinset with a box cutter and a wet microfiber cloth. The box cutter helps you get into the joints and break up any excess thinset where needed. The microfiber helps to get the tile nice and clean and ready for grouting.
Here are our counters all ready for grout!

Yes, we did put up that backsplash right after the countertop. We figured we’d grout them at the same time. Click here to read about how we installed this backsplash!
Grouting the granite tile counters
Now it’s time for grouting! Tile looks so much better after grouting, so I always look forward to seeing the finished result!
This is one of the only projects we did without epoxy grout. This time, we used a conventional grout. That being said, I highly recommend epoxy grout for all applications. It’s just better! Especially for countertops, it can be a good idea, since they can take such a beating and get stained quite easily. If you’re interested in the detailed breakdown of my epoxy grout method, you can check that out here.
Like I said, though, we used conventional grout this time. It is SIGNIFICANTLY cheaper, and there are high performance grouts out there!
We used Laticrete Permacolor grout. However, we later watched TileCoach’s video in which he tested the different types of grout. Ultimately, the Mapei Ultracolor performed the best, so that is what we like to use from now on if we don’t go with epoxy.
A general overview of the grouting process
- Mix up your grout according to the package directions. The mixing paddle we used to mix the thinset works well here. However, if you only have a small amount of grout to mix, you can mix it by hand.
- Spread the grout over the tile with a grout float and pack it into the joints. Make sure you really push to completely fill the joints.
- Use the edge of the grout float as a squeegee, holding it perpendicular to the tile, and clean excess grout off. Move at a 45° angle to the grout lines to avoid pulling grout from the joints.
- Wait for the designated amount of time the package states, or until you can see the grout has hardened up a bit. It should darken slightly and that is how you’ll know it is ready to be cleaned.
- Clean up the tiles with a sponge and water. You’ll want a nice big grouting sponge and a big bucket of water, as you’ll need to continually rinse your sponge. Work in circular motions and shape your grout joints, doing your best to leave them nice and full. Be sure to get up any stubborn grout from the face of the tiles!
- Come back the next day and buff the tiles to remove any remaining haze. You can use a bit of water at this step, and I would recommend using a microfiber cloth.
Here are some pictures taken immediately after washing the grout:
The final step: sealing your granite!
Whenever you use natural stone, please know that it needs to be sealed. Arguably, especially with more porous stones, it can be a good idea to seal before grouting to avoid any staining.
In our case, however, these are polished granite stones and staining was not a problem.
We applied an (expensive) stone sealer and impregnator to our countertops and travertine backsplash. You basically brush it on, leave it for a little while (read the directions), and then wipe it off. You can do it a couple of times to really ensure you’ve sealed your counters well.
Doing this step after grouting meant that the conventional grout we used was also sealed.
One last detail… the countertop edges
Something else you might have wondered is what we did about those raw, unpolished edges of our tile at the edge of the countertop. See what I mean here?
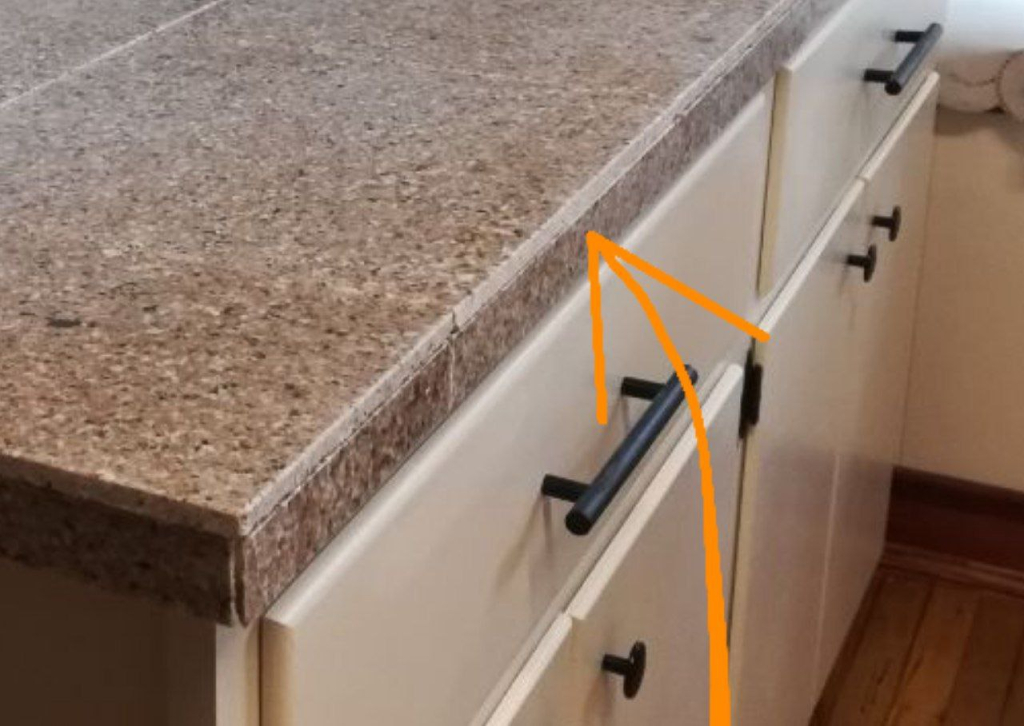
Well, enhancing sealers leave the tile looking wet after they’ve been applied. I noticed, when cutting the tiles, that the edges matched the polished part of the tile just fine when they were wet.
So, I decided to simply apply this sealer to the edges to help them blend in! No, they’re not perfectly smooth to the touch, but it was more the visual aspect I cared about here. This was the resulting effect:
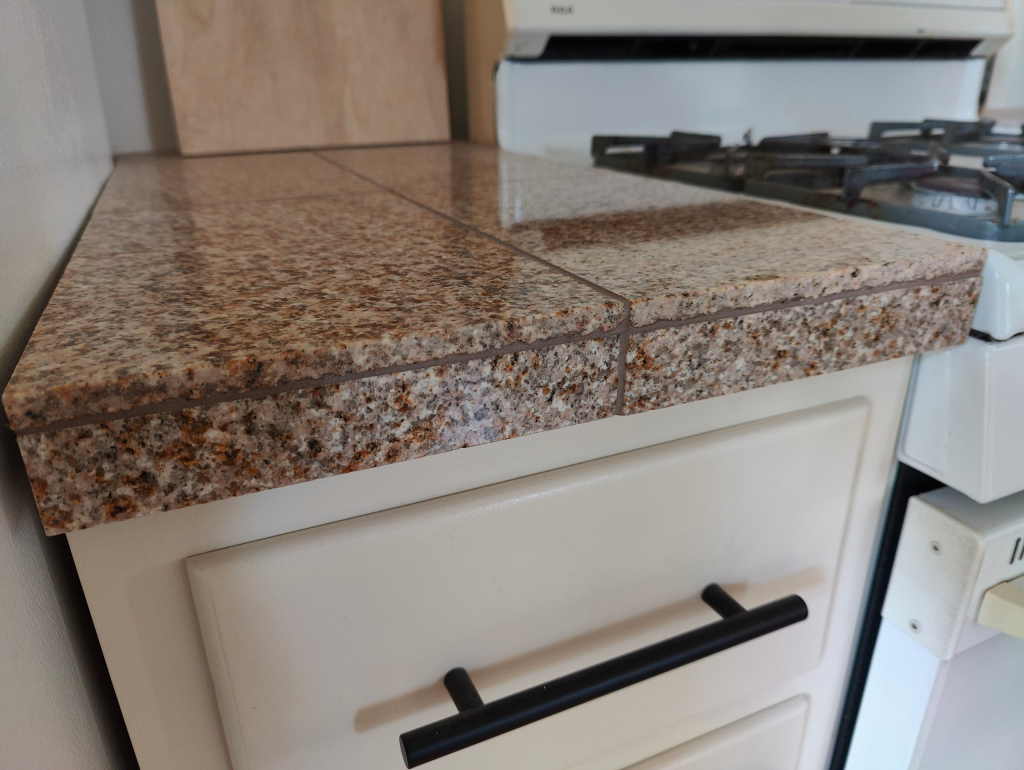
See how nicely it blends in now?
And now that this step was complete…
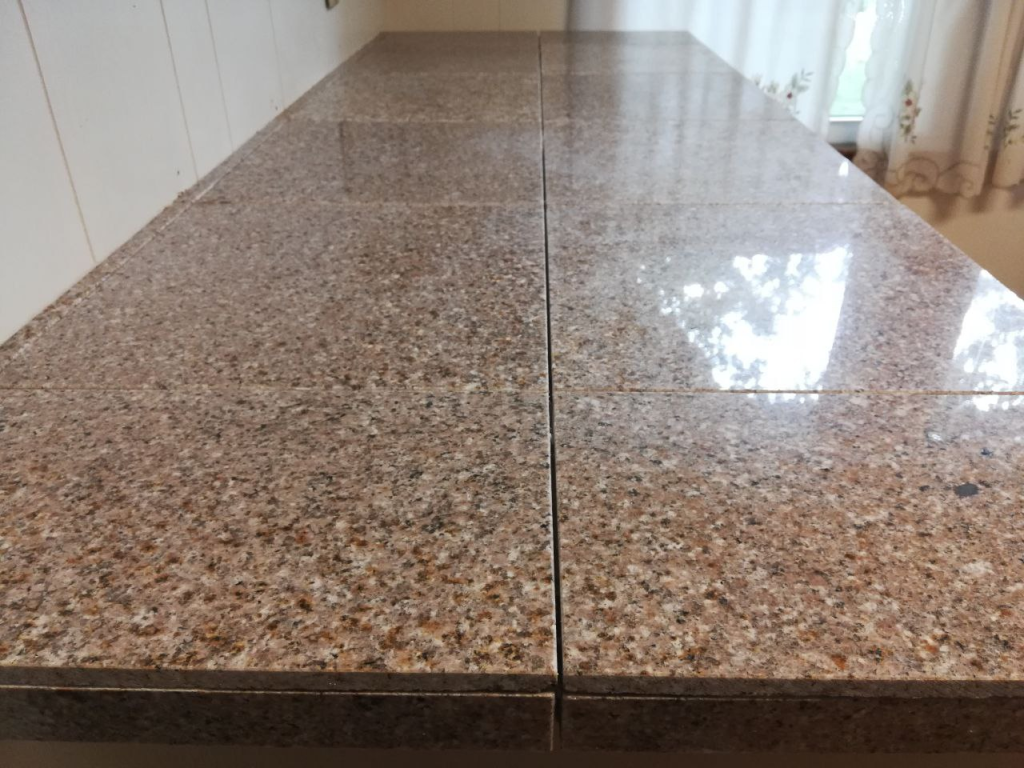
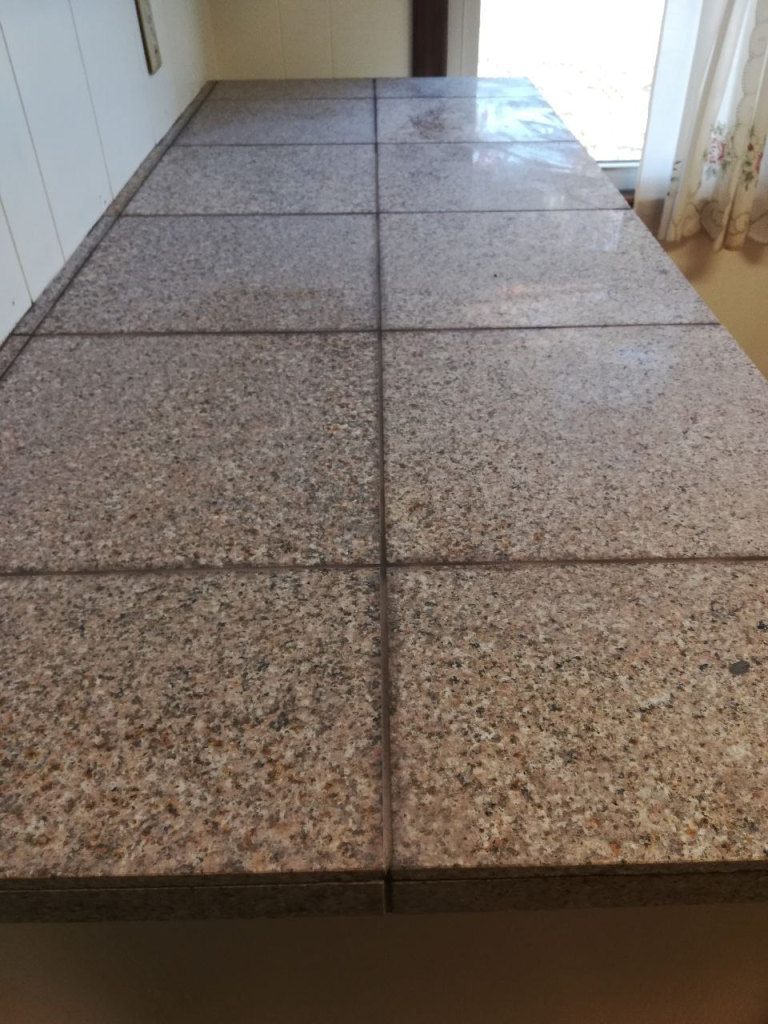
We’re done tiling our countertops with granite!
Here is the final result!
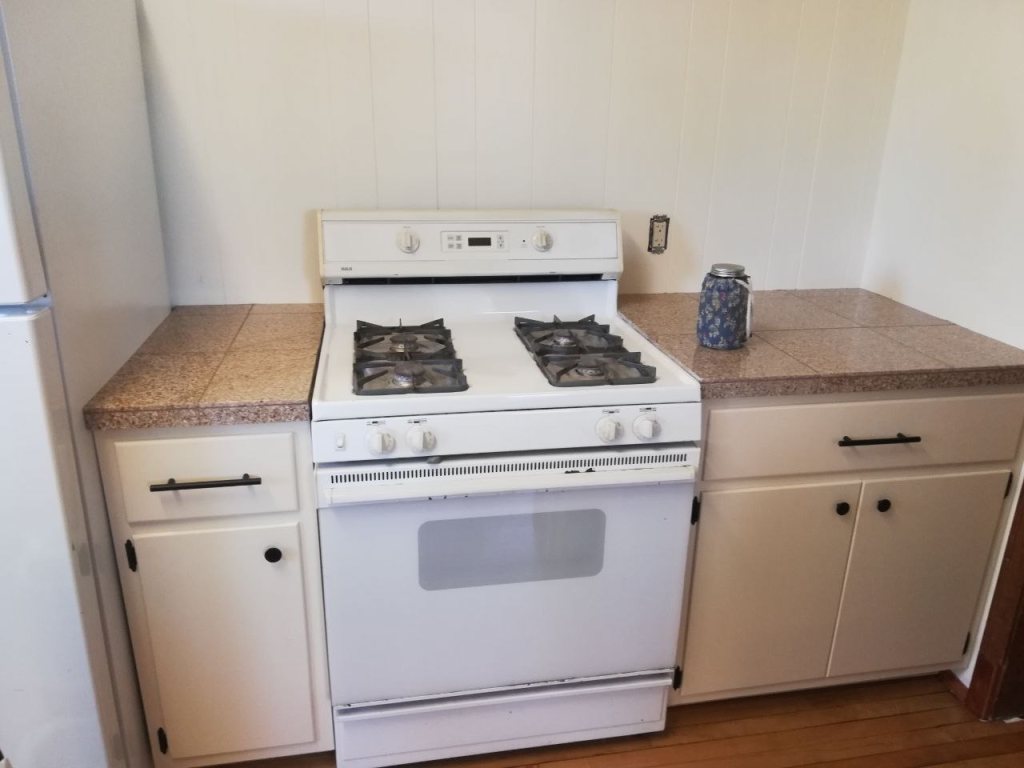

And I promise you, this did not cost us much more than $100, if that!
So, if granite slab counters are not in your wallet’s future, now you know a very cool alternative! I’ll admit, nothing will beat having beautiful granite slab countertops, but this is a close second! I love the feel and look of natural stone, especially on countertops!
If this post was helpful to you, I’d love to know! Shoot me a comment down below! Or, if you have any questions, don’t hesitate to ask! I wish you all luck (and patience) with your home improvement projects!