
I started making my own super simple DIY dish soap bars and I LOVE them!
Disclosure: I am an Amazon affiliate and this post contains affiliate links, which means I may earn a commission (at no extra cost to you) if you purchase products mentioned.
Recently, I was about to run out of the dish soap bars I usually buy… when I decided to do some research on making my own DIY dish soap bars! And, to my surprise, it was totally a thing!
If you follow my blog, you know that one of my biggest passions is learning how to make new things. I absolutely adore it! I love the feeling of satisfaction and the empowering sense of self-sufficiency it gives me!
So, I’m super excited to take you guys along on my journey of making solid soap for the first time, specifically dish soap!

Why use a dish soap bar?
If you haven’t heard of dish soap bars before, you might be wondering why on earth someone might want to use them. Especially in America, liquid dish soap is certainly the norm!
Well, when I was really into zero-waste stuff and trying to make my life more eco-friendly, I quickly realized that soap bars in general are more compact and require less packaging than liquid soap.
I even use shampoo bars in place of bottles of shampoo, and they take up so much less space and last for around the same amount of time! And they come in a little cardboard box instead of a plastic bottle.
Though not technically true, I think of solid soap as a more concentrated version of liquid soap. Just lather with water and it’s basically the same thing! Though there is a learning curve and adjustment period with getting used to dish soap bars, I actually find the bars are easier to use than bottled dish soap!
Making DIY dish soap bars is a SUPER simple process!
If you have used dish soap bars before, you’ll be thrilled to know that making them yourself is actually really easy! And cheap!
Personally, I did not expect this, since the bars I was buying seemed to have a complicated list of ingredients. I knew making soap was relatively straightforward, but I thought that a dish soap must be more complicated. But it wasn’t! And the one I ended up making actually works better than the one I was buying! Sometimes simpler ingredients are better, agreed?
And if you’re like me and you love ingredient lists which are as short and simple as possible, you’re going to love the ingredients for these bars!
The basic ingredients
All that is required to make these dish soap bars is:
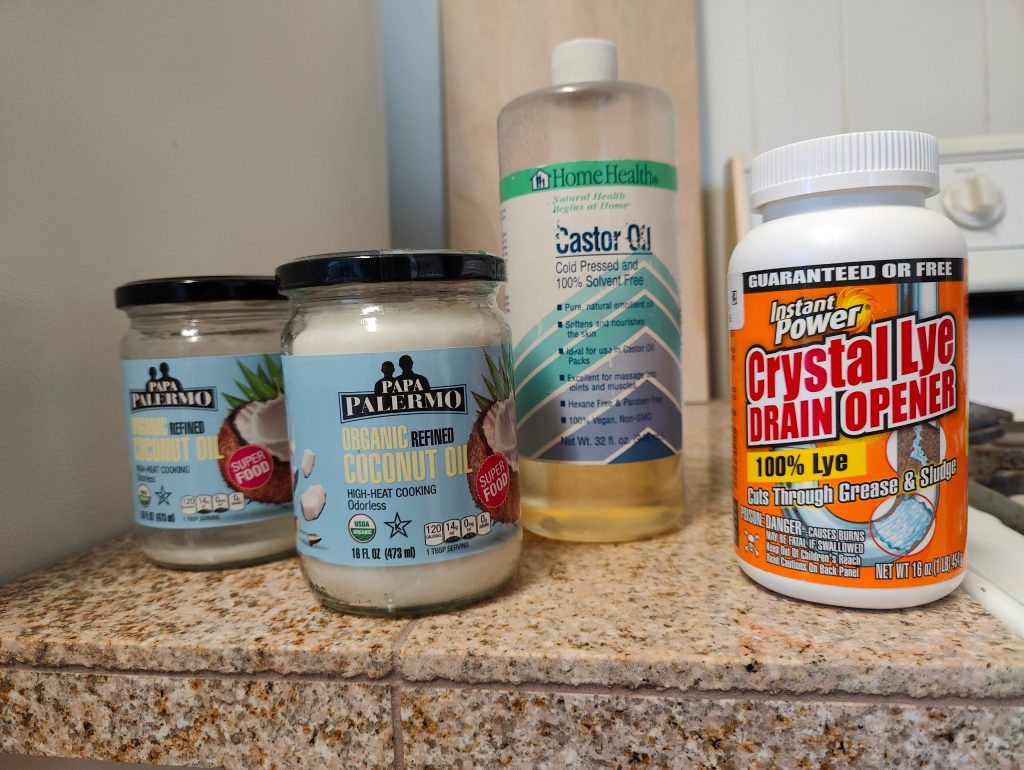
- Coconut oil (refined is cheaper and works fine)
- A bit of castor oil
- Essential oils of your choice
- Water
- Lye (sodium hydroxide)
Where to get the lye
When it comes to purchasing your lye, there are types which are specifically sold for soap making, but they are more expensive. In reality, all you need is something which says it is 100% sodium hydroxide. That’s why I went for the super cheap drain cleaner version (lye is also used as a drain cleaner) which I linked in the list above.
Lye: Why you don’t need to be afraid of it!
With all this talk of lye, you might be getting nervous at this point. And it’s true: Lye is extremely caustic and dangerous if mishandled. So, of course, a lot of naturally-minded people who don’t want toxins near them don’t want to use it. However, there is a bit of nuance here, so bear with me!

Lye is actually quite natural, it’s just also dangerous. In chemistry, it’s called sodium hydroxide (NaOH). And while it is caustic and can burn you in its raw form, once it is used in making soap, it is chemically converted into something totally harmless.
Saponification: The transformative power of chemical reactions
Think of salt, which is sodium chloride (NaCl). Both of those elements, sodium and chloride, are harmful on their own but, once they are chemically merged together, you have something that is harmless and actually necessary for human survival.
So, when you are making your soap, you definitely will want to wear the necessary protection while handling lye, but no lye will be leftover once the soap is made! This is because the chemical process of saponification has converted the oils and lye into a totally different substance – soap!
Saponification is when oils/fats are combined with something extremely basic, such as lye, which causes a chemical reaction that converts the ingredients into soap.
So, I hope that clears up any concerns you might have about lye. It is totally necessary for creating soap in the first place, so you can’t really get around it!
What materials did I need to make my dish soap bars?
When it comes to investing a little bit of money, the ingredients we discussed above are definitely not going to break the bank! Instead, it’s more the equipment you’ll use that might cost a little bit up front. But it’s not terrible! We’re talking maybe $50 max, and that’s if you don’t already have an immersion blender.
Here’s what you’ll need:
- Kitchen scale to precisely weigh your ingredients
- Stainless steel pot to heat/melt your oils and mix your ingredients
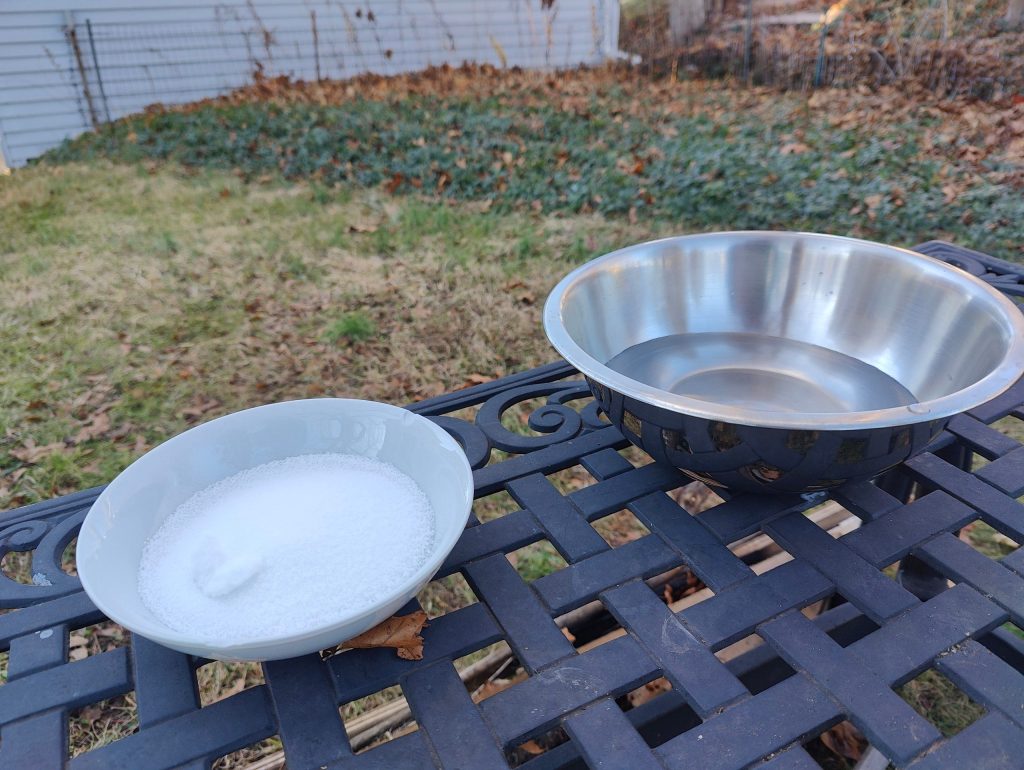
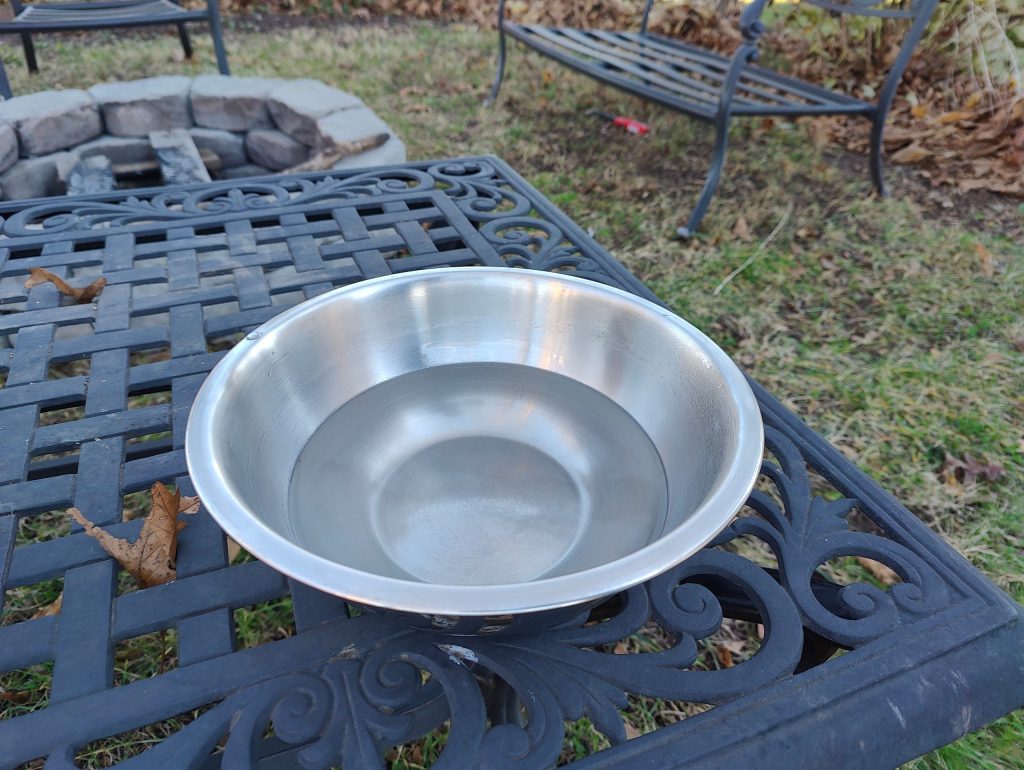
- Stainless steel bowl to mix your lye and water
- Stainless steel utensil (an ordinary spoon is fine) to mix lye and water
- Thermometer for checking the temperature of oils before adding the lye
- Immersion blender to mix lye solution and oils
- Rubber/silicone spatula to get every bit of soap out of your pot and into your molds!
- Soap molds to pour your soap into
The only thing I needed to buy was the soap molds!
Soap molds: The options are endless!
Personally, I was used to big blocks of dish soap rather than bars, so I opted for these big rectangular molds which would allow me to chop the soap into exactly the size I wanted. They even came with the cutting tools!
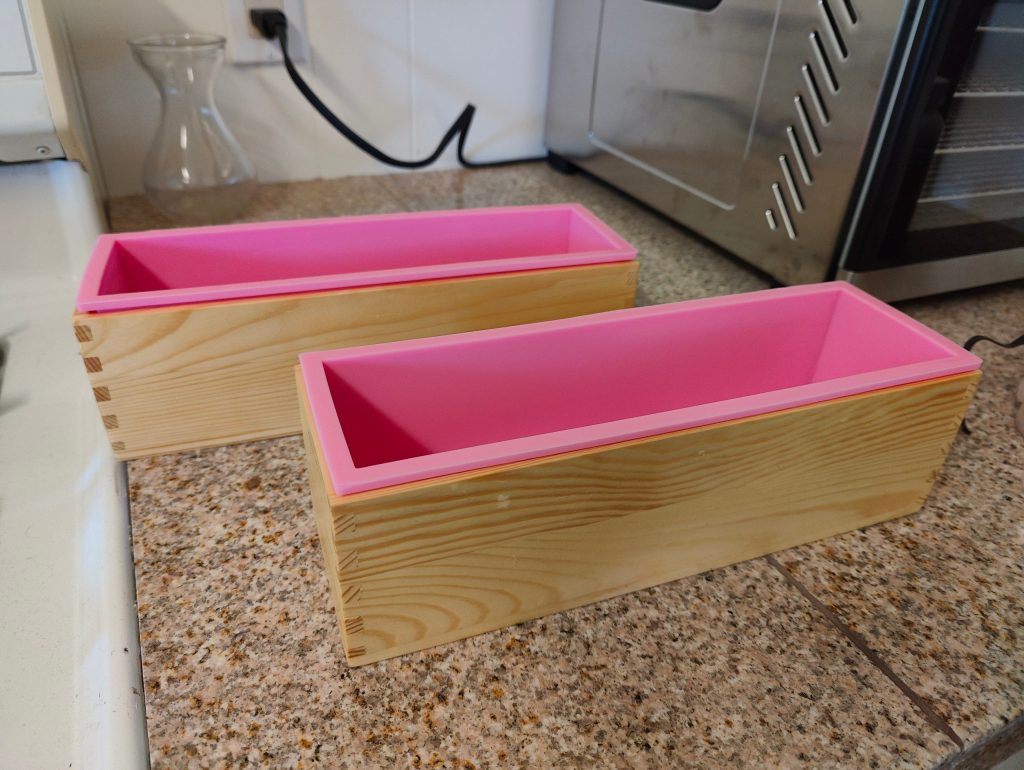
But, when it comes to soap molds, there are SO many out there! I have even found a couple silicone molds at Aldi which are intended for baking that I picked up for soap making. I’m super excited to make Christmas soaps for my family with this one in a few days!

And if you type in “soap mold” on Amazon, you’ll find so many different ones with beautiful designs, or other ones similar to the one I linked. Figure out what works best for you!
Making the DIY dish soap bars!
Once I had acquired my soap molds, lye, and oils, I went to work and prepared to make my soap!
Getting the oils ready
I made sure I knew the whole process from beginning to end, because certain steps in soap-making can be time-sensitive.
I had my molds ready on the counter, and began by weighing the coconut and castor oils and melting them gently over the stove.

Then, they needed to cool, so I let them chill until they reached 100°F.
Mixing the water and lye
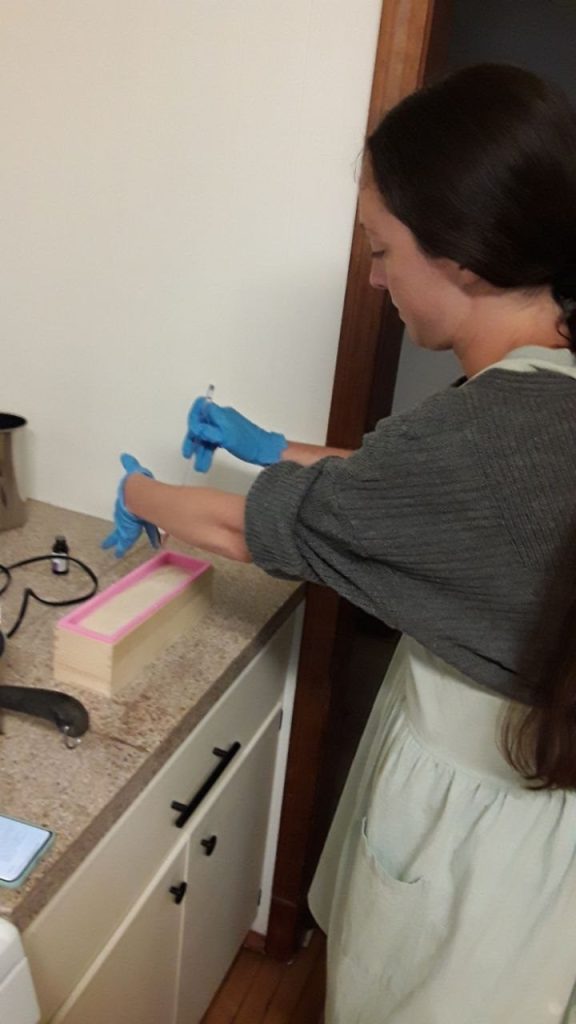
As the oils were cooling, I donned my safety goggles, apron, and long rubber gloves. Yes, I did feel like I was back in chemistry lab!
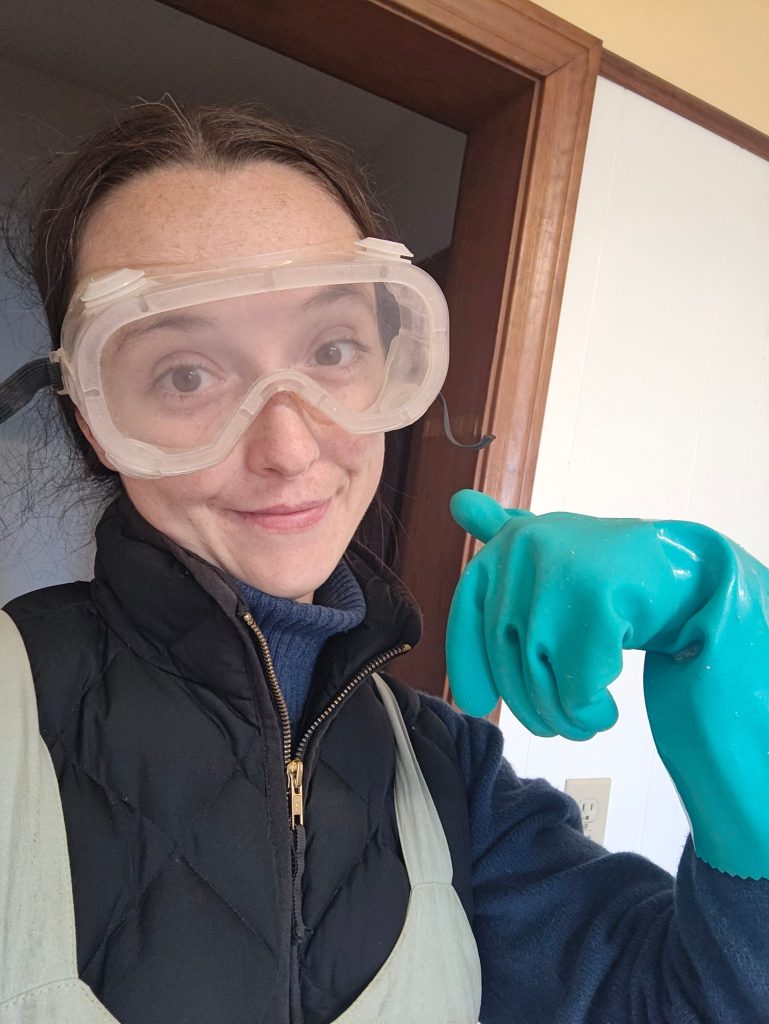
Then, I measured the correct amount of water into my stainless steel bowl and the correct amount of lye into a separate bowl and took them outside along with my spoon for mixing.
I slowly added the lye to the water as I mixed with the spoon. It’s very important to add the lye powder to the water, not the other way around! The solution started out very cloudy but, eventually, it turned clear. As the lye was added to the water, it generated a LOT of heat, so I was careful to not touch the bottom of the bowl. I let it cool outside for a bit. It didn’t take very long because it was November in New England, hah!

Mixing it all together
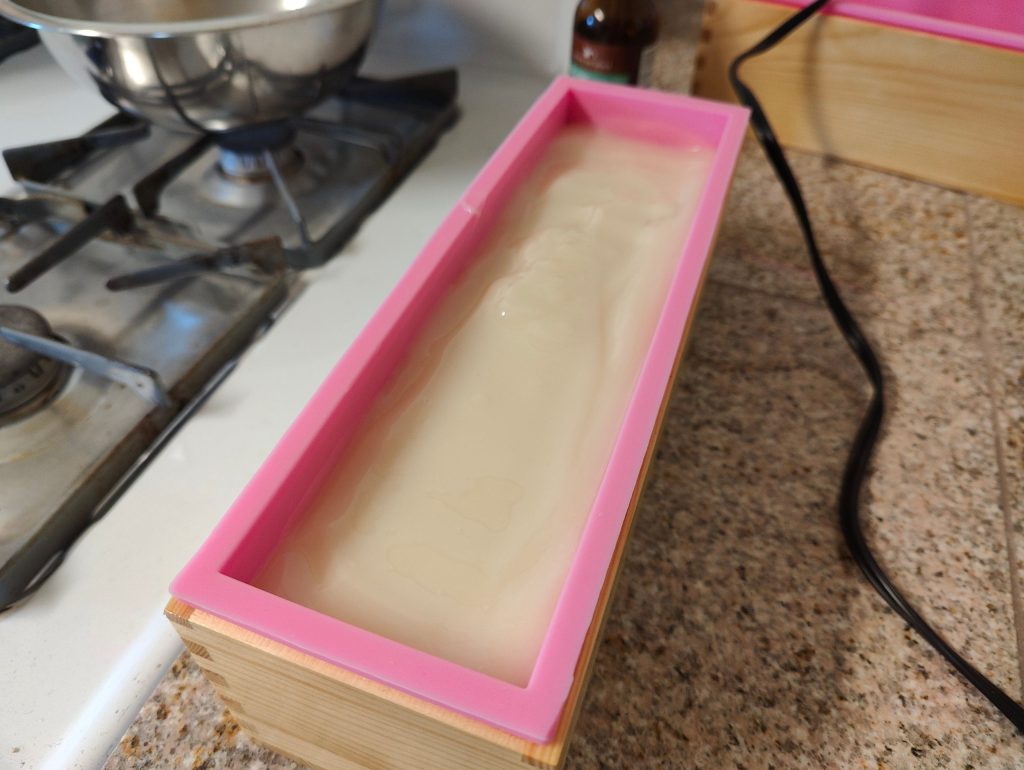
Once the oils were at a temperature below 100°F, I added the lye to them, then blended them with my immersion blender. In seconds, the mixture saponified and became thick. I quickly added around 20 drops of lavender essential oil, blended briefly, and then… it was time to pour it into my mold!

Transferring to the mold
I had a silicone spatula handy to get every last bit out of my pot and into the mold. I only required one of my molds for the amount of soap that this recipe made. Next time, I’ll likely double the recipe to make a big bulk batch!
I was surprised at how quickly the soap hardened, and how strong the smell was! My whole kitchen smelled like lavender!
I took the mold and wrapped it in a full-sized towel to keep the heat in. Apparently this can prevent cracking as the soap cures and cools.
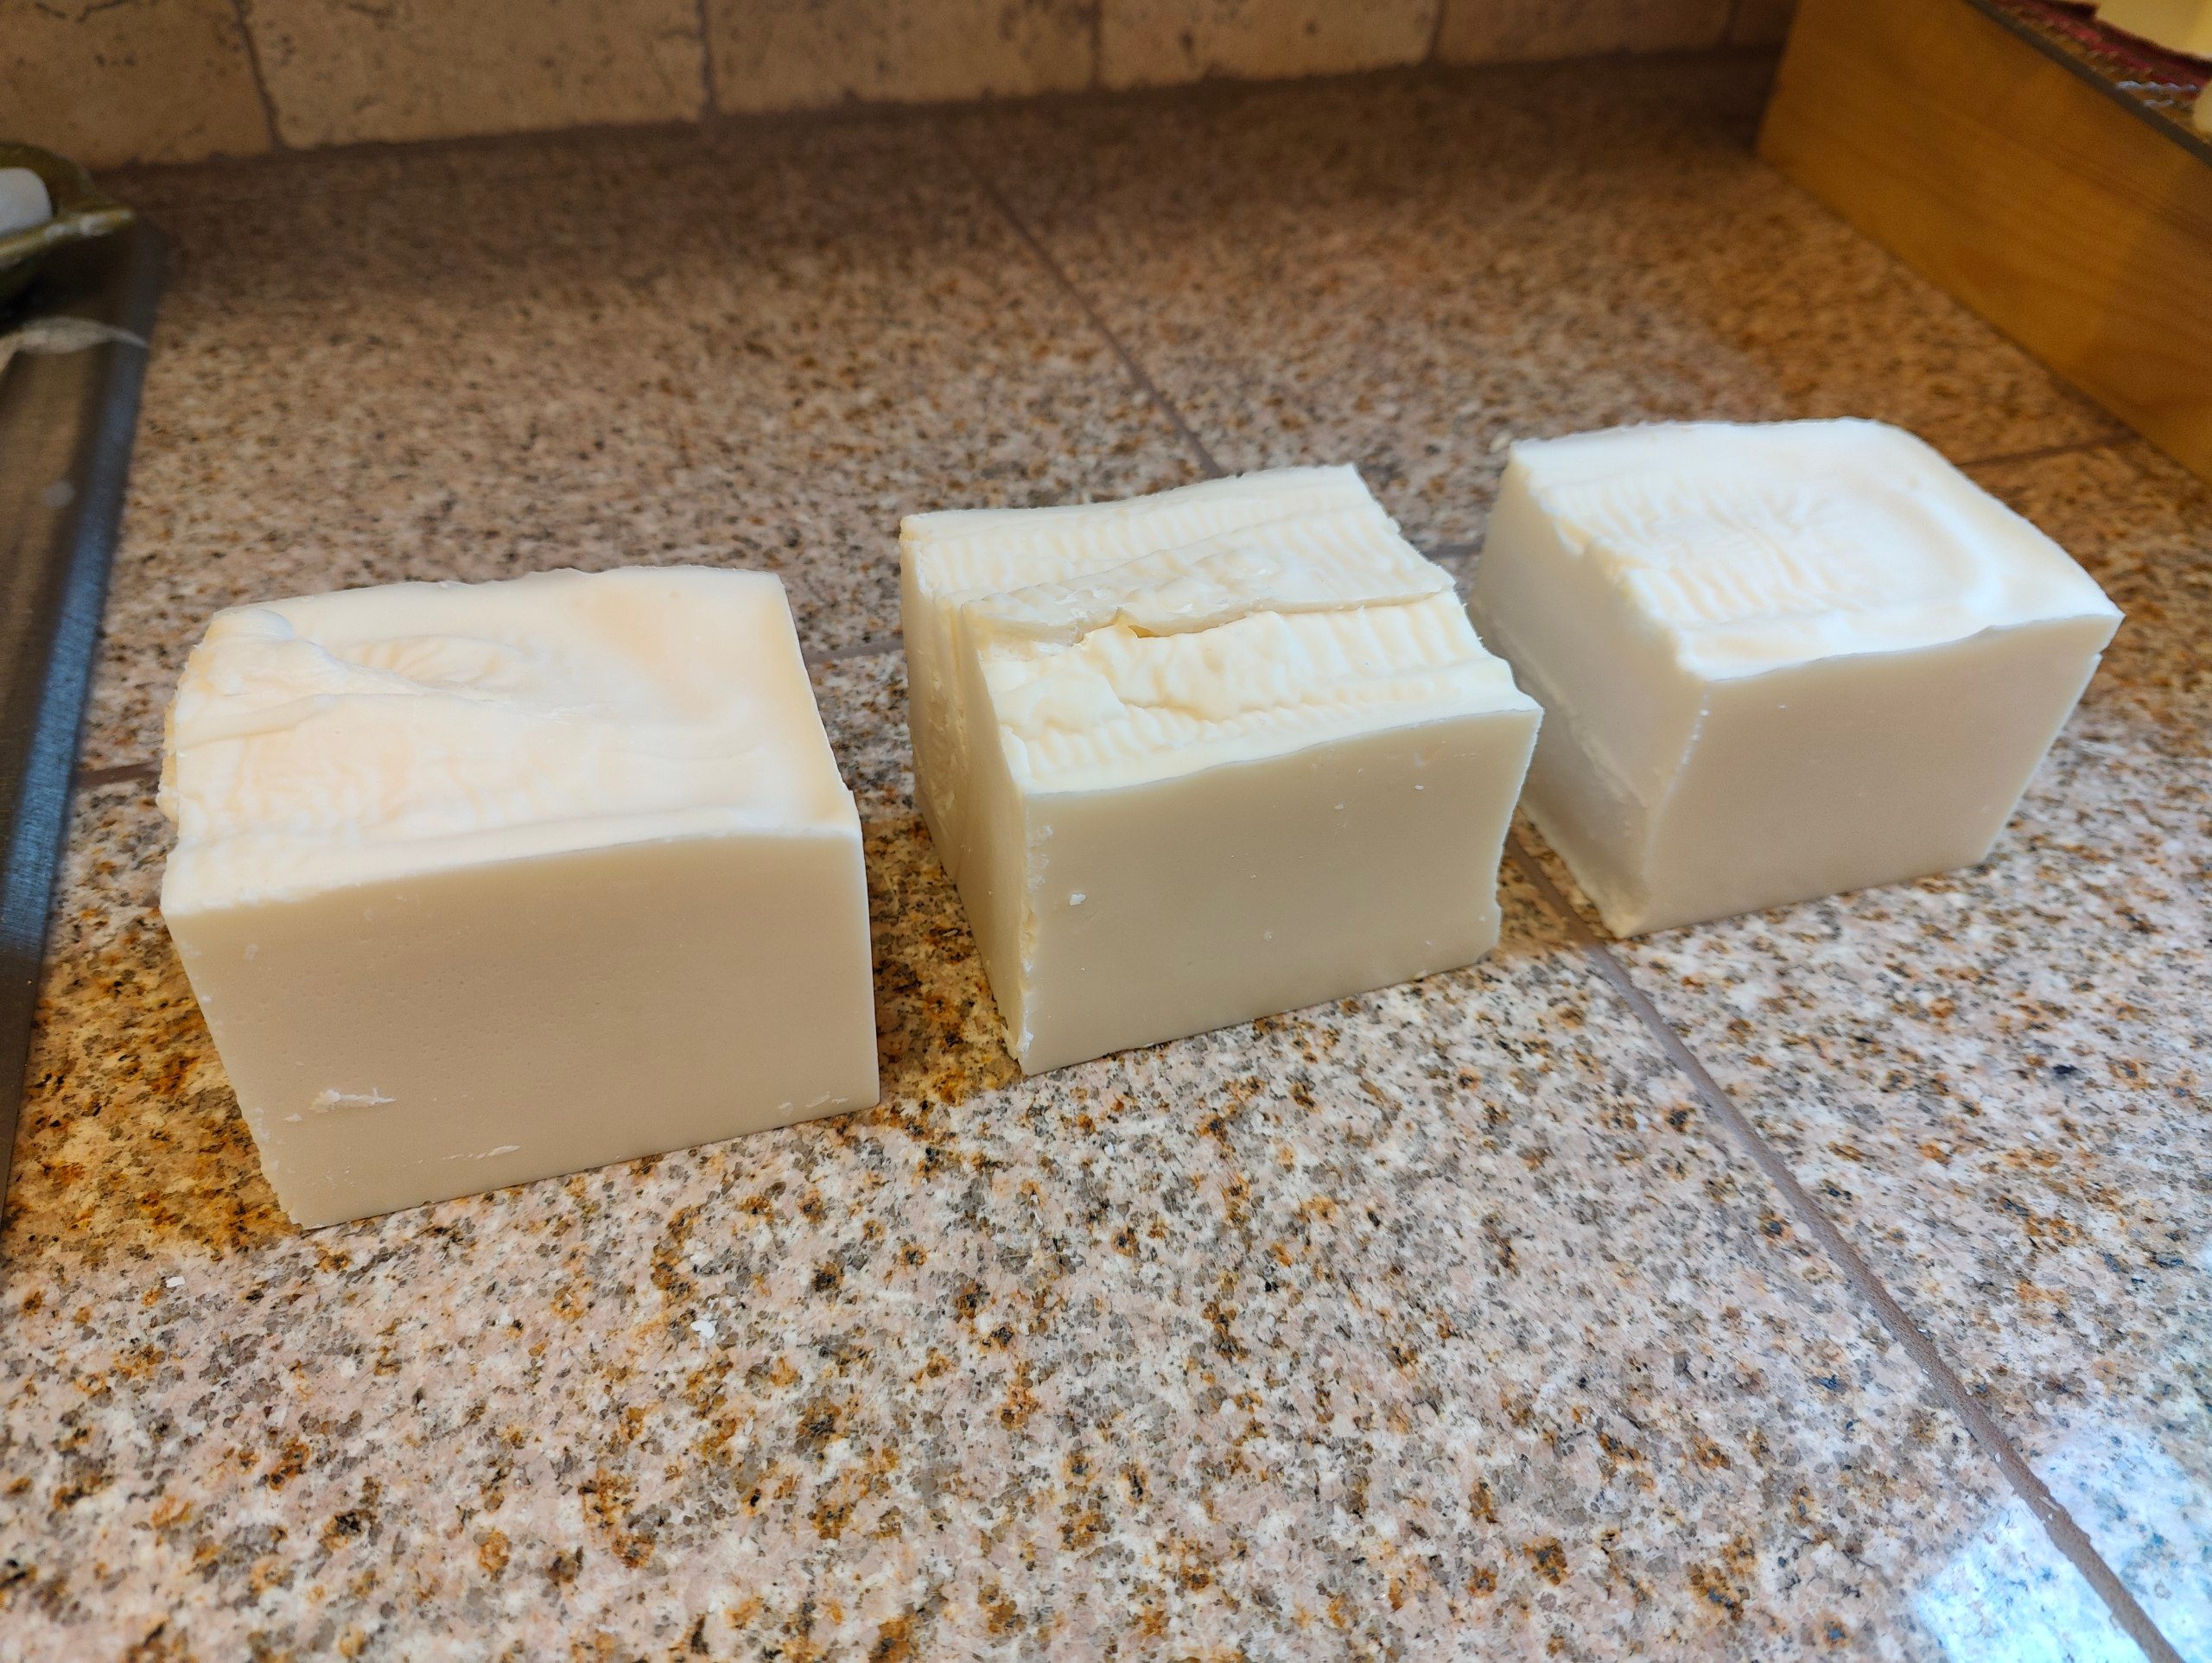
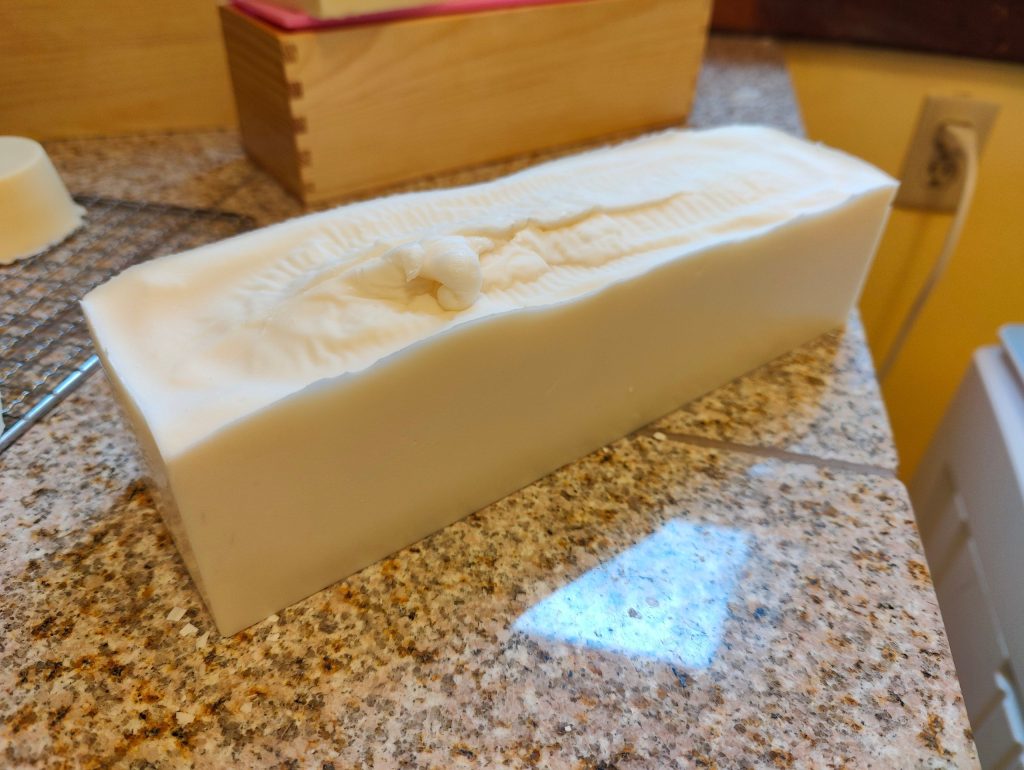
Demolding and cutting my soap!

The next day, I came back to remove the soap from the mold. You’ll notice in the picture above that the soap sort of expanded at the top and cured a bit bumpy. This is totally fine and won’t affect the performance of the soap, but you could totally use a soap cutter and smooth it out if you so desire.
At this point, the soap was still soft enough to be easily cut into the desired pieces I wanted. I decided to cut my long loaf into three big pieces which were similar in size to what I was used to. I simply did this on my wooden cutting board!

I prefer big hunks of dish soap so I can rub my sponge on them without them moving around as much.
Waiting for my soap to cure
Unfortunately, there is a bit of patience required with soap-making, as these soaps were not yet ready to use!
Soap actually needs time to cure more fully. I waited a month and, apparently the longer you wait, the more fully cured it becomes! Cool, right?

Finally using my DIY dish soap bars!
After a month had passed and I went to use my dish soap bar, I was completely amazed! The lather I got from it was far superior to the soap I was already using, and it cleaned my dishes so well! I seriously didn’t expect this at all, as the recipe I used was so simple compared to the ingredients of the dish soap I’d been buying!

I don’t know why, but I genuinely thought these dish soap bars would leave some kind of residue on my dishes since they’re basically just straight up soap. In contrast, I don’t think the commercial bars I had been using were technically soap, but more of a detergent, so I was worried an actual soap would pose issues. But see, this just goes to show that complicated isn’t always better. Sometimes simple is all you need! And making bar soap could not be simpler!
Calculating soap recipes
If you’re a math person like me, you might be interested in this section! If not, you can always skip to the recipe down below!
Since I love all things math, I was very interested to learn about how the amounts of each ingredient are calculated in soap.
This DIY dish soap bar is basically just a super strong type of ordinary soap. It would be too strong to use as a body soap, for example.
What makes it super strong are two things: it has very minimal leftover oil once made, and it is made with coconut oil which is extremely cleansing.
For more gentle soaps that are good for the body, you can actually “superfat” a soap, which means you use slightly more fat (oil) than required to saponify the lye. This leaves a bit of oil in the final product which helps to moisturize and is gentler on the skin.
This dish soap is basically calculated by using close to the exact amount of lye (but slightly less, just to be safe) you’d need for the given oils, because who wants extra oil moisturizing their dishes, right?
If you’re interested in calculating your own soap recipes or understanding how I came up with the values below, this site explains it in depth and has a chart of all the different saponification values of different oils and fats.
Now, for the recipe:
Super simple DIY Dish Soap Bars
Equipment needed:
- Kitchen scale
- Stainless steel pot
- Stainless steel bowl
- Stainless steel utensil
- Kitchen thermometer
- Immersion blender
- Rubber/silicone spatula
- Soap molds
Ingredients:
The following lists the recipe in ounces or grams, depending on your preference.
- Castor oil: 2 oz. / 57 g
- Coconut oil: 31 oz. / 879 g
- Lye (sodium hydroxide): 5.9 oz. / 168 g
- Water: 12.5 oz. / 356 g
- Essential oil of choice: 20 or so drops
Instructions:
- Gather all your equipment and ingredients.
- Weigh coconut and castor oils into stainless steel pot, then melt on low heat. Turn off heat once melted.
- Weigh water into your stainless steel bowl.
- Put on your eye, breathing, and skin protection (i.e. gloves and long sleeves!).
- Weigh lye into separate bowl from water.
- In a place with good ventilation, preferably outdoors, slowly add the lye to the water (not the other way around), mixing with the stainless utensil, until clear. Let cool to around 100°F.
- Once oils are around 100°F, add lye solution to the oils, immediately blending with an immersion blender until combined and thick, approximately 10-20 seconds.
- Quickly add your essential oils, blend briefly again.
- Pour soap into your molds, using the spatula to help transfer every last bit!
- Put your soap in a cool and dark place for one day, optionally wrapping it in a towel for heat retention as it cures, then remove from mold and cut if desired.
- Keep soap in cool and dark place and wait around a month to use!
See? Making dish soap bars really isn’t that complicated! I was so excited to write about making soap for the first time. I love the feeling of empowerment that comes from realizing I don’t need to pay premium prices for things that I can instead make myself!
As always, let me know your thoughts or questions down in the comments below. Happy soap-making!
Very interesting. You mentioned you wouldn’t use this as a body soap. Is it hard in your hands when you use it for washing dishes?
Hi Megan! I haven’t noticed it to be hard on my hands so far, but I prefer my body and hand soaps to be extra soothing and have some extra oil left for conditioning. It certainly wouldn’t hurt to use this one if it’s what is there (I do this when I’m in the kitchen) but I have a different recipe for hand/body soap bars here which is more conditioning.